No wiring harness? No problem. Whether you’re upgrading a vintage ride or dealing with damaged factory plugs, you can still get your stereo running. This guide walks you through every step — from battery safety to final sound checks — so you don’t fry your car’s electronics or end up with a radio that won’t shut off. Read through to the end before you start cutting anything.
Why You’d Need to Wire a Car Stereo Without a Harness
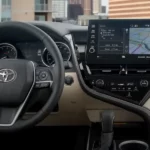
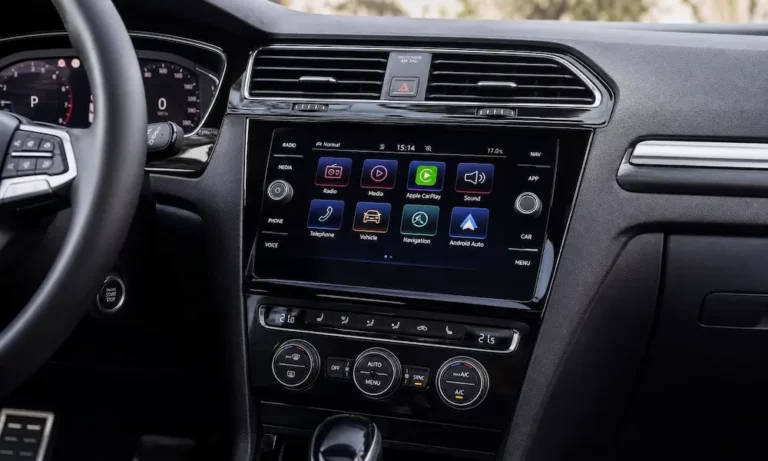
Most modern stereo swaps use a plug-and-play wiring harness adapter. But sometimes, that’s not an option.
Here’s when you’ll need to go the manual route:
- You’re restoring a classic or vintage car with no factory plug
- The previous owner cut or damaged the original harness
- Your vehicle uses a rare or discontinued connector
- You’re installing in a custom-built vehicle
In all these cases, knowing how to wire a car stereo without a harness is a real skill — and a totally doable one with the right tools and knowledge.
Tools You’ll Need Before You Start
Don’t improvise here. The right tools make this job clean and safe.
- Digital Multimeter (DMM) — your most important tool
- Wire stripper and crimping tool — get a dedicated crimping tool, not pliers
- Heat shrink tubing — dual-wall adhesive-lined type is best
- Butt connectors — quality matters here
- Trim panel removal tools — to avoid scratching your dash
- 1.5V AA battery — for the speaker pop test
- Electrical tape — backup only, not your primary insulation
A wire worm (a flexible nylon rod) also comes in handy for fishing wires through tight dashboard spaces.
Step 1: Disconnect the Battery the Right Way
This is non-negotiable. Skip it and you risk a short circuit, a fried ECU, or worse.
Always Disconnect Negative First
Your car uses its entire metal frame as the negative return path — it’s called a negative ground system. If you loosen the positive terminal while the negative is still connected, your wrench touching any metal surface creates a direct short. That means arcing, sparks, and potential damage to your car’s computer systems.
Disconnecting the negative terminal first breaks the ground path. After that, the chassis is no longer live — and accidental contact with the positive terminal won’t cause a short.
Follow this sequence every time:
| Step | Action | Why It Matters |
|---|---|---|
| 1 | Turn ignition off | Lets all modules power down cleanly |
| 2 | Identify terminals | Black (–) and red (+) — wipe off grime first |
| 3 | Remove negative (–) | Use a 10mm wrench; tuck cable away from post |
| 4 | Remove positive (+) | Cover with a dry rag to prevent accidental contact |
| 5 | Wait 10 minutes | Lets capacitors discharge fully |
When you reconnect, do it in reverse: positive first, then negative. That way, the final spark — which always happens — occurs at the ground, not the positive terminal.
Step 2: Understand Aftermarket Stereo Wire Colors
The aftermarket audio industry follows a standardized color-coding scheme from the Electronics Industries Alliance (EIA). Every Pioneer, Alpine, Sony, and JVC head unit uses the same colors coming out of the back of the radio.
Here’s what each wire does:
The Power Trio
- Yellow (Constant 12V): Always has power, even with the key off. It keeps your presets, clock, and EQ settings stored in memory.
- Red (Switched 12V / Accessory): Only powers up when the key is in “Accessory” or “On.” This is what wakes the radio up.
- Black (Ground): Connects to the car’s metal frame. A bad ground is the #1 cause of engine noise or alternator whine in your audio.
Control and Lighting Wires
- Blue (Power Antenna): Triggers a motorized antenna to extend when the radio is on.
- Blue/White (Remote Turn-On): Sends a 12V signal to external amps so they power up with the head unit.
- Orange (Illumination): Detects when your headlights are on and dims the radio screen automatically.
- Orange/White (Dimmer): Matches the radio brightness to your dash light dimmer setting.
Important: these colors are your new stereo’s wires. The factory wires in your dashboard will almost never match. That’s why you need a multimeter.
Speaker Wire Color Chart
Each speaker channel uses a solid-colored positive wire and a matching color with a black stripe for negative.
| Channel | Positive (+) | Negative (–) |
|---|---|---|
| Left Front | White | White/Black |
| Right Front | Gray | Gray/Black |
| Left Rear | Green | Green/Black |
| Right Rear | Purple | Purple/Black |
Reverse the polarity on even one speaker and you’ll get phase cancellation — your bass disappears and everything sounds thin and weak.
Step 3: Identify Your Factory Wires With a Multimeter
This is where most DIYers get nervous. Don’t be. A multimeter makes this straightforward.
Set your DMM to DC Voltage (the 20V setting). Connect the black probe to a solid metal grounding point on the car’s frame.
Finding the Constant 12V Wire
With the key completely off, probe each wire in the factory harness. You’re looking for one that reads 12.4–12.8V. Once you find it, turn the key to “On” to confirm the voltage holds steady. Also flip the headlights on and off — you want to rule out it being part of the lighting circuit. This wire connects to your stereo’s Yellow wire.
Finding the Switched 12V Wire
Turn the key to “Accessory” or “On.” Now probe the remaining wires for 12V. Turn the key back off — that voltage should drop to zero immediately. That’s your switched 12V wire. It connects to the stereo’s Red wire.
The Battery Pop Test for Speakers
When factory wire colors are unknown, use a 1.5V AA battery to identify speaker pairs and polarity.
Here’s how it works:
- Touch one factory wire to the battery’s negative terminal
- Briefly tap the other wire to the positive terminal
- Listen for a click or pop — that tells you which speaker you’ve found
- Watch the cone: if it moves outward, the wire on positive is the (+) speaker wire
- If the cone moves inward, that wire is actually the (–)
Don’t use a 9V battery for this test on tweeters or small speakers — the higher current can damage them. A 1.5V AA is plenty.
Step 4: Handle CAN-Bus Vehicles Differently
If your car was built after 2005, there’s a good chance it uses a Controller Area Network (CAN-Bus) system to control the stereo digitally. Instead of a physical switched 12V wire at the radio, the car’s computer sends a digital signal to turn the radio on and off.
The Problem This Creates
If you connect your new stereo’s red and yellow wires to the same constant 12V source, the radio stays on forever — even after you pull the key. Your battery will be dead by morning.
The Fix: Fuse Tap an Accessory Circuit
The cleanest solution is a fuse tap (also called an add-a-circuit). You pull switched power from an existing fuse slot in your interior fuse box — power windows, sunroof, or windshield wipers all work well. These circuits only go live when the ignition is on.
Crutchfield’s fuse tap guide covers the full process, but here’s the short version:
| Item | What to Do |
|---|---|
| Fuse Tap | Insert into a non-critical switched circuit |
| Fuse Rating | Use 5 amps or less for the radio’s trigger wire |
| Circuit Side | Make sure power flows through the fuse before reaching your device |
| Ground | Keep the black wire connected to a chassis point near the radio |
Another easy option: tap into the cigarette lighter or accessory socket, as long as it’s switched by the ignition (test it with your multimeter first).
Step 5: Make Your Connections the Right Way
This is where your installation either lasts 10 years or fails in six months.
Crimping vs. Soldering
Both work, but they suit different situations.
Soldering creates the lowest electrical resistance and a permanent metallurgical bond. The downside: solder makes the wire rigid at the joint. Under constant vibration, the wire can snap right at the edge of the solder joint if it’s not properly supported.
Crimping with a quality tool creates a “cold weld” mechanical connection. Done correctly, a proper crimp outperforms solder in automotive applications because it stays slightly flexible and handles vibration better. Use a dedicated crimping tool — pliers won’t compress the sleeve evenly.
Connector Options If You Don’t Want to Cut Factory Wires
- Posi-Taps: A small needle pierces the wire insulation without cutting it. Vibration-proof, reversible, and great for vehicles still under warranty. Reviewers consistently praise them for reliability.
- Scotchloks/T-Taps: Faster to install, but basic versions can corrode over time. If you use them, choose marine-grade versions with built-in sealant.
Step 6: Insulate Every Connection Properly
Don’t skip this step. Bare connections touching your metal dash can cause shorts months after the install.
Use Heat Shrink — Not Just Tape
Heat shrink tubing contracts around your connection when heated, creating a tight mechanical seal. It doesn’t rely on adhesive, so it won’t degrade in summer heat.
Standard electrical tape inside a hot car will eventually soften, creep, and unravel — a failure called “flagging.” Use tape for bundling wire runs, not as your primary insulation on power splices.
| Insulation Type | Lifespan | Heat Resistance | Best Use |
|---|---|---|---|
| Standard Electrical Tape | 1–2 years | Poor (adhesive melts) | Wire bundling only |
| Heat Shrink Tubing | 10+ years | Excellent | All splice connections |
| Dual-Wall Heat Shrink | 20+ years | Best (waterproof) | Power wires, outdoor-exposed runs |
Dual-wall adhesive-lined heat shrink is worth the extra cost for your power connections. It creates a waterproof seal that prevents copper corrosion for decades.
Step 7: Test Everything Before You Button Up the Dash
Don’t reassemble your dashboard until you’ve run through all of these checks.
Power Cycle Test
Turn the key on — radio should come on. Turn it off — radio should shut off. If your clock resets every time you kill the ignition, your yellow and red wires are swapped.
Speaker Balance Test
Use the radio’s fade and balance controls to isolate each corner. If “Front Right” plays from the rear left speaker, you’ve crossed a speaker pair.
Phase Check
Play a bass-heavy track. If the bass sounds thin and weak but improves when you reverse one speaker’s wires, you’ve got a phase cancellation problem from reversed polarity.
Illumination Check
Turn on your headlights. The radio’s display should dim automatically. If it doesn’t, the orange illumination wire isn’t connected to the right factory wire.
Once everything passes, use your trim removal tools to snap the panels back into place — and enjoy the upgrade you earned.