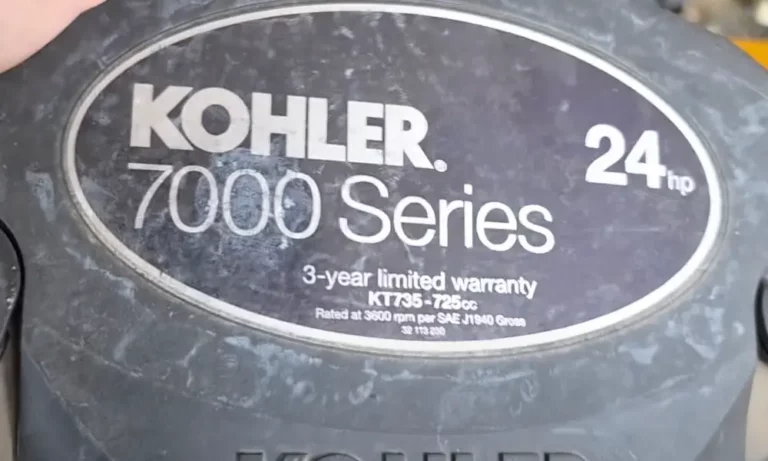
Got a Kohler 7000 Series engine and not sure how much oil it actually needs? You’re in the right place. Get the oil level wrong—too low or too high—and you’re looking at a ruined engine. This guide covers the exact Kohler 7000 Series oil capacity, which oil to use, how to check the dipstick correctly, and how to change the oil without making rookie mistakes. Read to the end—there’s a dipstick trick most people get wrong.
What Is the Kohler 7000 Series Oil Capacity?
The Kohler 7000 Series oil capacity is 1.9 liters (2.0 US quarts) for a standard oil and filter change. This applies across all the main models—KT715, KT725, KT730, KT735, KT740, and KT745. They all share the same crankcase design, so the volume stays consistent.
But here’s where it gets a little more detailed. The capacity shifts slightly depending on what you’re doing:
| Service Scenario | Volume (Metric) | Volume (Imperial) |
|---|---|---|
| Oil + Filter Replacement | 1.8 – 1.9 L | 2.0 qt. (3.8–4.0 pt.) |
| Oil Change Without Filter | 1.6 L | 1.7 qt. (3.4 pt.) |
| Standard Service Kit Volume | 1.9 L | 2.0 qt. |
The oil filter holds roughly 0.2 to 0.3 liters of oil on its own. If you swap the filter and don’t account for that volume, the engine starts up and pulls oil into the filter—leaving you short. Always replace the filter during every oil change and fill to the full 1.9 liters.
Dry Fill vs. Standard Refill: There’s a Difference
If you’re filling a brand-new engine or one that’s been completely rebuilt, you’re dealing with a dry fill. That means empty oil galleries, an empty oil pump, and possibly an oil cooler that’s never seen a drop of oil.
The Kohler 7000 Series service manual notes that a dry fill can require slightly more than the standard 1.9 liters—around 2.1 liters—to bring the dipstick up to the correct level after the pressure system primes itself. New engines typically ship with minimal oil for corrosion protection, so fill it before you even think about starting it.
Kohler 7000 Series Model Breakdown: Displacement and Capacity
All models share the same 83 mm bore. The stroke changes to bump up displacement and power. Here’s the full picture:
| Model Group | Bore | Stroke | Displacement |
|---|---|---|---|
| KT610, KT620 | 83 mm (3.27 in.) | 61 mm (2.40 in.) | 660 cc (40.3 cu. in.) |
| KT715, KT725, KT730 | 83 mm (3.27 in.) | 67 mm (2.64 in.) | 725 cc (44.0 cu. in.) |
| KT735, KT740, KT745 | 83 mm (3.27 in.) | 69 mm (2.72 in.) | 747 cc (46.0 cu. in.) |
The KT740 and KT745 run hotter due to their bigger 747 cc displacement. More combustion heat means more stress on the oil film. Kohler increased the sump capacity to 2 quarts when they launched this series specifically to give the oil a bigger thermal buffer. It’s a smart move—more oil means the heat spreads across a larger volume instead of cooking a smaller amount into sludge.
Which Oil Should You Use in a Kohler 7000 Series?
The 7000 Series runs a full-pressure lubrication system—not a splash system. Oil gets pumped through internal galleries directly to the crankshaft bearings and valve train. That means oil quality actually matters here.
Viscosity by Temperature
The Kohler owner’s manual lays out the viscosity recommendations clearly:
| Ambient Temperature | Recommended Oil Grade |
|---|---|
| -20°F to 100°F (-30°C to 40°C) | 10W-30 |
| Below 32°F (0°C) | 5W-30 |
| Above 32°F (0°C) | SAE 30 |
| All-Season / Heavy Duty | KOHLER PRO 10W-50 Synthetic |
10W-30 works for most people in most conditions. But once the mercury climbs above 80°F (27°C), thinner oils thin out even more under load. If your engine burns oil in summer, switching to a heavier grade often fixes it.
API Rating and Zinc Content
The oil must meet API service class SJ or higher. That’s the baseline. But there’s something more specific worth knowing: the Kohler 7000 Series has high-tension valve springs and a commercial-grade camshaft profile. Those metal-on-metal contact points need zinc (ZDDP) anti-wear additives to stay protected.
Here’s the problem. Modern automotive oils have reduced zinc levels to protect catalytic converters. Your mower doesn’t have a catalytic converter. Kohler’s genuine engine oils are formulated with higher zinc levels than most off-the-shelf automotive oils—which makes them worth considering if you care about long-term engine health.
The 300-Hour Oil Change Option (And When to Use It)
If you run your mower hard or manage a fleet of equipment, the KOHLER PRO 300-Hour Oil Change Kit is worth knowing about. It extends the service interval from 100 hours to 300 hours—but only when you use both components together.
KOHLER PRO 10W-50 Synthetic Oil
Kohler developed this oil in partnership with Amsoil specifically for air-cooled engines. Unlike automotive synthetics, it’s built to handle the higher operating temps that come from not having a liquid cooling system. Key benefits:
- Thermal resilience: The 10W-50 weight keeps the oil from thinning dangerously under peak load
- Extended stability: Resists oxidation and acid buildup for up to 300 operating hours—three times the standard interval
- Corrosion protection: Seasonal equipment sits for months. This oil includes extra inhibitors to protect internal surfaces during storage
PRO Extended Life Oil Filter
The 300-hour interval is only valid when you pair the synthetic oil with the KOHLER PRO Extended Life Oil Filter. It uses synthetic media with higher dirt-holding capacity and a bypass valve calibrated to maintain oil pressure even at the end of its extended life.
Use a standard filter with 300-hour oil? That filter saturates way before the oil wears out. You’ll end up circulating unfiltered oil through a precision engine. Stick to standard 100-hour intervals if you’re not using the full PRO kit.
How to Check the Oil Level Correctly
This is where most people mess up. The Kohler 7000 Series has a specific dipstick procedure that differs depending on your cap style—and getting it wrong gives you a false reading.
The Right Dipstick Protocol
- Stop the engine. Park on a level surface.
- Wait at least 5 minutes if the engine was running. Oil needs time to drain back down from the valve train into the sump.
- Clean the area around the dipstick and fill cap before removing anything.
- Remove the dipstick and wipe it clean with a lint-free cloth.
- Reinsert the dipstick:
- 1/4 turn cap style: Push the dipstick completely down into the tube. Don’t thread it.
- Threaded cap style: Rest the cap on top of the tube. Do NOT thread it in.
- Pull it back out and read the level. It should sit at the top of the crosshatched zone.
Here’s the common mistake people make: if you have a threaded dipstick and you screw it all the way in before reading, the dipstick goes deeper into the sump than it should. You’ll get a “Full” reading even when the engine is actually low. That’s how engines get damaged from what looks like a routine check.
The oil level must stay between the “L” and “F” marks. Above “F” is just as bad as below “L”—overfilling causes the crankshaft to whip oil into a mist that gets sucked into the air intake and burned.
How to Change the Oil on a Kohler 7000 Series
Step-by-Step Oil Service
1. Drain warm oil. Warm oil flows faster and carries more contaminants with it. Run the engine for a few minutes, shut it off, then drain.
2. Remove the old filter. Clean around the mounting surface. Wipe off any old gasket residue before installing the new one.
3. Prime the new filter. Set the new filter in a shallow pan, open end up. Pour clean oil in until it reaches the bottom of the threads. Wait two minutes for the filter media to soak it up. This prevents a dry start where the engine runs without oil pressure for several seconds while the pump fills the filter.
4. Lube the gasket. Apply a thin film of clean oil to the rubber gasket on the new filter. This ensures a good seal and makes removal easier next time.
5. Install the filter and drain plug. Torque the drain plug to 13.6 N·m (10 ft. lb.). Hand-tighten the filter until the gasket touches the base, then turn it an additional 1/2 to 3/4 turn.
6. Refill with 1.9 liters. Start the engine, let it run for two minutes, shut it off, and recheck the dipstick. Top up if needed.
Maintenance Schedule You Should Actually Follow
| Interval | Task |
|---|---|
| Daily / Every 8 Hours | Check oil level with dipstick |
| 100 Hours | Change oil and filter (standard service) |
| 100 Hours | Replace fuel filter |
| 300 Hours | Change oil and filter (KOHLER PRO kit only) |
| 500 Hours | Check and adjust valve lash |
| 500 Hours | Replace spark plugs (gap: 0.030″) |
Shorten these intervals if you’re mowing in dusty conditions, high heat, or running the engine at full throttle regularly.
Troubleshooting Oil Problems
Blue Smoke from the Exhaust
Blue smoke means oil is burning in the combustion chamber. Common causes:
- Overfilling – Oil above the “F” mark gets whipped into mist and pulled into the air intake
- Steep slopes – Operating beyond the 25° maximum tilt angle moves oil away from the pickup tube, causing pressure loss
- Clogged breather – A failed crankcase breather pushes oil past the piston rings
Oil Level That Keeps Rising
If your dipstick shows the oil level going up over time, that’s fuel dilution. Gasoline is leaking past the piston rings and mixing into the oil—usually from a leaking carburetor needle valve or a bad fuel pump diaphragm. Change the oil immediately and fix the fuel system. Running diluted oil wrecks bearings fast.
Oil Consumption in Hot Weather
Burning oil in summer? It’s often thermal thinning. If you’re running 10W-30 in high-ambient temperatures, step up to 10W-50 or SAE 30. That usually solves it without any mechanical fixes needed.
The Oil Sentry™ System: What It Does (and Doesn’t Do)
The Oil Sentry™ low-pressure protection system monitors oil circuit pressure, not oil level. If pressure drops below a safe threshold—from low oil, pump failure, or oil foaming—it can trigger a warning light or cut the ignition in some setups.
But don’t rely on it as your only safety net. Oil Sentry™ won’t always shut down a running engine before damage happens. And it won’t warn you about low oil if there’s still enough oil for the pump to maintain pressure. Check your dipstick every 8 hours. That’s Kohler’s recommendation, and it’s the right call.