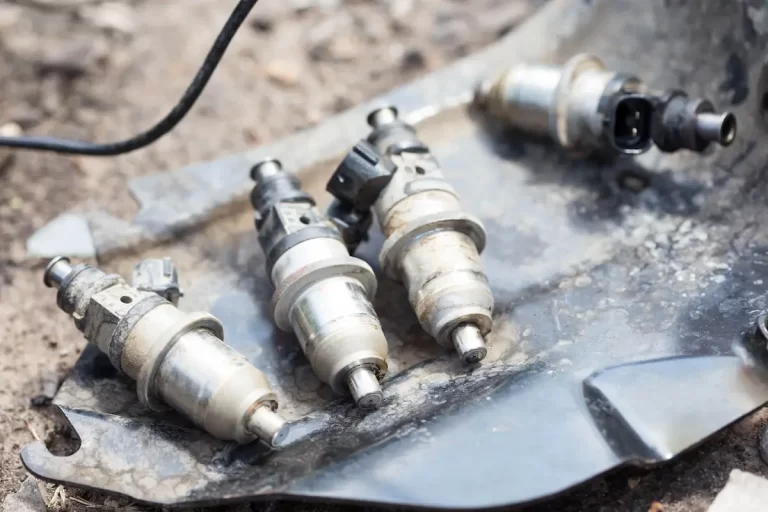
Got white smoke pouring from your exhaust, fuel in your oil, or a rough idle that won’t quit? Your LB7 injectors are probably screaming for help. This guide walks you through every stage of LB7 injector replacement—from spotting the early warning signs to torquing the final bolt—so you know exactly what you’re dealing with before spending a dime.
Why LB7 Injectors Fail So Often
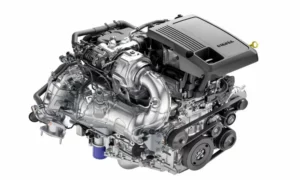
The 2001–2004 LB7 Duramax was a groundbreaking engine. It was the first mass-market domestic pickup to run a high-pressure common-rail injection system, cranking out 300 horsepower and 520 lb-ft of torque straight from the factory. Impressive for its time—but it came with a serious design flaw baked right in.
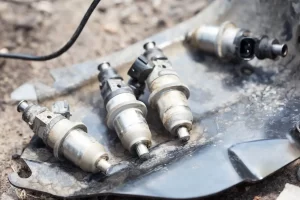
The injectors sit completely hidden under the valve covers, deep inside the cylinder heads. They’re constantly soaked in hot engine oil while cycling fuel at up to 24,000 PSI. That combination of extreme heat, relentless hydraulic stress, and flawed original metallurgy means injector failure isn’t a matter of if—it’s a matter of when.
General Motors actually acknowledged this by extending the factory injector warranty to 7 years or 200,000 miles for VIN-code 1 LB7 engines. Most LB7 trucks on the road today have already had at least one set of injectors replaced.
Here’s what’s actually killing them:
Cracked Injector Bodies and Fuel Dilution
The steel injector bodies develop micro-fractures from constant thermal cycling and hydraulic shock. When the body cracks, raw diesel leaks directly into the engine oil. Diesel fuel is a solvent—it strips the protective film from your crankshaft bearings, camshaft journals, and cylinder walls. Catch it late, and you’re looking at a full engine rebuild.
Ball Seat Erosion and Low Rail Pressure
Inside each injector, a hardened steel ball seat seals the fuel return circuit. Fluid cavitation physically erodes this seat over time—microscopic bubbles collapse against the metal and eat it away. Once the seat erodes, fuel bypasses the nozzle and dumps back into the return line instead of firing into the cylinder. Rail pressure drops, and the engine starts, stumbles, and stalls.
“Black Death” and the Copper Washer Problem
At the base of every injector sits a copper compression washer. When it fails, combustion gases above 2,000°F blast past the injector body. Those gases mix with engine oil under the valve cover and bake into a rock-hard carbon crust—what diesel techs call “Black Death.” It permanently entombs the injector inside its sleeve and can erode the aluminum cylinder head seat if left unchecked.
Solenoid Electrical Degradation
The solenoid at the top of each injector takes a beating from heat and constant electrical cycling. Once its resistance drifts outside the 10–18 ohm specification, the engine control module can’t fire the injector with the precise timing it needs. The result is misfires, rough idle, black smoke, and poor fuel economy.
How to Diagnose a Failing LB7 Injector
Don’t tear your engine apart until you’ve confirmed the injectors are actually the problem. These tests will tell you what’s really going on.
Check Your Engine Oil First
Pull the dipstick. If the oil level has risen above the max fill line between oil changes, and it smells like raw diesel fuel, you’ve got crankcase fuel dilution. Stop driving the truck immediately. Running an engine on fuel-thinned oil is a fast track to spun bearings and a destroyed crank.
Watch for These Symptoms
- White or gray exhaust smoke, especially at idle or cold start
- Rough, choppy idle with vibration you can feel in the steering wheel
- Extended cranking before the engine fires
- Power loss under load, particularly when towing
- Fuel smell from the oil cap or dipstick
Run a Cylinder Balance Rate Test
This is the most reliable electronic test for LB7 injectors. Connect a GM Tech 2, EFI Live AutoCal, or Edge Insight monitor and check the balance rates at idle. The engine control module adjusts fuel delivery to each cylinder to smooth out the idle—you can read those adjustments directly.
Acceptable balance rate thresholds:
| Transmission Position | Acceptable Balance Rate |
|---|---|
| Park or Neutral | ±4 mm³ per stroke |
| Drive (load applied) | ±6 mm³ per stroke |
Any injector consistently reading well outside these numbers has a serious flow problem and needs to go.
Perform a Fuel Return Flow Test
If balance rates are inconclusive, or the truck cranks hard but won’t start, run a return flow test. Disconnect the return lines from both cylinder heads, route them into graduated cylinders, and crank the engine for 15–30 seconds.
A healthy injector returns less than 10 ml per 30 seconds. Significantly more than that means the ball seat is eroded and the injector is dumping fuel back to the tank instead of firing it.
Measure Solenoid Resistance
Disconnect the battery and unplug the injector harness connectors at the valve covers. Use a digital multimeter across each injector’s terminals. You’re looking for 10–18 ohms per injector. A reading near zero means an internal short. An open (infinite) reading means a broken coil wire. Either way, that injector’s done.
Read the Diagnostic Trouble Codes
The LB7 doesn’t always throw codes for purely mechanical injector failures, but these codes point strongly toward fuel system problems:
| DTC Code | What It Means |
|---|---|
| P0087 | Fuel rail pressure too low |
| P0088 | Fuel rail pressure too high |
| P0201–P0208 | Injector circuit fault, cylinders 1–8 |
| P0300 | Random/multiple cylinder misfire |
| P2146/P2149 | Entire injector group circuit open |
LB7 Injector Replacement Cost: What You’re Really Paying For
This repair isn’t cheap, and understanding the cost breakdown helps you avoid getting blindsided.
Labor Is the Big Number
Factory labor guides allocate 8–12 hours for a full set of 8 injectors on a clean truck. Heavily corroded trucks or modified builds can push that to 14–16 hours. At $100–$150 per hour at a professional diesel shop, labor alone runs $1,400–$2,800. All-in, with parts, expect a total bill of $4,500–$7,000.
Always Replace All Eight Injectors
The #1 mistake owners make is replacing only the injector that’s currently failing. Here’s why that’s a bad idea:
- The labor to reach one injector is nearly identical to replacing all four on that bank. The valve covers, wiring harness, and turbo piping all have to come off regardless.
- Every injector in the engine has seen the exact same heat, fuel quality, and hydraulic cycles. If one failed at 150,000 miles, the rest are close behind.
- Mixing new and worn injectors creates fueling imbalances that cause rough running, increased smoke, and premature wear on the new units.
Replace all eight at once. Pay the labor cost once.
Remanufactured vs. New Injectors
New injectors are prohibitively expensive due to manufacturing costs. Properly remanufactured Bosch injectors are the accepted industry standard—completely disassembled, ultrasonically cleaned, fitted with updated internal components, and flow-tested on calibrated Bosch test benches.
Avoid cheap, non-certified aftermarket units. If they fail in six months, you’ll pay the full labor cost all over again. Do the job right the first time.
Don’t Forget These Ancillary Parts
A complete, reliable repair requires more than just the injectors:
- New high-pressure stainless steel fuel lines — Old lines contain rust scale that breaks loose during removal and destroys new injectors on first startup
- Copper compression crush washers — One per injector, never reuse them
- Upper and lower valve cover gaskets
- Banjo bolt copper seal washers
- Injector cup O-rings
- Injector cup sealant (Loctite 620, Permatex 27200, or 3M TL72)
Step-by-Step LB7 Injector Replacement Procedure
This job demands a clean environment, patience, and strict torque discipline. Dirt in the fuel system kills new injectors instantly.
Step 1 – Initial Preparation
- Disconnect both negative battery cables
- Drain the coolant completely from the radiator and engine block — if an injector cup pulls during extraction, you don’t want coolant flooding the cylinder bore
- Remove turbocharger intake piping, intercooler pipes, and the air filter housing
- Unbolt the Fuel Injection Control Module (FICM) and set it aside
- Loosen the serpentine belt and flip the A/C compressor out of the way — don’t discharge the refrigerant
- Detach the upper coolant pipe from the water pump and thermostat housing
- Remove the EGR valve if you’re working on a California-spec vehicle
Step 2 – Remove High-Pressure Fuel Lines and Valve Covers
- Blow compressed air aggressively across the engine valley and valve cover surfaces to clear all dirt before opening the fuel system
- Use a flare nut wrench to remove the high-pressure steel lines connecting the fuel rails to the injectors — discard them, don’t reuse
- Remove the glow plug wiring harness (8mm hex nuts)
- Carefully pry the upper valve covers free from the RTV silicone seal — use designated factory pry points only, not a screwdriver blade
- Remove the injector wiring harness terminal nuts (7mm socket) and extract the harness — inspect the plastic insulation for heat damage and replace if brittle
Step 3 – Remove the Lower Valve Cover and Access the Injectors
- Remove the 12 lower rocker arm cover bolts using a 5mm hex socket — use a ball-end bit for the rear bolts near the firewall
- Lift the lower cover to expose the injectors and valve train
Step 4 – Remove the Fuel Return Lines
- Remove the banjo bolts securing the return lines to each injector using a 5mm Allen bit
- Go slowly here — these banjo bolt heads strip with almost no effort. A rounded bolt means hours of extra work
Step 5 – Extract the Injectors
- Remove the 8mm hex hold-down bracket bolt from each injector
- Mount the GM J-44639 extractor tool onto the injector retaining bracket
- Apply controlled leverage with a wrench to draw the injector straight up and out
- Critical: Verify the copper crush washer came out with the injector. If it stayed in the bore, retrieve it with a pick — installing a new injector on top of an old washer destroys the combustion seal and the new injector immediately
Step 6 – Service the Injector Cups
The stainless steel injector cups pressed into the cylinder head must be inspected and resealed. If a cup shifts or pulls with the injector during extraction, it needs a full reseal.
- Use the GM J-45910 tool to extract the cup if resealing is required
- Clean the cup bore with an EN-47909-2 brass brush — never use steel, it scratches the sealing surface
- Blow the bore clean with compressed air and wipe with a brake-cleaner-dampened lint-free swab
- Do not crank the engine during this process — piston compression will blow unsecured cups out of their seats
Step 7 – Reseal and Reinstall the Cups
- Install two new rubber O-rings on the upper cup
- Apply Loctite 620, Permatex 27200, or 3M TL72 to the lower sealing area — these are anaerobic, high-temperature retaining compounds specifically engineered for this application. Standard red thread locker will not survive the heat
- Apply 6–8 ml of the specified anaerobic red injector cup sealant to the bottom seat
- Drive the cup into the head using the J-45910 installer
- Allow 72 hours of curing time before starting the engine
Step 8 – Install New Injectors
- Install a fresh copper crush washer on each new injector tip
- Lightly lubricate the upper body O-ring with clean engine oil
- Slide the injector into the cup by hand, engaging the alignment pins
- Install the hold-down bracket and torque the bolt to 37 ft-lb
LB7 Injector Replacement Torque Specifications
Get these wrong and you’ll be back under the hood. Use these specs every time — no guessing.
Fuel System and Upper Engine Fasteners
| Component | Torque Specification |
|---|---|
| Injector Hold-Down Bracket Bolt | 37 ft-lb |
| High-Pressure Line Flare Nut | 30 ft-lb |
| Injector Return Banjo Bolt (to injector) | 106 in-lb |
| Main Return Banjo Bolt (to cylinder head) | 144 in-lb (12 ft-lb) |
| Lower Valve Cover Bolts | 89 in-lb (sequence twice) |
| Upper Valve Cover Bolts | 71 in-lb (sequence twice) |
| Injector Wiring Harness Bracket Bolt | 80 in-lb |
| Injector Electrical Terminal Nuts | 18 in-lb |
| FICM Bolts | 15 ft-lb |
| Glow Plugs | 13 ft-lb |
| CP3 Pump Drive Gear Nut | 52 ft-lb |
Step 9 – Reassemble the Valve Covers and High-Pressure Lines
- Reinstall the lower valve cover with a new rubber perimeter gasket and new rubber bolt grommets — torque the 12 bolts to 89 in-lb in a spiral sequence starting from center, performed twice
- Route the wiring harness back through the lower cover and torque the terminal nuts to 18 in-lb
- Apply a continuous 2–3 mm bead of Loctite 5900 RTV silicone around the upper cover mating surface — press the cover into place and torque bolts to 71 in-lb, twice
- Install the new high-pressure stainless steel fuel lines and torque the flare nuts to 30 ft-lb
- Reinstall and secure all vibration dampener brackets on the lines
- Reassemble the FICM, turbo intake piping, A/C compressor, coolant pipe, and all wiring harnesses
Do You Need to Program LB7 Injectors?
Short answer: No. Unlike later Duramax engines—the LBZ, LMM, and LML—which require Injector Quantity Adjustment codes programmed into the ECM for each new injector, the LB7 doesn’t use calibration coding at all.
The LB7 ECM applies a universal fuel map and relies entirely on real-time balance rate feedback from the crankshaft position sensor. New injectors are essentially plug-and-play. The Glow Plug Control Module on the LB7 also requires no programming. Install the parts, prime the system, and start the engine.
Priming and Air Purging After Installation
The fuel system is full of air after reassembly. Don’t just turn the key and crank.
- Locate the manual primer button on top of the fuel filter housing
- Crack the bleeder screw slightly open on the side of the housing
- Pump the manual primer 30–50 times until a solid, bubble-free stream of diesel exits the bleeder screw, then tighten it
- Use a pocket tool to briefly depress the Schrader valve on the fuel feed line near the alternator while priming to ensure liquid fuel reaches the CP3 pump inlet
- Crank the engine in 15-second intervals with 2-minute rests between attempts — this protects the starter motor from heat damage
- Once the CP3 builds approximately 2,500 PSI of rail pressure, the ECM will allow the injectors to fire and the engine will start
After startup, let the engine reach normal operating temperature and inspect every high-pressure line and return fitting for leaks with a flashlight. Reconnect your scan tool and verify all eight balance rates read within ±4 mm³ at idle.
If the old injectors contaminated your crankcase oil with diesel fuel, do an immediate oil and filter change. Run it briefly, then do a second change shortly after to purge any remaining fuel traces from the lubrication system.
How to Extend the Life of Your New LB7 Injectors
Replacement injectors can last well past 200,000 miles with consistent maintenance:
- Replace the fuel filter every 10,000–15,000 miles without exception
- Install an aftermarket lift pump such as a FASS or AirDog for superior filtration and water separation
- Use a high-quality diesel lubricity additive — Opti-Lube or Hot Shot’s Secret work well to protect internal components against the low lubricity of modern ultra-low-sulfur diesel
- Consider annual ultrasonic injector cleaning if you run the truck hard or use varied fuel sources
Frequently Asked Questions
Why do LB7 fuel injectors fail at such high rates compared to later Duramax models?
The original Bosch steel castings in the LB7 had metallurgical weaknesses that couldn’t hold up against 24,000 PSI of hydraulic cycling. The internal ball seats suffered from fluid cavitation erosion, causing excessive fuel bypass and low rail pressure. The solenoid wiring degraded from constant heat exposure under the valve covers. GM actually extended the factory warranty to 7 years/200,000 miles because the failures were so widespread.
Is it acceptable to replace only the injectors that are currently failing?
No. Industry professionals universally advise against it. The labor to access one injector is nearly identical to replacing all four on that bank. Every injector in the engine shares the same mileage and wear history—if one failed, the rest are close behind. Replacing them one at a time means paying the $2,000+ labor charge multiple times. Do all eight at once.
Do I need to program new LB7 injectors into the engine computer?
No. The LB7 doesn’t use Injector Quantity Adjustment coding. Unlike later Duramax platforms that require IQA codes entered into the ECM, the LB7 uses a universal fuel map with real-time balance rate corrections. New injectors are plug-and-play—no scan tool programming required.
Why do the high-pressure fuel lines need to be replaced too?
Old steel lines develop internal rust scale over time. When you loosen them during disassembly, that scale breaks loose. Reinstalling contaminated lines sends rust particles directly into brand-new injectors the moment the engine starts, instantly destroying the micron-level tolerances and voiding the warranty. New lines are inexpensive compared to replacing a set of injectors a second time.
What is “Black Death” and how does it happen?
Black Death is a rock-hard carbon crust that forms when the copper compression washer at the base of the injector fails. Combustion gases over 2,000°F escape past the injector body, mix with engine oil under the valve cover, and bake into a dense, tar-like deposit that completely encases the injector. It makes extraction brutally difficult and can permanently damage the cylinder head bore. Proper torque on the hold-down bolt and a new copper washer every time are the only defenses.