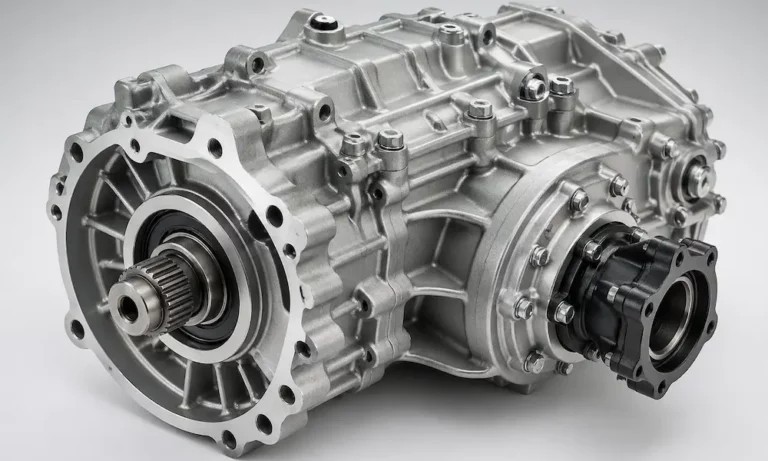
Got a grinding 4WD, a fluid puddle under your truck, or a “Service 4WD” light staring you down? A transfer case rebuild might be exactly what your rig needs. This guide walks you through every step — from diagnosis to final torque — so you know what’s involved and what to watch for.
What Does a Transfer Case Actually Do?
Your transfer case is the gearbox that splits engine torque between your front and rear axles. It’s what makes 4WD and AWD systems work. Flip into 4-High on a snowy road, and your transfer case is making that happen.
Modern units do more than just split power. AWD transfer cases monitor wheel speeds and redirect torque in milliseconds to prevent fishtailing on slippery roads. That’s a lot of responsibility riding on a component most drivers never think about.
There are two main internal designs:
- Chain-driven — Quieter and lighter. Found in most modern trucks and SUVs.
- Gear-driven — Heavier but nearly indestructible. Preferred for serious towing and rock crawling.
| System Type | Power Distribution | Driver Interface | Best For |
|---|---|---|---|
| Part-Time 4WD | Locked front & rear | Manual lever or switch | Loose surfaces, off-road |
| Full-Time AWD | Dynamic torque bias | Fully automatic | All-surface daily driving |
| Active Transfer Case | Electronic clutch | Dashboard dial | High-speed traction control |
| Manual Transfer Case | Direct gear engagement | Floor-mounted lever | Maximum reliability |
Signs Your Transfer Case Needs a Rebuild
Catching problems early saves you from a complete seizure. Here’s what to look and listen for.
Noises That Mean Business
Grinding sounds point to worn gears or bearings struggling without proper lubrication. A whine or hum that changes pitch with your speed usually means bearing wear or a stretched drive chain. Don’t ignore either one.
Fluid Leaks
Transfer case fluid is typically reddish or brownish and thinner than gear oil. A leak from the output shaft seals or the housing split line is a red flag. Here’s the dangerous part — most transfer cases don’t have a low-fluid warning sensor. The fluid drains quietly until internal parts seize from heat.
Shifting Problems
A stiff lever or resistance when engaging 4-High or 4-Low often points to bent shift forks or damaged synchronizers. On electronic systems, failure to engage may mean a faulty actuator — or internal binding that stops the actuator from completing its stroke.
Dashboard Warnings
A “Service 4WD” message means the control module caught a discrepancy in shaft speed or actuator position. It’s a built-in diagnostic gateway — don’t dismiss it.
| Symptom | Likely Cause | Risk Level |
|---|---|---|
| Metallic grinding | Worn bearings or chipped gear teeth | Critical |
| Clunking on acceleration | Excessive chain stretch | High |
| Fluid puddles under truck | Output seal or case half leak | High |
| Vibration at highway speed | Worn U-joints or unbalanced shaft | Moderate |
| Delayed 4WD engagement | Faulty actuator or shift linkage | Moderate |
| Burning petroleum smell | Overheated fluid or friction material | Critical |
Tools You Need Before You Start
A transfer case rebuild demands more than a basic socket set. Get these tools ready before you crack the housing open.
| Tool | Why You Need It | What Happens Without It |
|---|---|---|
| Snap ring pliers | Removes high-tension retaining clips | Damaged clips or shaft grooves |
| Bearing puller (2 or 3-jaw) | Non-destructive bearing removal | Marred shafts and bearing seats |
| Seal installer kit | Even seating of new oil seals | Immediate leaks after rebuild |
| Torque wrench | Precision fastener tightening | Stripped threads or loose bolts |
| Feeler gauges | Measuring internal clearances | Incorrect gear mesh |
| Transmission jack | Supports the unit during removal | Risk of injury or cracked housing |
| Dial indicator | Measures shaft runout and axial play | Undetected warping or vibration |
Cleanliness is just as critical as your toolset. A single piece of grit in the planetary gear set can cause catastrophic failure within a few thousand miles. Keep a parts washer and plenty of degreaser on hand.
The GM Magnesium Housing Problem You Must Know About
If you’re rebuilding a GM transfer case from 1998 to 2007 — including the NP136, NP246, or NP263 — you need to know about pump rub.
GM used magnesium housings in these units because magnesium offers a great strength-to-weight ratio. The problem? The aluminum oil pump vibrates against the softer magnesium rear case half over time, eventually wearing a pinhole through the housing wall.
That pinhole only leaks while the truck is moving, so it won’t leave a puddle in your driveway. Without a low-fluid sensor, most owners don’t find out until the transfer case runs dry and seizes completely.
Any proper transfer case rebuild on these GM units must include:
- A full inspection for pump rub wear marks
- Installation of a billet aluminum pump upgrade kit that spreads the load across a larger surface area
Skip this step, and you’ll be doing the rebuild again.
How to Remove the Transfer Case
Start with the vehicle on four heavy-duty jack stands — level and stable. Inspect the drained fluid for metal shavings or a burnt smell. That first look at the old fluid tells you a lot about what’s waiting inside.
Next, disconnect the driveshafts. Use box-end wrenches here — sockets often won’t fit in the tight clearance between the U-joint and yoke.
Before pulling the unit free, disconnect:
- The electrical wiring harness for the 4WD actuator
- The shift linkage (manual units)
- The speedometer cable (older models)
- Any skid plate or support member blocking access
Slide a transmission jack under the unit, take the weight, and carefully slide the transfer case away from the transmission splines. Lower it to the ground.
Disassembly and Forensic Inspection
Get the unit on a stable workbench. Use a cardboard template to track bolt positions — housing bolts are often different lengths, and mixing them up during reassembly causes headaches.
Separate the housing halves with a rubber mallet or careful pry bar work. Then it’s time to read what’s inside.
Internal Component Removal Order
| Step | Component | What to Inspect |
|---|---|---|
| 1 | Speed sensor gear | Chipped teeth |
| 2 | Rear output shaft | Bearing journal condition |
| 3 | Drive chain | Lateral slack — if it can touch the housing, it’s done |
| 4 | Front output shaft | Spline twisting |
| 5 | Shift fork rail | Bending, worn plastic pads |
| 6 | Planetary gear set | Pitting on gear teeth |
| 7 | Oil pump | Pump rub marks (GM units) |
Check each shift fork’s plastic pads. If they’re worn through to bare metal, the fork won’t move the synchronizer sleeve cleanly. Inspect every gear tooth under strong light for pitting — small, jagged craters that signal the hardened surface is breaking down.
Measuring Clearances and Replacing Bearings
A transfer case rebuild isn’t just swapping parts. It’s restoring the unit to factory tolerances.
After cleaning every component in a solvent tank, use feeler gauges and a dial indicator to measure gear thrust clearance and shaft axial play. Too much clearance creates noise and vibration. Too little creates heat and premature failure.
| Measurement Point | Tool | Why It Matters |
|---|---|---|
| Gear thrust clearance | Feeler gauge | Excessive play causes gear whine |
| Shaft axial play | Dial indicator | Leads to vibration and seal failure |
| Chain stretch | Manual tensioning | Housing contact and jumping teeth |
| Synchronizer gap | Feeler gauge | Causes difficult gear engagement |
| Bearing race surface | Visual inspection | Look for pitting or heat blueing |
| Housing mating surface | Straight edge | Warping prevents a proper seal |
Replace all bearings — even ones that look fine. Microscopic pitting on bearing races causes rapid failure once the unit returns to high-speed service. It’s not worth the gamble.
For Jeep NP231 units, verify whether your specific build uses caged needle roller bearings or oil-film bearings for the mainshaft — this affects rebuild kit compatibility.
Sealants and Threadlockers: Get the Chemistry Right
Transfer case housing halves use liquid gasket makers instead of pre-cut gaskets. Your sealant choice matters.
RTV silicone works well but carries a risk: excess RTV that squeezes inside the case can form rubbery strands that clog the oil pump or lubrication ports.
Anaerobic sealant is the professional choice for aluminum-on-aluminum surfaces. It only cures in the absence of air and in the presence of metal ions — meaning it hardens only when the housing halves are bolted together. Any excess that enters the case stays liquid and dissolves harmlessly into the fluid.
Either way, clean those mating surfaces with acetone first. A chemical bond needs a clean surface.
For fasteners, use medium-strength blue threadlocker on most transfer case bolts. It resists vibration but still comes off with hand tools. Save the red high-strength threadlocker for permanent fixtures like housing studs — it needs heat for removal.
Choosing the Right Fluid After a Transfer Case Rebuild
The longevity of your rebuild depends heavily on using the correct fluid. Most modern chain-driven units use ATF because its chemistry protects small bearings and friction clutch materials. Gear oil in the wrong unit can destroy friction materials fast.
GM’s AutoTrac systems specifically require AutoTrac II fluid — the blue-colored formula with friction modifiers that prevent clutch chatter during AWD engagement. Old-school gear-driven cases like the Dana 20 or NP205 call for 80W-90 gear oil or non-EP engine oil.
| Vehicle | Transfer Case | Fluid | Capacity |
|---|---|---|---|
| Ford Super Duty | NV271F / NV273F | Mercon LV ATF | 4.0 pts |
| Jeep Wrangler | NP231 / NV241 | ATF+4 | 2.5–3.5 pts |
| GM 1500 Truck | NP246 (AutoTrac) | AutoTrac II | 4.0 pts |
| Ford Expedition | BW4406 / BW4416 | Mercon LV ATF | 3.0 pts |
| Dodge Ram 2500 | NP271 / NV273 | Mopar TC Fluid | 4.0–5.0 pts |
| Vintage Jeep | Dana 18 / Dana 20 | 80W-90 Gear Oil | 2.0–3.0 pts |
For trucks used for heavy towing or regular off-road use, synthetic fluid handles heat better and resists thermal breakdown longer than conventional petroleum-based options.
Reassembly and Final Testing
Start reassembly with the planetary gear set and input shaft, lubricating all needle bearings with assembly lube or fresh fluid. Install the chain and sprockets as a matched pair. Add the oil pump, shift forks, and sector plate.
Apply a thin, continuous bead of sealant to the mating flange. Join the housing halves and torque the bolts in a crisscross pattern to spec. Before reinstalling in the vehicle, cycle the shift rail by hand to confirm everything moves freely.
Raise the unit with your transmission jack, align it with the transmission output splines, and bolt it home. Reconnect the driveshafts, wiring, and shift linkage. Fill through the upper fill plug until fluid starts to seep out — that’s your full mark.
Post-Rebuild Testing Checklist
- Test all ranges (2H, 4H, 4L) for clean, clunk-free engagement
- Road test at moderate speed to check for vibrations
- Return to the lift and inspect all seals and the housing split for leaks
- Change the fluid every 30,000 to 50,000 miles, especially if you tow or wheel regularly
A proper transfer case rebuild, done with the right tools, correct tolerances, and the right fluid, should give you years of reliable 4WD operation. Take shortcuts here and you’ll be pulling the unit again sooner than you think.