
Your car’s acting weird, shifting rough, or you just popped the hood and can’t find the transmission dipstick. You’re not imagining things — it might not exist. This guide explains exactly how to check transmission fluid without a dipstick, step by step, for the most common sealed transmission types on the road today. Stick around — getting this wrong can cost you thousands.
Why Your Car Doesn’t Have a Transmission Dipstick
Manufacturers started sealing transmissions to stop moisture and dust from getting in through the old dipstick tube. That moisture would slowly destroy the friction modifiers inside the fluid, which keep your gears shifting smoothly.
Modern transmissions like the ZF 8-speed and 10-speed units from Ford and GM operate with incredibly tight tolerances. Even a tiny bit of lint or grit from a rag can clog a solenoid in the valve body. Sealing the system eliminates that risk entirely.
Here’s the other reason: the dipstick method was never that accurate. The angle you held the stick, how fast you pulled it, whether the fluid was clear — all of it introduced error. The new “overflow” method is physically precise. If fluid trickles out of a hole at a specific temperature, the level is exactly right. No guesswork.
Worth noting: many manufacturers call this fluid “lifetime fill.” But automotive professionals are pretty clear that “lifetime” means the length of your powertrain warranty — not the actual life of the vehicle.
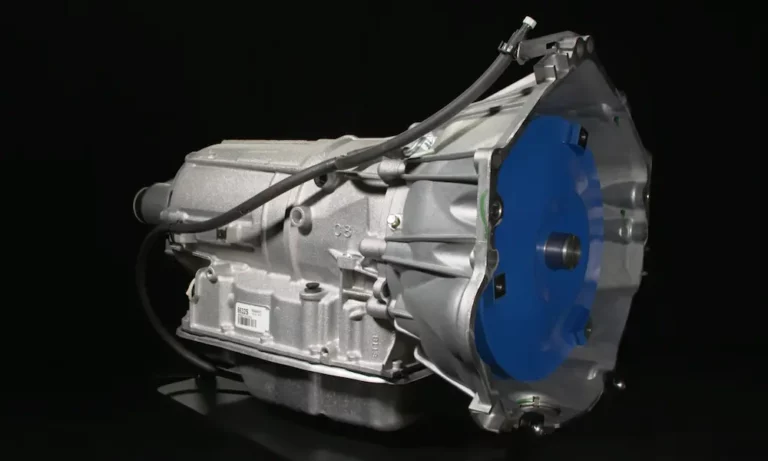
What Type of Sealed Transmission Do You Have?
Before you touch anything, figure out which system your car uses. There are three main designs, and the procedure is different for each one.
| Monitoring Architecture | Typical Plug Locations | How You Verify the Level |
|---|---|---|
| Two-Plug Side System | Fill plug on top/side; Check plug on side of case | Fluid trickles from side hole when full |
| Standpipe/Overflow System | Fill plug on side; Standpipe inside the drain hole | Fluid overflows a vertical tube in the drain hole |
| Special Dipstick Tool System | Sealed cap on fill port | External measuring tool compared to a temperature chart |
Two-plug side systems are the most common. You’ll find them on most GM, Ford, and BMW vehicles. Standpipe systems are typical on Toyota, Lexus, and many VW models. Special dipstick tool systems appear on certain Chrysler, Dodge, and Jeep vehicles with transmissions like the 948TE.
Check your owner’s manual or a quick search for your specific year, make, and model. Knowing this upfront saves a lot of confusion under the car.
Tools You’ll Need
Don’t start this job without these:
- OBD2 scan tool — essential for reading live transmission temperature
- Four jack stands — not two, not ramps, four stands
- Fluid transfer pump — you can’t gravity-fill a sealed transmission
- Heat-resistant gloves — fluid can exceed 90°C during this procedure
- Brake cleaner — to clean around plugs before removing them
- Torque wrench — plugs need to go back in at the right spec
- Drain pan — fluid will come out
- Manufacturer-specified fluid only — mixing fluid types causes shift problems
Safety First — This Job Has Real Risks
You’re working under a running vehicle with hot fluid. That’s not a combination to take lightly.
Level the vehicle perfectly. All four corners must be on jack stands. If the vehicle tilts toward the check plug, fluid drains out too early and you think it’s full when it isn’t. Tilt it away, and you overfill it before any fluid reaches the check point.
Wear the right gear. Transmission fluid at 90°C causes severe burns on contact. Use heat-resistant gloves and eye protection. If fluid gets in your eyes, flush with water for 15 minutes and see a doctor. Transmission fluid can also ignite if it sprays onto a hot exhaust manifold or catalytic converter, so stay aware of where hot surfaces are.
Keep the engine running during the check. If you shut it off, fluid from the torque converter and cooler drains back into the pan. That gives you a false overflow reading and leaves your transmission underfilled.
Why Temperature Is Everything
This is the part most people get wrong.
Transmission fluid expands as it heats up. Manufacturers use that expansion to set the correct level. You can only get an accurate reading inside a specific temperature window — not too cold, not too hot.
- Too cold: The fluid hasn’t expanded yet. You’ll add too much trying to reach the overflow point.
- Too hot: The fluid has expanded beyond its normal range. It overflows immediately, making you think it’s full when it’s actually short.
Here are the target windows for common transmissions:
| Transmission | Target Temperature Window | How to Monitor |
|---|---|---|
| GM 6L80 / 6L90 | 30°C – 50°C | Scan tool or instrument cluster |
| VW/Audi DSG (02E) | 35°C – 45°C | VCDS or VAS scan tool |
| ZF 8HP (BMW/Chrysler/Ram) | 30°C – 50°C | Scan tool |
| GM 10L80 (10-Speed) | 75°C – 80°C | Scan tool |
A professional OBD2 scan tool reads the transmission temperature sensor directly from the valve body or internal wiring harness. That’s the most accurate reading you can get. Infrared thermometers aimed at the pan are less reliable because the metal can read differently than the fluid inside.
Method 1: The Side Check Plug Method
This is the most common approach for GM, Ford, and most European vehicles.
Step 1: Raise the vehicle on four jack stands on level ground. Confirm it’s level with a spirit level on the transmission pan rail.
Step 2: Connect your scan tool and start monitoring transmission fluid temperature.
Step 3: Start the engine. Let it idle in Park. Cycle through every gear range — Reverse, Neutral, Drive, and any manual modes — holding each for 5–10 seconds. This pumps fluid into the torque converter, cooler lines, and clutch circuits. Skip this step and the pan level will read falsely high.
Step 4: Once the fluid hits the lower end of your target temperature window, spray brake cleaner around the check plug and wipe it clean. Then remove the check plug while the engine is still running.
Step 5: Watch what comes out:
- Slow drip or thin trickle — Level is perfect. Reinstall the plug and torque it to spec.
- Nothing comes out — Level is low. Add fluid through the fill port until it starts dripping.
- Steady stream — Transmission is overfilled. Let it drain until it slows to a drip.
Always use a new crush washer or seal when reinstalling the plug. A slow leak from a sealed transmission is hard to spot and easy to ignore until it becomes a big problem.
Method 2: The Standpipe / Overflow Method
This design is common on Toyota and Volkswagen models. A plastic or metal tube inside the pan extends upward from the drain hole to a specific height. That height represents the correct fluid level at operating temperature.
Step 1: Raise and level the vehicle on four jack stands.
Step 2: Warm the transmission to the target temperature window while cycling through gears.
Step 3: Clean around the drain plug thoroughly with brake cleaner.
Step 4: Remove the outer drain plug. If the level is correct, a small amount of fluid trapped in the tube will splash out first, followed by a light drip as the expanded fluid just barely crests the top of the standpipe.
Step 5: If nothing comes out, the transmission is underfilled. Use a fluid transfer pump to add fluid through the fill port on the side of the transmission until overflow begins at the standpipe.
One thing to know about Toyota WS systems specifically: you can’t gravity-fill these transmissions. The fill port is on the side of the case, often just above the pan rail. You need a pump to push fluid in — a long funnel from the engine bay won’t work.
Method 3: The Special Dipstick Tool Method
Some Chrysler, Dodge, and Jeep vehicles — particularly those with the 948TE transmission — have a fill tube with a cap, but no actual dipstick included with the car. You need to buy a specific flexible measuring tool separately.
Step 1: Connect your scan tool and warm the transmission to the specified temperature.
Step 2: Remove the fill cap and insert the dipstick tool until it bottoms out or hits the built-in stop.
Step 3: Pull the tool out and read the measurement in millimeters.
Step 4: Cross-reference that millimeter reading against a temperature chart for your specific transmission. For example, at 70°C, a reading between 40–50mm might indicate a correct level. At a different temperature, the acceptable range shifts.
This hybrid method combines the familiar concept of a dipstick with the thermal precision required by sealed systems. The key difference: this tool isn’t left in the vehicle. It’s a service instrument, not a permanent fixture.
The Extra Step for ZF 8-Speed Transmissions
If you’re working on a BMW, Ram 1500, or Jeep Grand Cherokee with the ZF 8HP transmission, there’s one more step you can’t skip.
After the warm-up and gear cycling, increase engine speed to 2,000 RPM and hold it for 30 seconds in Park or Neutral. This primes the torque converter, pushing fluid through the internal stator and turbine and purging any air pockets.
If you skip this step, the torque converter stays partially empty. The pan looks full when you check it. But once you drive the car and the converter naturally fills up, the pan level drops. Your transmission ends up chronically underfilled — causing harsh shifts, gear hunting, and premature clutch wear.
What the Fluid Tells You About Transmission Health
While you have the check plug out, pay attention to what the fluid looks like. This is free diagnostic information.
Color and smell:
- Bright red and translucent = healthy fluid
- Dark brown or black = thermal breakdown from heat
- Burnt toast smell = scorched friction material on the clutch plates
- Cloudy or “strawberry milkshake” appearance = coolant contamination from a leaking radiator — this needs immediate attention
Texture:
Rub a drop between your fingers. Healthy fluid feels smooth and oily. Gritty or sandy fluid means particulate matter is circulating through the valve body and wearing down the precision bores that control your shift solenoids.
Metallic particles:
A small amount of microscopic wear is normal. But visible silver or brass flakes indicate a bearing, bushing, or gear set is failing. That’s not a fluid change situation — that’s a rebuild conversation.
What Happens If You Get the Level Wrong
Getting the fluid level wrong in a sealed transmission isn’t a minor inconvenience. Here’s what actually happens:
Underfilling: The transmission pump starts pulling air along with fluid. That creates foam. Foamy fluid can’t hold hydraulic pressure, so the clutches slip. Slipping clutches generate heat. Heat degrades the remaining fluid faster. It’s a feedback loop that destroys the transmission.
Overfilling: The rotating gears churn the excess fluid like a blender. Same result — aeration and foam. On top of that, excess pressure can blow out the front pump seal or force fluid out of the vent. Fluid escaping from the vent can land on hot exhaust components and create a fire risk.
Either direction, you’re looking at gear slippage, harsh shifts, and a transmission that’s aging fast.
How Your Car’s Computer Monitors the Fluid
Your Transmission Control Module (TCM) doesn’t just control shifts — it watches the fluid too. Through your OBD2 port, a scan tool can reveal fault codes that point directly to fluid problems.
A “Ratio Error” code often means the input shaft is spinning faster than it should for a given gear — a sign of clutch slip from low fluid pressure. Temperature codes flag overheating before the fluid reaches a dangerous state. Some advanced systems even model fluid life mathematically, tracking heat cycles and shift counts to estimate when the additives are spent.
This is why a scan tool isn’t optional for this job. It gives you the transmission’s temperature in real time and tells you if there are existing faults before you start adding fluid to a system that already has a problem.
Quick Reference: Full Workflow Summary
Follow these steps every time, regardless of transmission type:
- Level the vehicle on four jack stands — confirm with a spirit level
- Connect your scan tool and check for existing fault codes
- Start the engine and cycle through all gear ranges for 5–10 seconds each
- Watch the temperature and wait for the fluid to hit the target window
- Clean around the check plug with brake cleaner before removal
- Remove the check plug with the engine running and observe the flow
- Add or drain fluid as needed using a transfer pump
- Reinstall the plug with a new seal, torqued to manufacturer spec
- Re-check for fault codes before calling the job done
Learning how to check transmission fluid without a dipstick takes more setup than the old dipstick pull — but once you’ve done it once, the process becomes straightforward. The precision it demands is exactly what keeps modern transmissions alive for the long haul.

