Your car’s heat or AC is acting up, blowing the wrong temperature no matter what you do. Before you assume the worst, your blend door actuator might be the culprit — and it’s easier to test than you think. This guide walks you through every method, from free zero-tool checks to electrical testing with a multimeter.
What Does a Blend Door Actuator Actually Do?
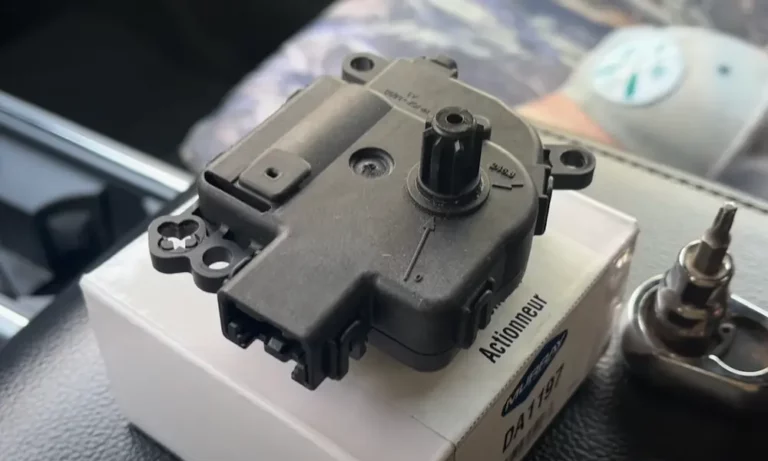
Think of it as the gatekeeper for your car’s air temperature. The blend door actuator is a small electric motor that moves a door inside your HVAC box. That door either routes air through the heater core, through the AC evaporator, or somewhere in between.
When you twist your temp dial, the actuator moves the door to match. A built-in potentiometer sends position feedback to your car’s climate control module, creating a closed loop. When any part of that loop breaks, your comfort suffers.
Signs Your Blend Door Actuator Is Failing
Knowing the symptoms saves you hours of guesswork. Here’s what to watch — and listen — for:
Temperature problems:
- Stuck blowing hot air no matter how low you set the temp
- Stuck blowing cold air even with heat maxed out
- One side of the car is hot, the other is cold (dual-zone vehicles)
- Temperature fluctuates on its own without you touching anything
Sounds from behind the dash:
- Rhythmic clicking or ticking after you start the car
- A rapid “plastic machine gun” sound when you change temp settings
- Faint whirring after you shut the engine off
Important distinction: If both sides of your cabin are wrong, the problem is probably your AC refrigerant level, heater core, or compressor — not the blend door actuator. A zone-specific failure points directly at the actuator.
| Symptom | Sound | Likely Cause |
|---|---|---|
| One side wrong temp | None or faint whirring | Zone actuator motor failure |
| Temp fluctuates randomly | Constant seeking sound | Worn potentiometer |
| Clicking in dash | Rapid ticking | Stripped plastic gears |
| No change at all | Silence | Blown fuse or dead motor |
| Air hits wrong vents | None | Mode door actuator (different part) |
| Slow response to changes | Droning | Sticky door seals or binding |
Step 1 — The Free Tests (No Tools Needed)
Always start here. These checks cost nothing and often reveal the problem immediately.
The Zone Comparison Test
Set both climate zones to max cold. Wait 60 seconds. Then set both to max hot. If one side responds and the other doesn’t, you’ve just isolated the problem to a single actuator. This rules out compressor issues, refrigerant leaks, and heater core failures in under two minutes.
The Ignition Listening Test
Turn your key to the “On” position without starting the engine. Your HVAC module will run a quick homing sequence, briefly moving each actuator to verify its position. The car is quiet with the engine off, so you’ll hear exactly where the problem is.
Silence from the dash? Check your fuses first. Clicking from a specific spot? That’s your faulty actuator telling you where it lives.
Watch the Linkage
In some vehicles, you can actually see the blend door linkage arm from the footwell. Change your temp settings and watch. If the lever barely moves and stops short, the door itself might be jammed. If the actuator moves but the door doesn’t, the output shaft is stripped.
A jammed door is sometimes caused by something as simple as a pen or coin that fell through your defrost vents. An endoscopic camera through a vent can confirm this before you start pulling panels.
Step 2 — The Software Reset (Still Free)
A surprising number of blend door problems aren’t mechanical failures at all. They’re calibration errors. Your HVAC module can lose track of the door’s position limits after a dead battery, a voltage spike, or even just years of use.
The Fuse Pull Reset
Pull the HVAC fuse for at least 60 seconds. When you reinstall it and turn the ignition on, the module automatically sweeps the doors to find their maximum and minimum positions. You’ll hear the actuators moving for about 30 seconds. That’s normal — it’s relearning.
This is safer than pulling your main battery cable because it doesn’t reset your radio presets or clock. Check your owner’s manual or fuse box diagram for the correct HVAC fuse location.
Brand-Specific Calibration Tricks
Some manufacturers build hidden reset sequences right into the climate control buttons. Per NHTSA technical service documentation, HVAC actuator recalibration is an official procedure for many vehicles.
Chrysler, Dodge, Jeep: Start the engine and hold the recirculation button for about 10 seconds. Three flashes from the indicator light means calibration mode is active. The doors will sweep for roughly 30 seconds.
Honda and Acura: Turn the ignition on while holding the climate “On/Off” button, then press the rear defogger button five times. The system enters self-diagnostic mode. A blinking “4” on the climate screen often means a blend or mode door circuit fault.
GM trucks and SUVs: Turn the ignition off, pull the HVAC/ECAS fuse for 10 seconds, restart the car, and let it idle for 40 seconds. Don’t touch any climate controls during that window. Let it complete the homing sweep undisturbed.
Step 3 — Test It With a Multimeter
When the free methods don’t solve it, you need electrical data. Grab a digital multimeter and follow this sequence.
Check Power and Ground First
With the ignition on and the actuator connector still plugged in, back-probe the power pin. You should read between 12.0 and 14.4 volts. Then check the ground pin. Resistance to chassis should be under one ohm.
No power? The problem is upstream — a blown fuse, a failed relay, or damaged wiring. Good power and ground? Keep going.
Read the Feedback Signal
This is the most revealing test. The potentiometer feedback signal tells your control module exactly where the door is. On a five-wire actuator, one wire carries a 5V reference from the module, one is ground, and one returns the signal.
Slowly move your temp dial from coldest to hottest. Watch the signal wire voltage on your multimeter. It should sweep smoothly from roughly 0.5V to 4.5V.
If the voltage jumps erratically, drops to zero mid-sweep, or stays flat: the potentiometer track inside the actuator is worn out. The module loses track of the door and goes into “hunting” mode, causing those annoying temperature fluctuations.
| Pin Function | Ignition State | Expected Reading |
|---|---|---|
| Main Power Supply | On | 12.0V – 14.4V |
| System Ground | On | 0V (under 1 ohm resistance) |
| 5V Reference | On | 4.9V – 5.1V |
| Feedback Signal | On + moving | 0.5V → 4.5V smooth sweep |
| Motor Drive A | Adjusting | Pulsed 12V |
| Motor Drive B | Adjusting | Pulsed 12V (reverse polarity) |
Step 4 — Bench Test the Actuator Directly
You’ve removed the actuator. Now confirm whether it’s actually dead before buying a replacement — or before reinstalling a “new” one that might be defective.
The 9-Volt Battery Test
Use a fresh 9-volt battery, not your 12-volt car power. 9 volts provides enough power to spin the motor without risking gear damage if the unit is internally jammed.
Find the two motor drive pins (usually the outer two on a five-pin connector). Touch the battery to them. The shaft should spin smoothly. Flip the battery leads — the shaft should reverse direction. If it only spins one way, clicks under no load, or doesn’t move at all, the actuator is bad.
Don’t hold it at the mechanical stop for more than a second. Without the control module’s current limiting, you can burn out the small brushed motor quickly.
Potentiometer Resistance Test
With the actuator disconnected from everything, set your multimeter to resistance mode. Place probes on the 5V reference pin and the signal pin. Slowly rotate the output shaft by hand. Resistance should change smoothly across the full range.
Any moment of infinite resistance during the sweep? That’s a break in the resistive track. Even a brief dead spot causes the control module to misread position and send the actuator hunting.
Step 5 — Use a Scan Tool for the Fastest Answer
If you have access to a bi-directional scan tool, this is the most direct path to an answer. Connect to the HVAC module and check for stored DTCs:
- B1080 — General blend door motor circuit fault (broken wire or dead motor)
- B1081 — Position sensor fault (potentiometer signal out of range)
- B1082 — Calibration not learned (try the reset procedures above first)
The real power of a scan tool is the live data. Pull up “Commanded Blend Door Position” and “Actual Blend Door Position.” In a healthy system, these two values track each other almost perfectly. If commanded reads 100% and actual reads 20%, the module is doing its job — the actuator physically can’t comply.
This single check separates a software fix from a parts replacement in about 30 seconds.
The Smart Order to Test a Blend Door Actuator
Follow this sequence and you won’t waste time or money:
- Listen and compare zones — free, takes two minutes
- Run a software reset — still free, rules out logic errors
- Scan for fault codes — fast if you have the tool
- Back-probe with a multimeter — confirms electrical health
- Remove and bench test — isolates the component completely
- Check the door itself — manual pivot test before installing anything new
That last step is critical. If the air door pivot feels stiff or won’t move freely, installing a new actuator will just strip its gears on the first calibration cycle. Fix the mechanical obstruction first.
One More Thing About Replacement Parts
If you’ve gone through all of this and the actuator needs replacing, don’t cheap out on the part — especially if accessing it required removing the glove box, lower dash panels, or anything under the center console. Low-cost aftermarket actuators often use inferior plastic gears and lower-grade potentiometer contacts. The labor to get back in there a second time will far exceed the few dollars you saved upfront.
A quality replacement matched to your vehicle’s OEM specs is always the smarter call on high-labor repairs.