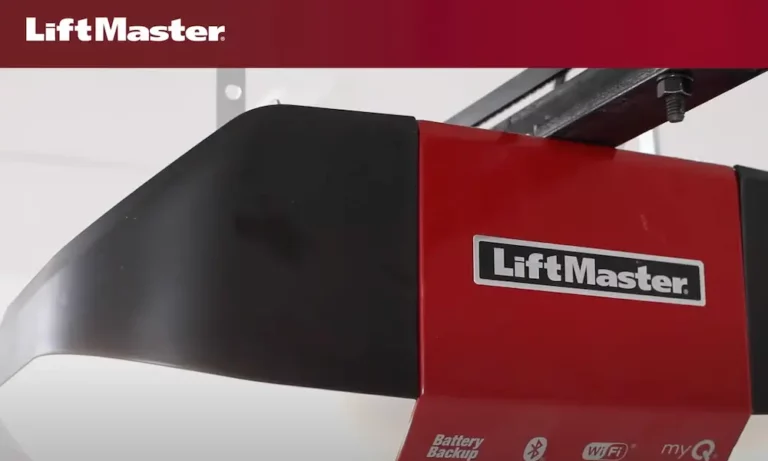
Is your LiftMaster garage door opener acting up? You’re about to discover exactly how to tackle the most common issues without calling in expensive professionals (though we’ll tell you when that’s necessary too).
From doors that won’t open to remotes that suddenly stop working, we’ve compiled the definitive troubleshooting guide based on real solutions that have worked for thousands of homeowners.
Power Issues: When Your LiftMaster Won’t Respond at All
Check Your Power Source First
Before diving into complex fixes, always confirm the basics. Your opener might simply lack power. Make sure:
- The unit is properly plugged into a working outlet
- Your home’s circuit breaker hasn’t tripped
- The surge protector (if using one) is functioning
If your model has battery backup, different beeping patterns indicate specific issues. A beep every 2 seconds with a steady orange light means it’s running on battery power, while beeping every 30 seconds with a flickering orange LED signals a low battery that needs replacement.
Test the Wall Console
If your remote isn’t working but the wall button is, you have a remote problem (more on that later). If neither works, you’re looking at a power or control board issue.
Try unplugging your opener for a full minute, then reconnect it. This simple power cycle can reset electronic components and resolve strange behavior.
Door Movement Problems: When It Won’t Open or Close Properly
Look for Physical Obstructions
Even small objects can trigger safety mechanisms. Check for:
- Debris in the door tracks
- Objects blocking the door’s path
- Spider webs or dirt around safety sensors
- Leaves or snow drifts near the bottom of the door
Regular cleaning of the tracks prevents many operational problems. Use a barely damp cloth to wipe down tracks and components monthly.
Inspect Door Springs and Hardware
When springs break, the opener motor might run but fail to move the door. Signs include:
- A loud bang during operation
- Difficulty moving the door manually
- Visible gaps in torsion springs
Warning: Never attempt to repair or replace garage door springs yourself. The high tension makes this extremely dangerous. This is one repair that always requires professional help.
Check Track Alignment
Misaligned tracks cause binding that prevents smooth operation. Visually inspect both tracks to ensure they’re:
- Parallel to each other
- Properly secured to wall brackets
- Free from bends or damage
Minor alignment issues can sometimes be fixed by loosening track hardware, adjusting position, and retightening securely.
Safety Sensor Problems: The Most Common Culprit
Understanding How Sensors Work
LiftMaster sensors are the primary safety system preventing doors from closing on people, pets, or objects. The system uses two sensors at the bottom of the door tracks:
- Sending eye (amber light)
- Receiving eye (green light)
When working correctly, both lights should be steady. Flashing or unlit sensors indicate problems.
Fix Sensor Alignment Issues
If your door starts to close but then reverses, misaligned sensors are likely to blame. To fix them:
- Locate both sensors (usually 4-6 inches from the floor)
- Check if both indicator lights are on (not blinking)
- If not, loosen the wing nut holding one sensor
- Adjust until both lights are steady
- Tighten the wing nut without changing the position
This simple alignment fix solves approximately 70% of door reversal issues.
Clean Those Sensors
Even invisible dust can block sensor signals. Every few months:
- Disconnect power to the opener
- Gently wipe sensor lenses with a clean, soft cloth
- Remove any cobwebs or debris around sensors
- Reconnect power and test operation
Never use cleaning chemicals on sensors as they can damage the lenses.
Check Sensor Wiring
Damaged or loose wiring to sensors can cause intermittent problems. Inspect the wires running from the opener to each sensor for:
- Visible damage or breaks
- Loose connections at terminals
- Staples piercing the wire insulation
Common error codes for sensor wiring issues include 1-1, 3-5, and 4-6. Replacing damaged wiring may be necessary if visual inspection reveals problems.
Remote Control Problems: When Your Clicker Fails
The Simple Battery Fix
Dead batteries are the most common remote issue. Even relatively new batteries can fail prematurely. Replace them with fresh ones, ensuring proper polarity. Most LiftMaster remotes use CR2032 button batteries.
Reprogramming Your Remote
If battery replacement doesn’t help, your remote may need reprogramming:
- Locate the “Learn” button on your opener unit (usually behind a light cover)
- Press and release this button briefly
- Within 30 seconds, press and hold the remote button
- Release when the opener lights flash or you hear a click
Different LiftMaster models have specific programming steps, so consult your model’s manual for exact instructions.
Light Interference Problems
Surprisingly, certain light bulbs can disrupt remote signals. If your opener’s light turns on but the remote only works after the light turns off automatically:
- Replace bulbs with 60W incandescent or LiftMaster-approved LED bulbs
- Some users have solved remote issues by removing light bulbs entirely
Range Issues
If your remote works inconsistently at different distances:
- Move closer to the garage when activating
- Check for new sources of interference (new LED lights, metal structures)
- Try pointing the remote in different directions
- Replace the antenna wire if damaged
Many users report remotes working perfectly inside the garage but rarely from outside, often due to signal interference or weak batteries.
MyQ and Wi-Fi Connectivity Issues
Wi-Fi Configuration Problems
Modern LiftMaster openers with MyQ functionality often face connectivity challenges:
| Issue | Solution |
|---|---|
| Won’t connect to 5GHz | LiftMaster only works with 2.4GHz networks – ensure you’re connecting to the correct band |
| WPA3 security issues | Temporarily disable WPA3 in router settings during setup |
| iPhone Private Relay | Turn off Apple’s Private Relay feature (in iCloud+) during initial setup |
Alternative Setup Methods
When the standard app setup fails, try these workarounds:
- Connect to the opener’s temporary Wi-Fi network
- Open a web browser and navigate to http://192.168.10.1/start.html
- Follow the on-screen instructions to complete setup
This browser-based approach has helped many users when the app method fails.
Factory Reset for Fresh Start
For persistent connectivity issues:
- Hold the middle button (gear) until the blue light blinks steadily
- Release, then hold down again until everything blinks and the unit beeps
- This resets all programming, allowing for a fresh setup
Control Board Problems: When Electronics Fail
Identifying Control Board Failure
The logic board is your opener’s brain, and issues here cause various malfunctions:
- Unit doesn’t power on at all
- Powers on but doesn’t respond to commands
- Motor runs but door doesn’t move
- Opener “forgets” programmed settings repeatedly
Error codes 2-1 through 2-5 typically indicate logic board problems.
Troubleshooting Steps
Before replacing the control board:
- Disconnect power completely for at least 1 minute
- Reconnect and test operation
- Check for loose wiring connections to the board
- Look for visible damage (burn marks, swollen capacitors)
Control board replacement typically costs $100-150 plus labor if professionally installed. Some homeowners successfully replace boards themselves following detailed instructions.
Motor Runs But Door Doesn’t Move
If you hear the motor running but see no movement, check:
- Drive gear for stripped teeth
- Chain or belt for breakage or extreme looseness
- Disconnect trolley for proper engagement
A grinding noise during operation typically indicates a stripped gear, while a humming motor with no mechanical sound might point to a capacitor issue.
Understanding Diagnostic Codes
Decoding Blinking Lights
Modern LiftMaster openers communicate problems through light patterns:
| Error Code | Meaning | Solution |
|---|---|---|
| 1-1, 3-5, 4-6 | Sensor alignment/wiring | Check sensor alignment and connections |
| 1-2 | Sensors shorted/reversed | Inspect sensor wiring for damage |
| 1-3 | Wall button wiring short | Check wall button wiring |
| 2-1 through 2-5 | Logic board problems | May require board replacement |
| 3-3 | Logic board failure | Board replacement needed |
When diagnosing, count the number of flashes followed by a pause, then any additional flashes to determine the specific code.
Using the Manual Override
During power outages or mechanical failures, you can manually operate your door:
- Pull the red emergency release cord hanging from the trolley
- This disconnects the door from the opener mechanism
- The door can now be opened and closed manually
- To reconnect, operate the opener with the door closed
Remember that an unlocked door creates a security risk, so only use manual override when necessary.
Preventative Maintenance: Avoiding Future Problems
Regular Maintenance Checklist
Prevent problems before they start with this quarterly maintenance routine:
- Lubricate moving parts (rollers, hinges, springs) with silicone-based lubricant
- Tighten all hardware connections (track brackets, chain/belt tensioner)
- Clean safety sensor lenses
- Test manual operation to ensure smooth movement
- Check and replace remote batteries annually
This simple maintenance routine prevents 80% of common opener problems.
Listen for Warning Signs
Your LiftMaster often gives early warning of developing problems:
- New noises during operation (grinding, scraping)
- Increased vibration or shaking
- Inconsistent stopping points
- Delayed response to commands
Addressing these symptoms early prevents more serious failures later.
Upgrade Options for Older Systems
If your LiftMaster is over 15 years old, consider these modern upgrades:
- Battery backup capability for power outage protection
- MyQ smart connectivity for phone control
- Enhanced security features with rolling code technology
- Energy-efficient motors that use 75% less power
- Ultra-quiet belt drive systems for noise reduction
New models offer significant improvements in security, reliability, and features that may justify upgrading rather than repairing older units.
Extending Your Opener’s Lifespan
The average LiftMaster opener lasts 10-15 years, but these tips can help yours last longer:
- Adjust force settings to the minimum needed for reliable operation
- Keep door well-balanced to reduce strain on opener
- Install a surge protector to prevent electrical damage
- Consider professional annual inspection and tune-up
- Replace worn components promptly before they cause cascading failures
With proper maintenance and prompt attention to minor issues, your LiftMaster can provide reliable service for many years beyond its expected lifespan.