Have you clicked your remote only to find yourself walking into a pitch-black garage? A non-working garage door opener light isn’t just annoying—it’s a safety issue that deserves quick attention. The good news is you can likely fix it yourself without calling a professional. Let’s shed some light on this common problem.
The Most Common Reasons Your Garage Door Opener Light Isn’t Working
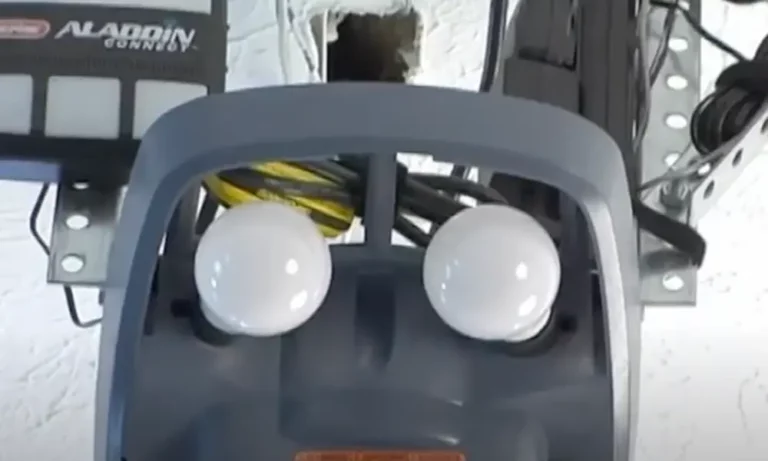
It’s Just the Bulb (But Not That Simple)
The first culprit is often the simplest—a burnt-out light bulb. But before you grab any replacement bulb from your kitchen drawer, know that not all bulbs work with garage door openers.
Many homeowners run into trouble when switching from traditional incandescent bulbs to LED bulbs. Your opener might be picky about what it accepts. For instance, Chamberlain openers specifically require size A19 incandescent bulbs or similar-sized CFLs that don’t exceed 2.375″ in diameter.
If you’ve recently switched to a CFL bulb and it’s not working, the problem might be its wider base preventing proper connection with the socket contacts.
The LED Interference Problem
If you’ve installed an LED bulb that lights up but your remote control suddenly has poor range, you’ve discovered one of the most frustrating garage door opener issues.
Many standard LED bulbs produce radio frequency interference within the 315 MHz or 390 MHz spectrum—the exact frequencies most garage door openers use for their remotes. This interference can cause:
- Dramatically reduced remote range
- Doors that won’t open or close when commanded
- Frustrating intermittent operation
The solution? You’ll need specially designed LED bulbs for garage door openers that are shielded against radio frequency interference.
Socket Connection Issues
If the bulb works in other fixtures but not in your garage door opener, the socket connection is likely the problem.
Inside the socket is a small metal tab (sometimes called a “tongue”) that contacts the base of the bulb. Over time, this tab can get pushed down too far, losing contact with the bulb. You can fix this by:
- Unplugging the opener (always disconnect power first!)
- Using a flathead screwdriver to gently bend the metal contact upward
- Making sure it will properly touch the bulb’s base
Corrosion is another common socket issue. If you see rusty contacts, unplug the unit and gently clean them with fine sandpaper.
Electrical Problems
More complex electrical issues might be at play if simpler fixes don’t work.
The logic board—essentially the brain of your garage door opener—might be malfunctioning. To check, unplug the opener, then plug it back in immediately and listen for a clicking sound from the light relay on the logic board. No click might mean a bad board.
Broken wires to the socket can also prevent the light from working. This is harder to diagnose without a multimeter, but visually inspecting the wires for damage might reveal the issue.
How to Fix Your Garage Door Opener Light: Step-by-Step Guide
Basic Troubleshooting First
- Check power to the opener: Plug a lamp into the same outlet to verify the circuit is working.
- Try a known working bulb: Use a bulb you know works in another fixture.
- Verify bulb compatibility: Make sure you’re using the correct type and size for your opener model.
Fixing Socket Issues
- Unplug the garage door opener from the electrical outlet.
- Remove the light cover and bulb to access the socket.
- Inspect the metal contact at the bottom of the socket—it should protrude enough to touch the bulb’s base.
- Adjust the contact if needed: Using a flathead screwdriver, gently bend the metal tab upward so it will make better contact with the bulb.
- Check for corrosion: If you see rust or buildup on the contacts, clean them with fine sandpaper.
- Reinstall the bulb and restore power to test if your fix worked.
Solving LED Interference Problems
If you’re experiencing remote control issues with an LED bulb:
- Switch to a garage door opener-specific LED bulb: Both Genie and LiftMaster make LED bulbs specifically designed to prevent interference.
- Try different LED brands: Some users report success with EcoSmart, Phillips, Feit Electric, and Great Eagle LED bulbs.
- Position LED bulbs away from the opener’s antenna: Sometimes physical distance helps reduce interference.
- Use a ferrite bead or powerline filter: These can help diminish interference from LED bulbs.
- Return to incandescent bulbs: If all else fails, traditional bulbs don’t cause interference issues.
This Table Shows Compatible Bulb Options for Major Opener Brands
| Brand | Recommended Bulb Types | Max Wattage | Special Notes |
|---|---|---|---|
| Chamberlain/LiftMaster | A19 Incandescent, CFL, Opener-specific LED | 100W | LEDs must be specifically designed for openers |
| Genie | A19 Incandescent, Genie LED | 60W | Genie LED bulbs are RFI-shielded |
| Craftsman | A19 Incandescent, CFL | 60W | Most LEDs may cause remote interference |
| Overhead Door | A19 Incandescent, CFL, Compatible LED | 100W | Verify LED compatibility before purchasing |
Advanced Fixes for Persistent Light Problems
Check Your Opener Settings
Some opener models have light settings that might have been accidentally changed:
- Check your opener’s manual for light duration settings
- Verify that the light panel switch isn’t permanently turned off
- Test the motion sensor functionality (some openers turn on lights when motion is detected)
Inspect the Logic Board
If none of the above solutions work, your opener’s logic board might be the issue:
- Unplug the opener and wait 30 seconds
- Plug it back in and listen for a clicking sound (the light relay)
- If you don’t hear a click or the light still doesn’t work, the logic board may need replacement
Replace the Light Socket
If the socket itself is damaged, it may need replacement:
- Light sockets are relatively inexpensive (around $15)
- For most DIYers, this is where you might consider calling a professional
- Always disconnect power before attempting any internal repairs
Preventative Maintenance for Garage Door Opener Lights
To avoid future light issues:
- Use only compatible bulbs recommended by your opener’s manufacturer
- Clean socket connections annually to prevent corrosion
- Don’t overtighten bulbs, as this can damage the socket or contacts
- Keep a spare compatible bulb on hand for quick replacement
New Technology Options
If your older opener continues having light problems, it might be worth considering newer models with improved lighting:
- Modern openers often include bright, long-lasting LED lighting systems
- Some new models feature motion-activated lighting that works independently of door operation
- Smart garage door openers allow you to control lights from your smartphone
A non-working garage door opener light is more than just an inconvenience—it’s a safety issue worth fixing promptly. By understanding the common causes and following these troubleshooting steps, you can usually solve the problem yourself and avoid the expense of a service call.
Remember that using the right bulb for your specific opener model is crucial, especially with LED technology. When in doubt, consult your opener’s manual or manufacturer’s website for the exact specifications your model requires.