The “Tesla touch screen not working” is a common problem. It often presents differently. Sometimes you’re in the middle of doing something, but the touchscreen won’t respond to any of your touches.
Other times, the unresponsiveness may be intermittent. Some people have had their screens go completely blank. Whatever your situation, it’s both an inconvenience and a potential safety issue. Here’s our guide on how you can fix it.
How To Fix the “Tesla Touch Screen Not Working” Issue?
To fix the “Tesla touch screen not working” issue, perform a soft restart. Hold the scroll wheels for 10-30 seconds until the instrument cluster restart. You can also hard reset it by disconnecting the 12V battery for about 10 minutes. Replacement applies if the screen has irreversible damage.
As mentioned, the Tesla’s touchscreen malfunction is commonplace. In early 2021, the manufacturer recalled specific models to resolve the screen problems. That included several concerns. Primarily, it was required to address critical safety issues with the screen not functioning. For example, the case of not being able to use defogging.
Generally, most of the reported screen problems on Tesla are as follows:
- Slow response to inputs or loading: Sometimes, a touch input takes up to 5 seconds to respond. That’s particularly so after a long screen inactivity.
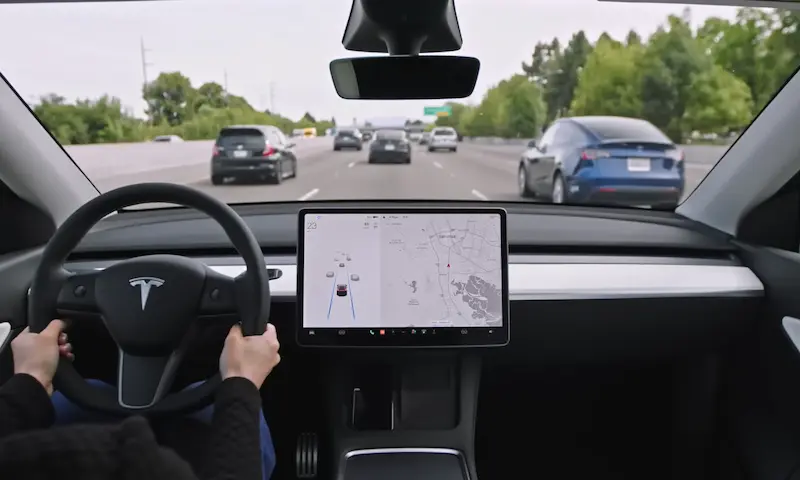
- The screen usually displays but doesn’t respond to touch inputs. Unresponsiveness (frozen display) often happens while driving.
- Yellow banding around the screen’s edge develops slowly with time. That often happens in the hot climate or when you’ve parked in the sun.
- The screen goes completely black and fails to recognize touch inputs.
Let’s now get into the details of how to resolve the highlighted concerns:
Possible Fix #1: Soft Restart
A soft restart will resolve various issues. It will mainly fix a frozen, unresponsive, flickering, or black Tesla screen. If you own a Model Y or Model 3, you’ll use the scroll wheels on each side of the steering wheel.
- Hold down the buttons for 10-30 seconds. If the screen is on, you’ll see it turn off.
- Wait for 10-30 seconds until the instrument cluster restart. That should clear any software issues you have.
Note: You can also perform this reset procedure in another way. Hold the buttons on top of the scroll wheels on the steering wheel.
If your Tesla model is other than the mentioned ones, the steps to soft restart are a bit different:
- You’ll need to enter the “Park” mode.
- Depress the brake pedal to the floor and hold it.
- Hold the button above your screen until you see a flash on the speedometer.
- Release the buttons but keep depressing the brake pedal.
- Press and hold the two scroll wheels on the steering wheel. Please do it for about 10 seconds to complete the procedure.
Note: Ensure you’ve parked your vehicle in a safe parking area. It’s essential before attempting any troubleshooting.
Possible Fix #2: Check for Slow Internet or Loose Connection
An unstable internet connection can cause slow-loading issues on your Tesla screen. You can fix this by a soft restart using the scroll wheels on the steering wheel. You must also ensure a strong and stable internet before reconnecting.
Power cable connection faults can cause black screen or flickering issues. Thus, check and ensure there are no damaged cables and loose connections.
Note: Dust and debris on the screen could also affect its touch sensitivity. Wipe the screen using a soft, dry microfiber cloth.
Possible Fix #3: Hard Reset
If the solutions above don’t bear fruits, a hard reset may be what the system needs to function normally again. This solution has worked for many people experiencing black screen issues. To do a hard reset:
- Park your Tesla in a safe location – away from the elements.
- Remove the 12 volts battery by following the guidelines in your owner’s manual. You’ll need a wrench.
- Allow the engine to rest for 10-15 minutes. That will ensure the residual current in the vehicle’s computer has been depleted.
- Reconnect the car battery and start the vehicle as usual.
Warning: A slight mistake while removing the battery could seriously affect your vehicle’s electronics. Only try it if you’re confident working with cars and their electronics.
Possible Fix #4: Replace the Faulty Screen
The damage to your Tesla touchscreen could be irreversible, necessitating a replacement. For example, there’s no way to repair a cracked screen. Even hairline cracks can affect the functionality of your screen significantly.
Severe yellow banding or an utterly black screen can imply that the unit has a serious fault. Another notorious issue is the degradation of the memory built into the processor that controls the media control unit (MCU). The condition affects the display, and there’s no way to fix it without replacement.
The touch screen replacement may be under warranty, especially if your car is a model year between 2014 and 2018. Visit your local dealer and see if they can repair it. Many people have reported having experienced no issues after replacing their screens. That could also be the exact solution you need.
Note: Book an appointment through Tesla’s service center app to get them to fix your screen quickly. Some centers may accept a video of your screen malfunctioning as sufficient proof to replace it. That may only apply if your vehicle’s warranty is active and it also covers the screen. Talk to an authorized dealer to be sure.
Take Away
Tesla vehicles are one of the century’s technological marvels. They boast cutting-edge features that make your ride safer, more comfortable, and eco-friendlier. However, these cars aren’t perfect. Once in a while, your model will experience an issue, such as the touch screen not working.
The easiest way to deal with the problem is to soft restart the screen. If that doesn’t work, perform a hard reset and ensure no loose connections. A screen that’s damaged beyond repair will require replacement. Please execute the solutions above individually and see which works for you!