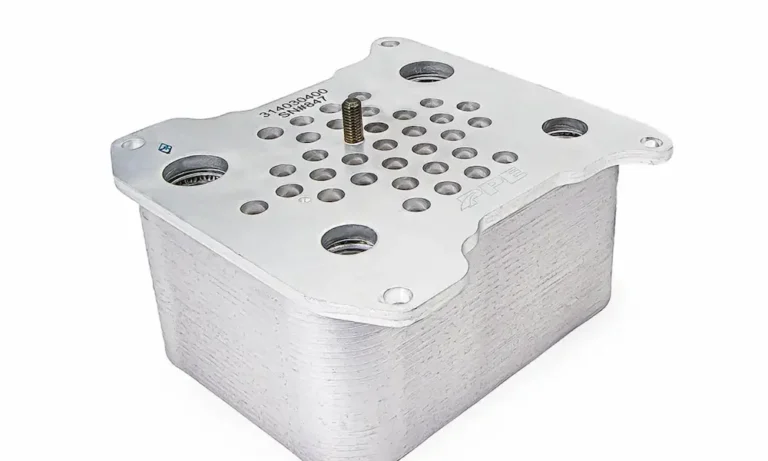
Got an oil puddle forming under your 7.3 every cold morning? Your oil cooler seals are probably toast. This guide covers everything about 7.3 Powerstroke oil cooler replacement — from diagnosing the failure to torquing the final bolt. Stick around, because skipping a few key steps here turns a $50 seal job into a $500 nightmare.
Why the 7.3 Powerstroke Oil Cooler Matters So Much
The 7.3 Powerstroke runs a Hydraulically Actuated Electronically Controlled Unit Injection (HEUI) system. That means engine oil — pressurized up to 3,000 PSI — fires the injectors. That much pressure generates enormous heat, and the oil cooler is the only thing standing between your engine and a thermal meltdown.
Unlike the nightmare-inducing 6.0 and 6.4 Powerstroke oil coolers buried deep in the engine valley, the 7.3’s external tubular cooler sits right on the driver’s side of the block. It’s accessible, robust, and rarely fails internally. When it does fail, it’s almost always the seals — not the cooler itself.
How to Spot a Failing 7.3 Oil Cooler
The Classic Cold-Start Leak
You walk out to a cold truck and find oil spots under the driver’s side. You start it up, let it warm up, and the leak disappears. That’s not magic — that’s compression set, and it’s your outer seals telling you they’re done.
Cold rubber shrinks and pulls away from the aluminum bore, letting oil seep through. Heat expands everything back together temporarily. This will keep getting worse until the seal blows out entirely — potentially dumping all your oil on the highway.
Other Warning Signs
- Visible oil streaks or buildup on the driver’s side of the block
- Milky, chocolate-colored coolant (internal seal failure pushing oil into the cooling system)
- Unexplained oil loss with no external puddle
- Coolant in the oil reservoir (less common on the 7.3, but possible with a complete internal failure)
Understanding the Oil Cooler Assembly
The oil cooler assembly has three main parts:
- Front header — aluminum casting bolted to the timing cover; routes coolant into the tube
- Heat exchanger tube — a steel shell packed with copper-nickel tubes; oil flows around the outside, coolant flows through the inside
- Rear header — the complex end; it holds the oil filter, pressure relief valve, filter bypass valve, and block heater element
Four elastomeric seals hold it all together. Two inner seals prevent oil and coolant from mixing. Two outer seals keep oil inside the assembly. When these fail, you’ve got problems.
Choosing the Right Replacement Seals: Nitrile vs. Fluorocarbon
This is where a lot of people shortcut themselves into doing the job twice.
| Material | Continuous Temp Limit | Oil Resistance | Ozone Resistance | Cost |
|---|---|---|---|---|
| Nitrile Butadiene Rubber (NBR) | 100°C | Excellent | Poor | Low |
| Fluorocarbon (Viton) | 204°C | Excellent | Excellent | 10–15x higher |
Nitrile rubber handles petroleum oil fine, but it degrades fast under sustained heat above 100°C. Engine oil in a HEUI system runs way hotter than that. It hardens, cracks, and fails — sometimes within a year.
Fluorocarbon (Viton) seals handle continuous temps up to 204°C and resist ozone, UV, and modern synthetic oil additives. Yes, they cost more. But this is a labor-intensive job — you don’t want to open it back up in 18 months. Stick with genuine Ford or International authorized kits to guarantee the right compound.
Parts and Part Numbers You Need
| Component | Ford Part Number | Navistar (T444E) Part Number |
|---|---|---|
| Inner Seal O-Ring | 1C3Z-6C610-BA | 1840053C96 / 1836542C141 |
| Outer Seal O-Ring | 1C3Z-6K649-BA | 1840053C96 / 1836542C141 |
| Front Header Gasket | F7TZ-6A636-AAA | 1815738C140 |
| Rear Header Gasket | F4TZ-6A636-AA | 1820653C140 |
| Heat Exchanger Tube | 1C3Z-6A642-AA | 1815904C2 / 1841737C143 |
Important: The F-Series and E-Series oil cooler headers are completely different. The van’s cramped engine bay requires uniquely angled castings. Don’t grab the wrong assembly — they won’t interchange.
Step-by-Step: 7.3 Powerstroke Oil Cooler Replacement
Step 1: Drain Everything First
The 7.3 holds 15 quarts of oil and 32.75 quarts of coolant. Drain the radiator through the petcock, but don’t stop there. The engine block has two dedicated drain plugs requiring a 16mm hex driver — one on each side of the block. Open both, or you’ll get a coolant shower when you pull the headers.
Drain the oil pan, then loosen the spin-on oil filter to let residual oil drain from the housing. Remove and discard the filter.
Step 2: Remove Surrounding Components
Disconnect the lower radiator hose — it blocks access to the front header bolts. Unplug the block heater cord at the rear header. Remove any exhaust gas temperature sensors in the driver-side manifold to avoid damage during extraction.
Step 3: Remove the Five Mounting Bolts
Five 10mm bolts hold the assembly to the engine — two at the front header (timing cover) and three at the rear header (block pad). Break them loose by hand before using any power tools. A snapped bolt in the timing cover is a very bad day.
Step 4: Pop the Assembly Free
Once the bolts are out, the cooler stays stuck from old gasket adhesion. Pry between the cast-iron block and the rear header only. Never pry against the aluminum timing cover — it cracks easily and requires major engine teardown to repair. Place a large drain pan underneath before the final pop. Residual oil and coolant will spill.
Step 5: Disassemble on the Bench
Work the headers off the heat exchanger tube. The front header separates with a pry bar wedged against the metal alignment tab. The rear header is stubborn — use a rubber or dead-blow mallet, striking uniformly around the circumference to walk it off evenly. Don’t use brute force — the rear header costs over $400 to replace if you crack it.
Pick out the four old seals. They’ll be flat, brittle, and possibly pitted. That’s your smoking gun.
Step 6: Clean and Inspect Everything
Soak both headers in parts washer solvent to remove sludge and calcium scale. Then carefully polish the internal aluminum bores with fine emery cloth until they’re smooth and uniform. Any pitting left in the bore will leak around even brand-new seals.
If the pitting is deep and won’t polish out, replace the header. Aftermarket billet aluminum headers offer tighter tolerances and hard-anodized surfaces that permanently eliminate this problem.
Inspect the heat exchanger tube for exterior rust. Surface rust is fine. Flaking, structural rot, or pinhole corrosion means you need a new tube.
Step 7: Lubricate and Press the Assembly Together
Install the new seals into their grooves on the tube. Then — and this is critical — lubricate everything heavily. Dry assembly will tear the seals instantly.
You have two solid options:
- Fresh 15W-40 engine oil — the factory-approved method; coat the seals and the bore liberally
- Synthetic dielectric grease — many veteran techs prefer this for its superior slip factor and long-lasting lubrication
Align the cast notch marks on the header with the riveted tabs on the tube. Don’t use a hydraulic shop press. You’ll get zero feedback if a seal starts to roll, and you’ll crush an expensive header before you know it happened. Instead, place the tube vertically on a block of wood and use your body weight to press the header down until you feel it seat. That tactile feedback is everything.
Step 8: Install and Torque to Spec
Scrape the block pad and timing cover clean of old gasket material. Use a razor scraper on the aluminum cover — no abrasive discs.
Install the new gaskets. Set the assembly against the engine, thread the two front bolts in first (leave them loose), align the rear header, then thread the three rear bolts in. Once everything’s hand-tight, torque all five bolts to 18 foot-pounds with a calibrated torque wrench.
That 18 ft-lb spec is non-negotiable. Under-torque and the gaskets blow. Over-torque and you pull threads out of the aluminum timing cover or warp the flanges.
| Component | OBS 1994.5–1997 | Super Duty 1999–2003 |
|---|---|---|
| Oil Cooler Retaining Bolts | 18 ft-lb | 18 ft-lb |
| HPOP Mounting Bolts | 18 ft-lb | 18 ft-lb |
| Cylinder Head Bolts (Final Stage) | 105 ft-lb | 95 ft-lb |
| Crankshaft Balancer Bolt | 212 ft-lb | 212 ft-lb |
| ICP Sensor | — | 22 ft-lb |
Step 9: Reassemble and Fill
Reconnect the block heater cord and lower radiator hose. Fill a new oil filter with fresh 15W-40 and spin it onto the rear header. Fill the oil pan and cooling system to capacity. Start the engine and watch for leaks as it reaches full operating temperature and pressure.
What to Do If the Cooler Failed Internally
If oil got into your coolant, replacing the cooler stops the contamination — but doesn’t fix the cooling system. Standard water flushes can’t dissolve petroleum. You need an alkaline-based chelating cleaner like Fleetguard Restore.
Here’s the flush process:
- Remove the thermostat for unrestricted flow
- Add Fleetguard Restore, top off with clean water
- Set interior heat to maximum to flush the heater core
- Run the engine 60–120 minutes
- Drain completely — including the block drain plugs
- Repeat 3–6 clean-water flushes until the drain runs crystal clear
- Install a new thermostat and fill with fresh heavy-duty coolant
Note: Fleetguard Restore Plus (acidic) handles rust and scale. For oil contamination, you need the alkaline Restore formula. Don’t mix them up.
Used Oil Disposal: Stay Legal
Draining 15 quarts of engine oil and over 32 quarts of coolant creates a real waste management responsibility. The EPA regulates used oil disposal under 40 CFR Part 279. Key requirements:
- Store used oil in sound containers clearly labeled “Used Oil”
- Don’t mix used oil with coolant unless you confirm it won’t create hazardous waste
- If oil and coolant are mixed (internal cooler failure), the emulsion may require hazardous waste handling — not standard recycling
- Transport no more than 55 gallons at a time to an approved collection center in your own vehicle
- Clean up any spills immediately using sorbent materials; dispose of soiled rags and booms under the same used oil framework
Block Heater Leak After Oil Cooler Service
Don’t remove the block heater element from the rear header during cleaning. Disturbing the threaded base seal almost always causes a slow coolant drip afterward. If it’s already dripping, back the element out just enough to expose the threads, apply high-quality thread sealant paste or PTFE tape, and drive it back in. Overtightening a brass element into an aluminum casting strips the threads fast.
FAQs: 7.3 Powerstroke Oil Cooler Replacement
Why does my oil cooler only leak when the engine is cold but stops when it warms up?
That’s textbook compression set. Your outer seals have permanently flattened and lost their elasticity. Cold temperatures shrink the rubber further, opening a gap for oil to seep through. Heat expands everything shut temporarily. It’ll keep getting worse until the seal blows completely — don’t ignore it.
Can I use a hydraulic shop press to push the headers onto the tube?
No. A hydraulic press gives you zero tactile feedback. If a seal starts to roll or bind, the press will crush the headers before you react. Press the headers on manually using body weight and a block of wood — you’ll feel exactly when the seal seats properly.
What lubrication should I use on the seals during assembly?
Never assemble them dry — the rubber will shear immediately. Use either a heavy coating of fresh 15W-40 engine oil (factory method) or synthetic dielectric grease. Dielectric grease is preferred by many experienced techs for its superior, long-lasting slip.
I have oil in my coolant reservoir. Is it a blown head gasket?
On the 7.3 Powerstroke, oil in the coolant is overwhelmingly caused by internal oil cooler failure — not head gaskets. The engine oil pressure (up to 3,000 PSI) easily overwhelms the cooling system pressure, forcing oil through a failed inner seal or ruptured tube into the water jackets.
Why do I need an alkaline flush specifically if the oil cooler fails internally?
Standard water and acidic radiator flushes can’t dissolve petroleum. Oil clings to metal surfaces and insulates them, destroying heat transfer efficiency. An alkaline chelating cleaner like Fleetguard Restore chemically emulsifies the oil so it drains out. Acidic cleaners (Restore Plus) tackle rust and scale — not oil contamination.
What’s the difference between F-Series and E-Series oil coolers?
The internal heat exchanger tube and seal kits are identical across both platforms. The cast aluminum front and rear headers are completely different due to the E-Series van’s tight engine bay clearances. An F-Series assembly won’t fit an E-Series — verify your chassis before ordering parts.
How do I know if my starting issue is the HPOP or the oil cooler?
The oil cooler won’t cause a no-start unless it fails catastrophically and drains the engine oil. Use a scan tool to monitor Injection Control Pressure (ICP) during cranking. The engine needs at least 500 PSI to fire. Under wide-open throttle, a healthy system hits 2,500–3,000 PSI. If pressure plateaus low while the IPR duty cycle maxes at 65%, the high-pressure oil pump is the suspect.