That dreaded amber glow on your dashboard can trigger instant anxiety. When your GMC Sierra’s check engine light illuminates, it’s telling you something needs attention – but what exactly? And more importantly, how do you make it go away once you’ve addressed the issue?
This guide walks you through every method to reset your Sierra’s check engine light, from the simplest DIY approaches to when you might need professional help.
Understanding Why Your Sierra’s Check Engine Light Is On
Your GMC Sierra’s check engine light is part of the vehicle’s On-Board Diagnostics II (OBD-II) system. When something isn’t right with your engine, emissions system, or electronics, this system stores a specific trouble code and turns on the warning light.
Common triggers include:
- A loose or damaged gas cap
- Oxygen sensor malfunctions
- Catalytic converter issues
- Spark plug or ignition coil failures
- Mass airflow sensor problems
- Faulty fuel injectors
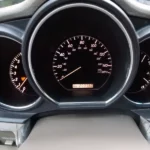
The light can be solid (indicating a non-emergency issue) or flashing (signaling a serious problem requiring immediate attention).
Method 1: Check and Tighten Your Gas Cap
Believe it or not, a loose gas cap is one of the most common reasons for a check engine light. The fuel system is pressurized, and a loose cap allows fuel vapors to escape, triggering the light.
Here’s what to do:
- Turn off your engine
- Remove the gas cap completely
- Examine the rubber gasket for cracks or damage
- Reinstall the cap, turning until you hear three clicks
- Drive normally for 10-15 minutes
If the issue was just a loose cap, your check engine light should turn off after a few driving cycles. According to the National Highway Traffic Safety Administration, fuel system issues like loose gas caps account for a significant percentage of check engine light activations.
If your cap is damaged, replace it with an OEM or high-quality aftermarket cap designed specifically for GMC vehicles.
Method 2: The Battery Disconnect Method
This technique works by resetting your Sierra’s computer system:
- Turn off the ignition and open the hood
- Find the negative battery terminal (marked with a “-” symbol)
- Use a 10mm wrench to loosen the negative cable clamp
- Remove the cable and keep it away from the terminal
- Wait 30-60 seconds (this allows the capacitors to discharge)
- Reconnect the negative cable and tighten securely
Be aware: This method will reset your radio presets, clock, and some learned driving behaviors. Your truck might run slightly differently until the computer relearns your driving patterns.
Method 3: Using an OBD-II Scanner (The Professional Method)
This is the most reliable and precise way to reset your check engine light:
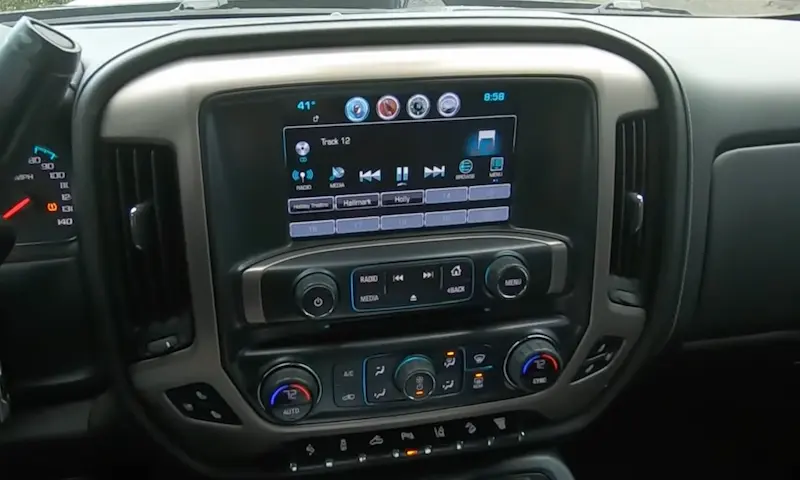
Locating Your Sierra’s OBD-II Port
In most GMC Sierras, you’ll find the OBD-II port under the driver’s side dashboard, usually near the hood release lever. In 2020-2024 models, it’s positioned below the steering column.
Using the Scanner
- With your truck off, plug the scanner into the OBD-II port
- Turn your ignition to the “ON” position (don’t start the engine)
- For push-button start models: Press the brake pedal and hold the start button for 5-10 seconds until dashboard lights appear
- Turn on the scanner and follow the menu prompts
- Select “Read Codes” to see what triggered your check engine light
- Write down any codes for future reference
- Select “Erase Codes” or “Clear Codes”
- Confirm the action when prompted
- The scanner should display “No Codes” if successful
Basic code readers start around $25, while advanced scanners with Sierra-specific diagnostics can cost $100-300. Many auto parts stores offer free code reading services.
Method 4: The Ignition Cycling Method
This lesser-known technique works on some Sierra models:
- Insert your key and turn to the “ON” position (don’t start the engine)
- Press the accelerator pedal to the floor three times within five seconds
- Turn the ignition off, wait 10 seconds
- Start the engine normally
This method may not work on all model years or for all types of codes, but it’s worth trying before more involved approaches.
Method 5: Complete a Drive Cycle
If you’ve fixed the underlying issue but your check engine light remains on (especially for emissions-related codes), you may need to complete a drive cycle to reset the system:
- Ensure your engine is cold (below 122°F)
- Start the engine and let it idle for 2-3 minutes with A/C and rear defroster on
- Drive at 55 mph steadily for 3 minutes
- Without braking, coast down to 20 mph
- Accelerate back to 55 mph and maintain for 5 minutes
- Come to a complete stop and idle for 1-2 minutes
- Repeat the process 3-4 times
This procedure helps your Sierra’s computer verify that all systems are functioning properly. It’s particularly effective for resetting emissions monitors before smog tests.
Dealing with Permanent Diagnostic Trouble Codes (PDTCs)
Modern GMC Sierras (especially 2010 and newer) store certain trouble codes as “permanent” in the system memory. These codes can’t be cleared using standard methods and require:
- Fixing the underlying problem
- Completing 15-40 drive cycles (approximately 200+ miles)
- Allowing the system to verify the issue is resolved
The EPA requirements for emissions systems include this feature to prevent temporary clearing of codes without actually fixing problems.
Understanding Code Categories in Your Sierra
When using a scanner, you’ll encounter different types of codes:
| Code Type | Description | Example | Reset Method |
|---|---|---|---|
| Pending | Recent issue, not yet triggering CEL | P0171 | Often clears automatically |
| Current | Active issue triggering CEL | P0300 | Requires fix + reset |
| Permanent | Stored in non-volatile memory | P0420 | Requires fix + drive cycles |
| History | Previously detected issues | P0456 | Can be cleared with scanner |
Using Advanced Diagnostics for Specific Sierra Models
Different generations of the GMC Sierra have unique diagnostic characteristics:
2014-2018 Sierra (K2XX Platform)
These models often store more sensitive oxygen sensor and EVAP system codes. Resetting often requires a scanner with GM-specific protocols.
2019-2024 Sierra (T1XX Platform)
The newer platform uses more sophisticated engine management systems. For these models:
- Select “Enhanced diagnostics” on your scanner
- Choose “GM” from the manufacturer menu
- Select engine type (5.3L, 6.2L, Duramax diesel, etc.)
- Use model-specific diagnostic trees
Troubleshooting After Reset
If your check engine light returns shortly after resetting:
- Oxygen Sensor Issues: If you get codes like P0135 or P0141, inspect or replace the sensor.
- Catalytic Converter Problems: Codes P0420 or P0430 indicate converter efficiency issues.
- EVAP System Leaks: Codes P0455 or P0442 point to vapor leaks in the fuel system.
When DIY Reset Methods Aren’t Working
If you’ve tried these methods and your check engine light persists, it’s time to consider:
- Using a more advanced diagnostic scanner
- Taking your Sierra to a GMC dealership
- Consulting with a specialized GMC technician who has access to manufacturer-specific diagnostic software
According to vehicle diagnostic experts, up to 30% of persistent check engine lights require professional diagnostic equipment to properly diagnose and reset.
Preventing Future Check Engine Light Issues
Keep your Sierra’s check engine light from returning with these preventive steps:
- Follow the maintenance schedule in your owner’s manual
- Use high-quality fuel from reputable stations
- Replace wear items like spark plugs and oxygen sensors at recommended intervals
- Address minor issues before they become major problems
- Consider a high-quality aftermarket extended warranty for older Sierras
By understanding how to properly reset your GMC Sierra’s check engine light and address the underlying causes, you’ll save time, money, and frustration while keeping your truck running at its best.