Your license plate light burns out, and suddenly you’re risking a traffic ticket over a $5 bulb. Sound familiar? This guide walks you through exactly how to change license plate light on almost any vehicle — no mechanic needed. Stick around to the end for the LED upgrade tips that’ll save you from doing this again anytime soon.
Why a Dead License Plate Light Is a Bigger Deal Than You Think
A burned-out tag light isn’t just cosmetic. Every U.S. state legally requires your plate to be visible from at least 50 feet at night, illuminated by white light only. Drive without it, and you’re handing a cop a reason to pull you over.
In most states, it’s treated as a correctable violation — also called a “fix-it ticket.” That means you fix the problem, get a cop to sign off on it, and pay a small admin fee instead of a full fine. But if you miss the deadline (often 30 days), that minor ticket snowballs into late fees and possible license suspension.
Bottom line: Fix it now. It takes 15 minutes and costs less than a coffee.
What the Law Actually Says About License Plate Lights
Before you grab any bulb off the shelf, know this: the light must be white. No exceptions.
- Florida explicitly states the plate light must be white, even while other rear lights are red or amber
- Washington State mirrors this rule — white light only for plate illumination
- Pennsylvania adds that it must be bright enough to read the plate from 50 feet
Colored LEDs, tinted lens covers, or flashing lights? All illegal and ticketable. Stick to steady, white light and you’re covered everywhere.
What You’ll Need Before You Start
You don’t need a toolbox full of gear. Here’s what to gather:
- Phillips or Torx screwdriver (check your vehicle — some use both)
- Plastic pry/trim tool (for clip-mounted assemblies)
- Soft mechanics gloves or nitrile disposable gloves
- Small magnetic bowl or cup (for screws — trust the process)
- Replacement bulb (more on sizing below)
- A flashlight or headlamp
Why gloves? Skin oils on a new incandescent bulb create hotspots when it heats up. That shortens the bulb’s life dramatically — sometimes cracking the glass within days.
Finding the Right Replacement Bulb
Getting the wrong bulb is the most common mistake. Here’s how to get it right every time.
Check Your Owner’s Manual First
The lighting section lists every bulb by its standardized alphanumeric code. If you’ve lost the manual, use the Vehicle Year/Make/Model selector at AutoZone or the Sylvania bulb finder tool to cross-reference instantly.
You can also pull the old bulb out first and check the number stamped on its base — it’s printed right there.
Common Bulb Sizes at a Glance
| Bulb Type | Base Style | Best For |
|---|---|---|
| 194 / T10 | Flat wedge | Most sedans and compact cars |
| 168 / 2825 | Flat wedge (higher output) | Full-size trucks and large SUVs |
| Festoon 42mm / 31mm | Dual-ended tube | Older domestic vehicles, cargo lights |
| C5W / W5W | Varies | European imports (BMW, Audi, VW, Mercedes) |
Should You Go LED?
Short answer: yes. LED replacement bulbs last far longer than incandescent options, run cooler, and put out a crisper white light. Brands like Sylvania ZEVO, Lasfit, and Alla Lighting lead the aftermarket space.
One catch: modern cars use CANBUS computer systems that monitor bulb power draw. A standard LED draws so little power that the computer flags it as a dead bulb, triggering a dashboard warning. The fix is easy — buy bulbs specifically labeled “CANBUS Error Free.” They have built-in resistors that mimic incandescent power draw and keep your car’s computer happy.
Cost comparison: DIY bulb replacement runs $2–$35 for parts. Handing it to a shop? Expect to pay $95+ in labor alone, not counting the markup on the bulb itself.
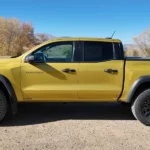
How to Change License Plate Light: Exterior-Access Method
Most trucks, SUVs, and older sedans have the assembly accessible from outside. This is the quick version.
Step 1: Confirm Which Bulb Is Dead
Turn the ignition to “Accessory” mode and switch on the parking lights. Walk to the rear and look. Note which side is out, then turn everything off before you touch anything.
Step 2: Remove the Lens Cover
Look for small screws on the outer edges of the lens — usually Phillips or Torx. Remove them and drop them straight into your magnetic bowl. If there are no visible screws, the housing uses plastic clips. Slide a thin flathead or plastic pry tool into the notch on the side and gently pop it free.
In rust-belt states, those screws may be corroded tight. A drop of penetrating oil and some patience beats snapping the head off.
Step 3: Check the Gasket
As the lens comes off, watch for the rubber weatherproofing gasket. If it’s cracked, flattened, or missing, replace it. A compromised gasket lets in water, which corrodes the socket contacts and kills bulbs fast.
Step 4: Remove the Socket and Pull the Old Bulb
Grip the socket base and rotate it counterclockwise until the tabs align with the release slots, then pull it straight back out of the housing. For wedge bulbs, pull the glass straight out — no wiggling side to side, or the base can shatter inside the socket. For festoon bulbs, push sideways against one spring terminal to release the tube.
Step 5: Install the New Bulb
With clean gloves on, push the new bulb straight into the socket until you feel firm resistance or a small click. That’s your sign it’s fully seated.
LED polarity tip: If the LED doesn’t light up during testing, it’s in backward. Pull it out, flip it 180 degrees, and reinsert. LEDs are polarized — direction matters.
Step 6: Test Before You Reassemble
Don’t button everything up until you confirm it works. Reconnect the battery if you disconnected it, turn the parking lights on, and walk to the rear. Bright white light? You’re good. Dark? Check the fuse box before assuming the bulb is defective.
Step 7: Seal It Up
Lock the socket base back in with a clockwise turn. Seat the gasket carefully into its groove. Place the lens cover back and tighten the screws until snug — not tight. Over-torquing cracks the plastic housing, and that’s an expensive mistake.
How to Change License Plate Light: Interior Trunk Access Method
Modern sedans and EVs like the Tesla Model 3 have zero screws on the outside. The assembly bolts from inside the trunk lid — which means you’re going in.
Step 1: Open the Trunk and Peel Back the Liner
The trunk lid’s inner surface is covered by a fabric or plastic liner held in by push-pin fasteners. Slide a flathead or plastic trim tool under the center pin of each fastener and pry it up. Once the pin releases, the whole fastener pulls out cleanly. Work around the lower edge of the liner near the license plate area, store every fastener in a bowl, and fold the liner back out of the way.
Step 2: Disconnect the Wiring Harness
Locate the plastic electrical connector plugged into the back of the light assembly. Press the locking tab and pull the plug straight back to disconnect it. On EVs like the Tesla Model 3, you may also need to unclip a plastic latch cover first to clear the path.
Step 3: Pop the Assembly Out
These units use spring metal clips instead of screws. Slide the housing horizontally toward one side of the car to compress the clip on that side, then squeeze and push the opposite side inward to release it. The whole assembly drops out from the exterior. Take it to a workbench with good light to swap the bulb.
Step 4: Replace the Bulb and Reassemble in Reverse
Follow the same bulb swap steps from the exterior method. Once the new bulb is in, push the housing back into the trunk lid opening from outside until both clips snap firmly. Reconnect the wiring harness until it clicks locked. Fold the trunk liner back, align the fastener holes, and push the center pins down to lock each one.
One Upgrade Worth Doing While You’re In There
Replace both license plate bulbs at the same time — even if only one burned out. Here’s why:
- Both bulbs are the same age and have the same wear
- The second one will likely fail within weeks of the first
- Mismatched bulbs look bad — one bright white, one dim yellow
- Replacing them as a pair restores even, uniform illumination across the entire plate
It’s an extra $5–$15 and saves you from repeating this whole job next month.
Quick Troubleshooting: When the New Bulb Still Doesn’t Work
| Symptom | Most Likely Cause | Fix |
|---|---|---|
| Light flickers or stays off | Blown fuse | Check the parking light fuse in the fuse box |
| LED doesn’t light up at all | Polarity reversed | Flip the bulb 180 degrees |
| Dashboard shows “Bulb Out” after LED install | CANBUS incompatibility | Replace with CANBUS Error Free LED |
| Light works when you tap the housing | Loose socket connection | Remove housing, inspect contacts, apply dielectric grease |
| New bulb fails quickly | Moisture in housing | Replace the rubber gasket or entire assembly |
The Real Cost of Ignoring This Fix
A dead license plate light seems minor. But ignoring a fix-it ticket past the court deadline turns a correctable warning into a full fine, possible license points, and eventually a suspended license. And if you show up for the officer’s sign-off with other violations visible — illegal tint, missing front plate — you may walk away with additional citations too.
Fix the bulb. It’s a 15-minute job, costs almost nothing, and keeps you out of situations that cost both time and money.