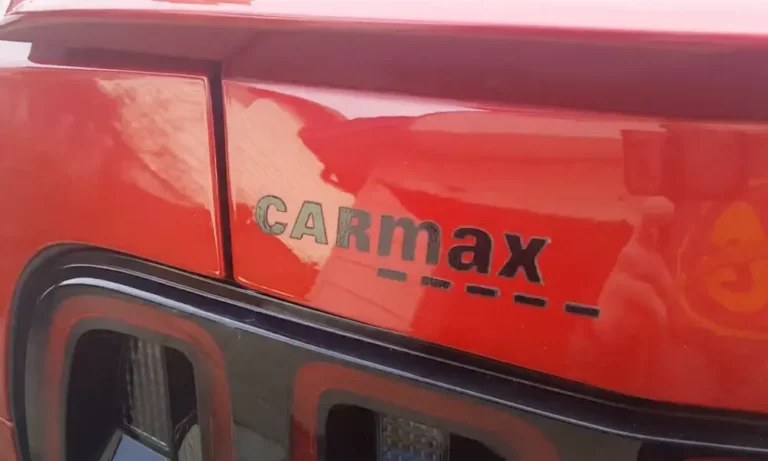
Got a shiny car from CarMax but not thrilled about being their mobile billboard? Those dealership stickers might showcase where you bought your ride, but they don’t need to be a permanent fixture. Whether it’s on your bumper, trunk, or window, removing that CarMax sticker is simpler than you might think—and you can do it without risking your paint job.
Why Remove Your CarMax Sticker?
CarMax stickers serve as free advertising for the dealership, not as decorative elements for your vehicle. Beyond just the aesthetics, there are practical reasons to remove them:
- They clash with your car’s appearance and personal style
- Long-term exposure can cause uneven paint fading around the sticker
- UV rays can create a “ghost outline” even after removal
- A clean, sticker-free car often looks more premium and well-maintained
Essential Tools for Safe Sticker Removal
Before diving in, gather these supplies for a damage-free removal process:
| Heat Sources | Removal Tools | Cleaning Products |
|---|---|---|
| Hair dryer (safer than heat gun) | Plastic scraper or old credit card | Microfiber towels (never paper towels) |
| Extension cord if needed | Rubber spatula (optional) | Adhesive remover (Goo Gone, 3M, or WD-40) |
| White vinegar or 70% isopropyl alcohol | ||
| Car soap and water | ||
| Automotive wax or sealant |
The Heat Method: Most Effective Approach
Using heat is typically the safest and most effective way to remove CarMax stickers without damaging your paint.
Step-by-Step Heat Removal:
-
Wash the area with car soap and water to remove dirt that could scratch your paint during removal.
-
Apply heat evenly using your hair dryer on its highest setting. Hold it 3-4 inches from the sticker for 30-60 seconds, moving constantly to prevent overheating any spot.
-
Test a corner by gently lifting with your fingernail or plastic scraper. If it lifts easily, the adhesive is sufficiently softened.
-
Peel slowly at a 45-degree angle while continuing to apply heat as needed. Work patiently to avoid tearing the sticker into smaller pieces.
-
Tackle any residue with adhesive remover applied to a microfiber cloth, then wipe clean.
The Vinegar Method: Household Solution
White vinegar offers a gentle approach using items you likely already have at home.
Using Vinegar to Remove CarMax Stickers:
-
Soak paper towels in white vinegar until fully saturated.
-
Cover the sticker completely with the vinegar-soaked towels.
-
Wait 5-10 minutes to allow the vinegar to penetrate and soften the adhesive.
-
Lift the sticker using a plastic scraper or credit card, working slowly from one corner.
-
Clean remaining residue with additional vinegar-soaked towels, followed by soap and water.
Commercial Adhesive Removers: Professional Strength
Products specifically designed for adhesive removal can make quick work of stubborn stickers.
Which Products Work Best:
-
Goo Gone is formulated for safe use on car paint when used as directed.
-
3M Adhesive Remover contains non-abrasive solvents that won’t harm automotive finishes.
-
WD-40 works effectively but requires thorough cleaning afterward.
Application Process:
-
Apply the product to a microfiber cloth rather than directly onto the sticker.
-
Dab the sticker and let the product sit for the recommended time (typically 1-3 minutes).
-
Gently rub in a circular motion until the sticker begins to dissolve or lift.
-
Wipe away residue with additional product as needed.
-
Wash thoroughly with car soap and water to remove all traces of the remover.
The Alcohol Technique: Balanced Approach
Isopropyl alcohol provides a middle ground between household remedies and commercial products.
Safe Alcohol Application:
-
Mix a solution of 70% isopropyl alcohol and water in a 1:1 ratio for optimal safety.
-
Saturate a microfiber cloth and press it against the sticker for 5-10 minutes.
-
Lift the sticker with a plastic scraper, working from the edges inward.
-
Remove remaining adhesive with additional alcohol solution.
-
Wash the area with soap and water to neutralize the alcohol.
Ask CarMax to Remove It: The No-Hassle Option
Many CarMax customers don’t realize the dealership will often remove their stickers upon request.
- CarMax will typically remove stickers free of charge
- Can be done during purchase or on a return visit
- Ensures professional removal without risk to your paint
- Saves you time and potential headaches
Paint Protection After Sticker Removal
Proper aftercare is crucial to maintain your car’s appearance after removing a sticker.
After-Removal Care:
-
Thoroughly clean the area with car-safe soap and water.
-
Inspect for damage such as minor scratches or dulled areas.
-
Apply polish if needed to restore the paint’s original luster.
-
Protect with wax or sealant to prevent damage and maintain your car’s shine.
Common Mistakes That Damage Paint
Avoid these pitfalls that can turn simple sticker removal into an expensive repair:
Never Use:
- Metal razors or sharp tools on painted surfaces
- Acetone or paint thinner on automotive paint
- Excessive heat that could warp trim or damage clear coat
- Paper towels that can create fine scratches
Best Practices:
- Always test products on an inconspicuous area first
- Work in the shade to prevent products from drying too quickly
- Take your time—rushing increases the risk of damage
- Use only automotive-safe products specifically designed for paint
Stubborn Sticker Solutions
If you’re facing a particularly difficult sticker, try these advanced techniques:
-
Layered approach: Apply heat first, then use adhesive remover for any remaining residue.
-
Extended soak time: For older stickers, allow adhesive removers to penetrate longer (5-10 minutes).
-
Repeated applications: Some stickers require multiple treatments with heat and adhesive remover.
-
Plastic wrap method: Apply adhesive remover, cover with plastic wrap to prevent evaporation, and let sit for 15-20 minutes.
How to Remove Window Stickers
CarMax sometimes places stickers on windows, which require slightly different removal techniques:
-
Spray with glass cleaner and let it sit for a minute to penetrate.
-
Use a razor blade at a 45-degree angle (safe only on glass, never on paint).
-
Apply heat if the sticker is stubborn, then try the razor again.
-
Clean thoroughly with glass cleaner to remove streaks and residue.
Maintaining Your Car’s Appearance Post-Removal
After successfully removing your CarMax sticker, maintain that fresh, clean look:
-
Regular waxing (every 3-4 months) helps protect the area where the sticker was removed.
-
Paint sealant provides longer-lasting protection than traditional wax.
-
Ceramic coating offers the ultimate protection if you want to invest in long-term care.
-
Routine washing prevents dirt buildup that can damage paint over time.
Removing Stickers from Different Surfaces
CarMax places stickers on various parts of vehicles, each requiring specific approaches:
Painted Surfaces (Bumpers/Trunk):
- Heat method is safest
- Use plastic scrapers only
- Apply adhesive remover sparingly
Glass (Windows):
- Razor blades are safe to use
- Glass cleaner helps with removal
- Less risk of damage overall
Chrome or Metal Trim:
- Heat works well
- Use extra caution with scrapers
- Metal-safe adhesive removers only
Plastic Trim:
- Low heat only (can warp with excessive heat)
- Gentle adhesive removers (test first)
- Extra care with pressure applied
Professional Detailing Options
If you’re uncomfortable removing the sticker yourself or have tried without success, professional help is available:
- Auto detailers have specialized tools for sticker removal
- CarMax service centers will often remove their stickers upon request
- Mobile detailing services can come to your location
- Body shops can handle difficult removals and address any paint issues
Preventing Future Sticker Issues
When purchasing your next vehicle:
- Request sticker removal before taking delivery
- Ask for dealer emblems to be left off during pre-delivery preparation
- Inspect thoroughly during delivery to ensure all stickers are removed
- Get it in writing that any post-purchase sticker removal will be done free of charge
By following these comprehensive steps, you can safely remove that CarMax sticker and restore your car’s clean, professional appearance. With the right tools and techniques, you’ll have your vehicle looking sticker-free in no time—without risking your paint job or finish.