
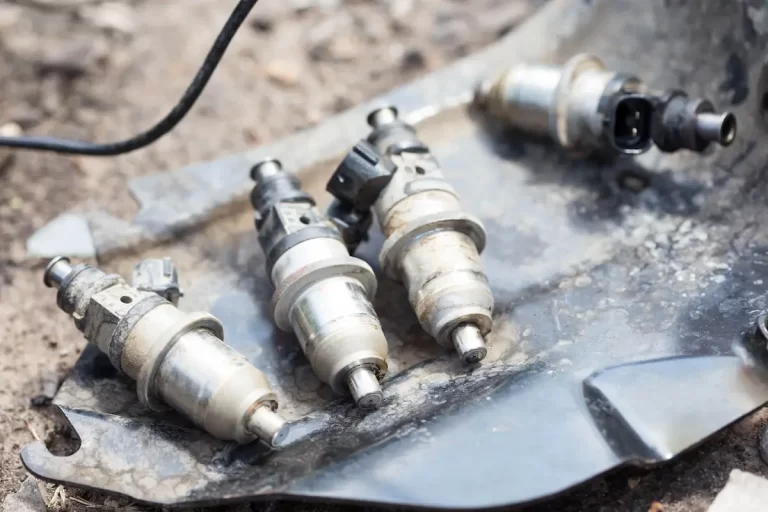
Tackling a 6.4 Powerstroke injector replacement is no small job. Get it wrong and you’re looking at a seized engine, destroyed fuel pump, or a $10,000 repair bill that could’ve been avoided. This guide walks you through everything — diagnosis, removal, torque specs, and bleeding — so you do it right the first time. Read every section before you touch a wrench.
What Makes the 6.4 Powerstroke Fuel System So Unique
The 6.4 Powerstroke ran from 2008 to 2010 in Ford’s heavy-duty F-Series trucks. Unlike older diesel engines that used hydraulically actuated injectors, this engine runs a high-pressure common rail system capable of hitting nearly 25,000 PSI at the fuel rail.
Instead of traditional solenoid injectors, the 6.4 uses piezoelectric actuators. These crystal-based assemblies react to electrical current in microseconds — far faster than any solenoid. That speed lets the engine fire three distinct injection events per combustion cycle:
| Injection Stage | What It Does |
|---|---|
| Pre-Injection (Fill Stage) | Warms the cylinder, reduces knock, cuts NOx emissions |
| Main Injection | Delivers the bulk of fuel for power and torque |
| Post-Injection (End Stage) | Burns off soot or raises exhaust temps for the DPF |
That precision is what makes these injectors brilliant. It’s also what makes them expensive and unforgiving to replace.
Diagnosing Injector Failure Before You Buy Parts
Here’s where most people waste money — they replace injectors without confirming the injectors are actually the problem.
Symptoms That Point to Bad Injectors
Watch for these warning signs:
- Rough idle or severe engine misfires
- Loss of towing power or throttle response
- Engine knocking or ticking
- Excessive exhaust smoke (white, blue-white, or black)
- Fuel smell inside the cab
Run a Cylinder Contribution Test First
Before ordering parts, grab a professional scan tool and run a cylinder contribution test. This measures crankshaft velocity during each cylinder’s power stroke. A weak or dead cylinder shows up immediately. Ford’s diagnostic procedure requires you to run this test both cold and fully heat-soaked after a hard drive.
Use a Physical Block-Off Cap to Confirm
Electronically disabling a suspected injector via scan tool cuts the signal — but it doesn’t cut fuel pressure. If the injector nozzle is physically stuck open, raw fuel keeps entering the cylinder. To confirm a mechanical failure, remove the high-pressure jumper line and cap the fuel rail port with a steel block-off cap. If the knock or smoke disappears, that injector is your culprit.
Read the Exhaust Smoke
Smoke color tells you a lot about what’s actually failing:
| Smoke Color | What It Means | Likely Cause |
|---|---|---|
| White | Unburned fuel or coolant vapor | Carbon-fouled injector tip or cracked EGR cooler |
| Blue-White | Raw fuel bypassing combustion | Mechanically stuck injector nozzle or low compression |
| Black | Rich condition, incomplete burn | Turbo failure, torn intercooler hose, worn nozzle spray pattern |
Don’t Overlook These Two Impostors
The 6.4 has two notorious base engine failures that mimic injector problems perfectly.
Worn rocker arms are the first trap. The diesel particulate filter regeneration cycle washes raw fuel down the cylinder walls, diluting the engine oil. That diluted oil travels to the valvetrain and destroys the rocker arm ball pivots. A failed rocker arm causes misfires and a loud popping that echoes back through the intake — easily mistaken for injector knock.
Cracked pistons are the second trap. High mileage or aggressive tuning can fracture the aluminum piston bowls. A cracked piston causes misfires, white smoke, and crankcase pressure blow-by — identical symptoms to a dumping injector.
Run a compression test through the glow plug ports before condemning any injectors. If compression is below spec, replacing injectors won’t fix anything.
The Metal Contamination Problem Nobody Warns You About
This is the most expensive mistake in a 6.4 Powerstroke injector replacement. The Siemens K16 high-pressure fuel pump relies entirely on diesel fuel for internal lubrication. If water gets past a neglected fuel conditioning module, it rusts the pump internals. Those rust particles grind the plungers apart and send metal shrapnel directly into the fuel rails and injectors.
Before installing anything new, inspect the high-pressure fuel volume regulator screen on the K16 pump. If you find metallic debris, a single injector replacement won’t survive. Ford’s documentation requires replacing the entire high-pressure system — pump, rails, lines, and all eight injectors — as one complete unit.
Safety and Cleanliness: Non-Negotiables
The 6.4’s fuel system operates at pressures that can penetrate skin and cause fatal blood poisoning. Let the engine cool completely. Disconnect both batteries to prevent accidental starter engagement and to protect the injector driver circuits.
Cleanliness is equally critical. A single dust particle introduced into a high-pressure line can permanently jam a new injector. Degrease and blow dry the entire engine valley before cracking any fuel connections. Cap every open port immediately with proper plastic sealing plugs the moment you expose them.
Removing the Injectors: Side-by-Side Breakdown
The 6.4’s engine bay is extremely tight. Injector access is different on each side of the engine.
Passenger Side
You’ll need to remove the air intake assembly, cold-side intercooler pipe, secondary fuel filter housing and its mounting bracket, and the wiring harnesses routing across the valve cover. This side is more straightforward once the air system components are out of the way.
Driver Side
The compound turbo setup makes the driver side considerably more involved. Drain the coolant, remove the upper radiator hose, pull the degas bottle and driver-side battery tray, and remove the glow plug control module and charge air cooler tubes. On some trucks, EGR cooler components need to be loosened to reach the rear cylinders.
Pulling the Injectors Out
Once both sides are clear:
- Remove the high-pressure jumper tubes from the fuel rail to each injector
- Pull the upper and lower valve covers
- Disconnect the electrical connectors — these don’t have standard push-tab releases. Squeeze the connector body gently and pull straight up. Cracked connectors need Bostech replacement pigtails
- Disconnect the low-pressure fuel return hose
- Remove the Torx hold-down bolt and clamp
Seized injectors are common. Thread an old high-pressure connector tube onto the injector top, grip with locking pliers, and use a pry bar or slide hammer to pull straight up. A Tork Teknology puller tool works well on severely stuck units.
Critical check: Confirm the copper sealing washer came out with the injector. If it stays in the bore and you install a new injector on top of it, combustion gas will blow past, overheat the new injector, and destroy it immediately. Use a pick tool to retrieve any stuck washers and clean the seating surface thoroughly.
Installation and Torque Sequencing
This is where precision matters most. Never reuse the old high-pressure jumper tubes. The metal sealing cones deform permanently during initial installation. A reused tube won’t seal properly against a new injector’s geometry — you’ll get a microscopic high-pressure leak that will dilute your engine oil and eventually destroy the engine. New tubes are mandatory. The hold-down bolts are torque-to-yield fasteners and must also be replaced every time.
Follow this exact sequence:
- Lower injectors into bores, start hold-down bolts by hand
- Snug hold-down bolts to 1.5 ft-lbs — just enough to seat the copper washer while the injector can still shift
- Place the fuel rail on its mounting stanchions, leave bolts loose
- Hand-thread new jumper tube nuts on both ends — no wrench yet
- Torque tube nuts to 1.5 ft-lbs, working inside-out (center cylinders first) — this pulls everything into alignment
- Final torque injector hold-down bolts to 28 ft-lbs
- Torque rail mounting bolts to 23 ft-lbs
- Torque tube nuts to 106 inch-pounds ⚠️ — this is inch-pounds, not foot-pounds. Applying foot-pounds here will crush the lines and strip threads
- Mark the hex nut and fitting with a marker, then rotate the nut exactly one flat (60 degrees) further
| Component | Initial Torque | Final Torque |
|---|---|---|
| Injector Hold-Down Bolt | 1.5 ft-lbs | 28 ft-lbs |
| High-Pressure Rail Bolts | Hand-tight | 23 ft-lbs |
| Rail-to-Injector Tube Nuts | 1.5 ft-lbs | 106 in-lbs + 60° rotation |
| Valve Cover Bolts | — | 80 in-lbs |
Bleeding the Fuel System After Injector Replacement
Skipping this step destroys brand new injectors. The K16 pump was exposed to air during the repair. Cranking a dry pump causes metal-on-metal scoring within seconds, sending debris directly into your freshly installed injectors. Trapped air also triggers fault codes P0087 and P0088 and prevents the PCM from firing the injectors at all.
The Banjo Bolt Bleeding Method
The 6.4 is notoriously hard to bleed with key cycles alone. Here’s the method that actually works, as demonstrated here:
- Locate the banjo bolt fitting near the front of the engine on the low-pressure fuel circuit
- Modify a spare banjo bolt by drilling and tapping it to accept a barbed hose fitting
- Attach a length of clear vinyl hose and route it into a catch container
- Turn the ignition to Run (don’t crank) — this activates the electric lift pump
- Watch the hose — you’ll see aerated, bubbly fuel flowing through
- Cycle the key off and back to Run repeatedly to keep the lift pump running
- Keep going until the fuel flows completely clear with zero bubbles
- Remove the modified banjo bolt, install the factory bolt with fresh sealing washers, and torque to spec
Post-Installation Checklist
Once the engine starts and reaches operating temp, do all of this before calling the job done:
- Inspect every fuel connection for leaks while the engine idles
- Check for coolant leaks if you disturbed the cooling system on the driver side
- Change the engine oil and filter immediately — injector failure pushes excess fuel past the rings and into the crankcase. Leaving diluted oil in the engine accelerates bearing and rocker arm wear rapidly
- Use a full-synthetic diesel oil and switch to a 5,000-mile oil change interval going forward
Keeping Your New Injectors Alive: Preventative Maintenance
Protect your investment with these habits:
| Action | Interval | Why It Matters |
|---|---|---|
| Drain the water separator | Monthly | Prevents coagulation from allowing water into the K16 pump |
| Change engine oil | Every 5,000 miles | Counteracts fuel dilution from DPF regen cycles |
| Replace both fuel filters | Every 10,000 miles or sooner | Protects injectors and maintains proper low-pressure supply volume |
Also consider installing upgraded valve covers with integrated oiling passages while the engine is apart. The rocker arm oiling problem is a real threat on high-mileage 6.4s, and the labor overlap during injector replacement makes it the perfect time to address it.
A CCV reroute is also worth doing at the same time — it stops oil vapor from fouling the intake and intercooler, which reduces soot loading in the DPF and extends the time between regeneration cycles.
Frequently Asked Questions
Why do I have to replace the high-pressure fuel lines during an injector replacement?
The jumper tubes use a soft metal cone seal. During initial installation, the torque required to hold back 25,000 PSI permanently deforms that cone. Reuse it on a new injector and the mismatched geometry guarantees a microscopic fuel leak. That leak sprays raw fuel under the valve cover, thins your engine oil, and eventually destroys the engine.
How do I tell a bad injector apart from a worn rocker arm?
Both cause misfires and knocking. Start with a cylinder contribution test to find the problem cylinder. Then physically block off the fuel to that cylinder using a steel cap on the fuel rail port. If the noise stops, the injector is mechanically failing. If the noise continues — especially as a popping sound echoing through the intake — a worn rocker arm is your likely culprit.
What happens if I torque the tube nuts to 106 foot-pounds instead of 106 inch-pounds?
It’s catastrophic. One hundred and six foot-pounds is roughly twelve times higher than the specification. That level of force crushes the jumper tube, strips the threads on the injector body, and can crack the fuel rail connector. Everything gets replaced again at your expense.
My oil level keeps rising on the dipstick. Is a leaking injector doing that?
A leaking injector under the valve cover can contaminate the oil — but the most common culprit on the 6.4 is the DPF regeneration cycle. The computer injects raw fuel during the exhaust stroke to burn DPF soot. That fuel clings to the cylinder walls, slides past the rings, and drains into the oil pan. If your oil level is rising, change the oil immediately and switch to a shorter drain interval.
Do I really need to replace all eight injectors if only one fails?
You’re not required to — but it’s strongly recommended. All eight injectors share the same fuel supply, heat cycles, and operating environment. If one has failed, the rest are likely close behind. Replacing all eight saves you from tearing down the engine bay again in six months. And if the failure was caused by pump debris, installing even one new injector into a contaminated system destroys it instantly.













