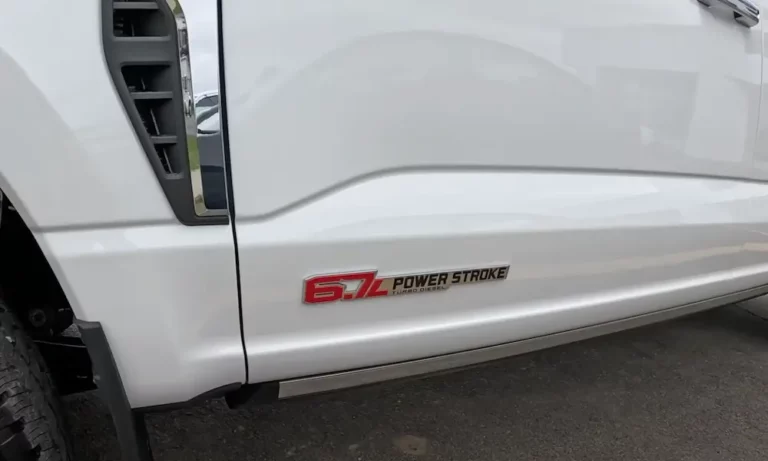
Got a rough-running 6.7 Powerstroke? Black smoke on acceleration? A knocking that wasn’t there last month? Your injectors might be crying for help. This guide walks you through everything — from spotting the warning signs to torquing the final bolt. Stick around to the end, because skipping even one step here can turn a $1,500 repair into a $15,000 nightmare.
What Makes the 6.7 Powerstroke Injection System Different
Before you grab a wrench, you need to understand what you’re working with.
Ford’s 6.7 Powerstroke — nicknamed the “Scorpion” — broke from tradition in a big way. Unlike the older 6.0L and 7.3L engines that buried injectors under the valve covers, the 6.7L places its injectors externally on the outboard sides of the cylinder heads, right above the exhaust manifolds.
That’s good news for your back. No valve cover removal. No draining oil rails. No tearing apart the valvetrain just to reach a single injector.
The system uses Bosch piezo-electric injectors that fire at up to 36,000 PSI on third-generation engines (2020+). They can execute up to five separate injection events per combustion cycle — pilot shots, a main event, and post-injection pulses to manage the DPF and SCR systems. It’s sophisticated hardware, and it demands a precise replacement process.
Signs Your 6.7 Powerstroke Injectors Are Failing
Don’t guess. Know exactly what to look for before you spend a dime.
Here are the symptoms that point directly to a failing fuel injector:
- White or blue smoke on cold start — Raw fuel weeping from a leaking nozzle or failed return seal. It smells like diesel, burns your eyes, and clears up once the engine warms. Don’t ignore it just because it stops.
- Black smoke under load — The injector’s stuck open or dumping too much fuel. This hammers piston temps and risks turbo damage.
- Rough idle or cylinder misfire — One cylinder isn’t pulling its weight. Your PCM will likely log codes like P0269 (cylinder 3) or P0281 (cylinder 7).
- Fuel dilution in the oil — Check your dipstick. If the oil level is mysteriously climbing or smells like diesel, a stuck-open injector is washing fuel past the rings into the crankcase. Shut it down immediately.
- Injector knock — A sharp metallic clatter that rises with RPM signals erratic firing and localized pressure spikes that can crack a piston.
Run These Diagnostic Tests First
Replacing a $400+ injector without confirming the diagnosis is a fast way to waste money. Run these tests in order.
1. Relative Compression Test
A scan tool measures starter motor amperage as it pushes each piston through compression. Low compression from a bent rod or bad rings means a new injector won’t fix anything.
2. Power Balance / Cylinder Contribution Test
This test watches crankshaft acceleration after each cylinder’s power stroke. A weak cylinder shows up immediately and tells you exactly which injector to pull.
3. Low-Pressure Fuel Supply Check
On 2011–2014 models, supply pressure needs to hold above 53 PSI. 2015+ models use an integrated pressure/temperature sensor in the supply tube. A weak lift pump can mimic injector failure perfectly.
4. Injector Return Flow Test
Block the return rails and measure fuel volume during cranking. If a single injector returns more than 3 milliliters in 15 seconds, its internal seals are shot and it needs replacing.
The CP4 Pump Problem You Can’t Ignore
Here’s the part most guides skip — and it’s the most expensive mistake you can make.
The Bosch CP4.2 high-pressure pump used in the 6.7 Powerstroke has one fatal flaw: when its internal cam and lifter wear out, it sends metal shavings — the “glitter bomb” — straight into the fuel rails and injectors. Piezo injectors have clearances measured in microns. Metal debris destroys all eight simultaneously.
Before you replace a single injector, pull the fuel volume control valve (MPROP) off the top of the injection pump and look for metallic debris on the screen.
If you see it, a full system replacement is required:
- All 8 injectors
- Both fuel rails
- All high-pressure lines
- The CP4 pump itself
- Complete fuel tank flush
That repair runs $8,000–$15,000. You can’t shortcut it.
Proactive Protection: Disaster Kits and Pump Conversions
If the pump is still intact, consider protecting it now while everything’s open.
- Disaster Prevention Kit — An aftermarket bypass block that reroutes return fuel through the primary filter rather than back through the pump’s high-pressure circuit. It doesn’t prevent CP4 failure, but it contains the damage when it happens.
- S&S DCR Conversion — Replaces the CP4 entirely with a robust dual-piston pump. Direct bolt-on, no tuning required.
- SPE CP3 Conversion — Mounts a proven Bosch CP3 externally, driven off the crankshaft. Removes all load from the factory timing gears.
Choosing the Right Replacement Injector
Not all 6.7 Powerstroke injectors are the same — and installing the wrong one will cause immediate problems.
The two most common variants are the Blue Stem and Gray Stem injectors. Both use the same piezo-electric technology, but they have different flow rates and calibrations based on model year and emissions tier. A stock injector flows roughly 2,000 mm³ per stroke at full load.
Always match the part number to your VIN. Mixing stems or generations creates fuel trim imbalances that trash your aftertreatment system fast.
| Generation | Rail Pressure | Common Stem | Notes |
|---|---|---|---|
| 2011–2019 | Up to 30,000 PSI | Blue or Gray Stem | Confirm by VIN |
| 2020–2023 | Up to 36,000 PSI | Gen 3 spec | Higher flow rate |
For performance applications, companies like Dynomite Diesel and S&S Diesel Motorsport offer injectors rated 20–300% over factory flow. These require custom PCM tuning — without it, you’ll melt pistons.
How to Remove Seized 6.7 Powerstroke Injectors
Here’s where most DIY jobs go sideways. Carbon buildup commonly seizes injectors in the bore. Never pry against the plastic electrical connector or the return port — you’ll shatter the injector body and lose your core refund.
You’ve got three solid options:
Method 1: Commercial Injector Puller
Tools from ProMAXX, CTA Tools, or Grizzly thread onto the injector’s fuel inlet port and pull straight up along the bore axis. Zero risk of galling the aluminum head. Some kits include a slide hammer for stubborn units and cut extraction time by over 50%.
Method 2: Inverted Hold-Down Clamp
Remove the hold-down bolt, flip the clamp upside down onto the injector body, and tap upward with a brass or dead-blow hammer. The shockwave breaks the carbon bond. No special tools needed — just patience and a steady hand.
Method 3: Modified Fuel Line Lever
Cut an old high-pressure line a few inches above the nut, thread it onto the injector’s inlet port, notch the stub, and use a pry bar levered against the cylinder head. Slow, controlled upward pressure pops it free. Keep your angle perfectly vertical to avoid bending the nozzle tip against the aluminum wall.
Cylinder Head Seat Preparation
Pulling the injector is half the job. The aluminum sealing seat at the bottom of the bore determines whether your new injector lasts or fails within weeks.
First — confirm the old copper washer came out with the injector. Installing a new injector on top of a leftover copper washer guarantees instant blow-by and engine damage.
Second — clean the seat properly. A shop rag on a screwdriver doesn’t cut it. Carbon embeds into the aluminum at temperatures near 1,100°F, creating pits that prevent sealing. Use a precision seat-restoration tool like the ProMAXX Robby, which shaves roughly 0.003 inches of contaminated aluminum and traps the debris in lithium grease so nothing falls into the cylinder.
Third — vacuum out the cylinder. Run a vacuum tube through the nozzle hole before you reinstall anything. Diesel fuel or solvent pooled on top of the piston will cause hydrostatic lock on first crank and destroy the engine.
Installation: Torque Specs and Sequences You Must Follow
The 6.7 Powerstroke injector installation has zero tolerance for guesswork. Here are the exact specs:
| Component | Step 1 | Step 2 | Hardware Note |
|---|---|---|---|
| Injector Hold-Down Bolt | 22 ft-lbs (30 Nm) | + 90° rotation | New bolt required |
| Fuel Line to Injector | 177 in-lbs (20 Nm) | 26 ft-lbs (35 Nm) | New line required |
| Fuel Line to Fuel Rail | 177 in-lbs (20 Nm) | 26 ft-lbs (35 Nm) | New line required |
| Return Line Bolts to Valve Cover | 89 in-lbs (10 Nm) | — | Do not over-torque |
| Fuel Rail Mounting Bolts | 18 ft-lbs (24 Nm) | — | — |
A quick note on critical installation points:
- Lube the O-rings with clean engine oil before inserting the injector
- Hand-press the injector into the bore — never hammer it. Piezo crystals shatter under impact
- The hold-down bolt and all high-pressure fuel lines are single-use parts. The metal flare fittings permanently deform under 30,000 PSI. Reusing them invites fuel leaks and fire risk
- If you’re replacing multiple injectors on the same bank, loosen the fuel rail mounting bolts before installing the new lines so the rail can float into alignment
Watch out for this: The upper intake plenum fasteners torque to 89 inch-pounds — not foot-pounds. Applying 89 foot-pounds will shatter the composite manifold and snap the bolts.
IQA Programming: The Step Most People Skip
Bolting in a new injector doesn’t complete the job. The PCM still thinks it’s talking to the old unit.
Every injector leaves the factory with a 10-digit Injector Quantity Adjustment (IQA) code laser-etched on its body. This code tells the computer exactly how to adjust the electrical pulse width for that specific injector’s flow characteristics.
Here’s the programming sequence using Ford IDS or FORScan:
- Read the IQA code off the new injector before installation — it’s much harder to read once it’s in the engine bay
- Connect your scan tool and navigate to PCM programming
- Enter the 10-digit IQA code and assign it to the correct cylinder number
- Reset Minimum Fuel Mass Adaptations for the affected cylinder to clear the old learned memory
- Stick a label on the oil separator housing noting the cylinder number and new IQA code for future reference
Skip this step and you’ll get rough idle, erratic fuel trims, elevated EGTs, and rapid DPF loading — all of which look exactly like a defective injector. It’s not the part. It’s the calibration.
Two More Things to Handle While You’re In There
Since the injectors are already out, handle these while labor is free.
Injector-to-Valve Cover Seals
Each injector passes through a rubber grommet (part number 6C535) seated in the valve cover. Heat cycles harden these seals over time, and when they fail, oil leaks down the side of the engine block mimicking a valve cover gasket failure. Since all the hardware is already off, replace them now.
CCV Filter Inspection
The crankcase ventilation filter sits on top of the passenger-side valve cover and needs replacement every 67,500 miles. A saturated CCV filter builds crankcase pressure that actively blows out injector seals and valve cover gaskets. You’re already moving the housing to access Bank 1 injectors anyway — a fresh filter is cheap insurance.
Quick Cylinder Reference for the 6.7 Powerstroke
| Bank | Vehicle Side | Cylinders (Front to Rear) |
|---|---|---|
| Bank 1 | Passenger Side | 1, 2, 3, 4 |
| Bank 2 | Driver Side | 5, 6, 7, 8 |
Firing order: 1 – 3 – 7 – 2 – 6 – 5 – 4 – 8 (consistent across all model years and output levels)
The 6.7 Powerstroke injector replacement rewards patience and precision. Clean the seat, use new hardware, torque everything in sequence, and program the IQA codes. Do all of that, and your engine will run the way Ford engineered it to.