Got a Ford Super Duty that’s slipping gears, jerking between shifts, or stuck in limp mode? Your 6R140 valve body might be the problem. This guide covers everything — symptoms, removal, solenoid calibration, programming, and fluid checks. Read to the end before you touch a single bolt.
What Is the 6R140 Valve Body and Why Does It Matter?
The 6R140 TorqShift transmission debuted in 2011, replacing the older 5R110 in Ford’s F-250 through F-550 Super Duty lineup. It handles the 6.2L gas engine and the 6.7L Powerstroke diesel.
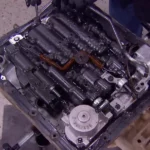
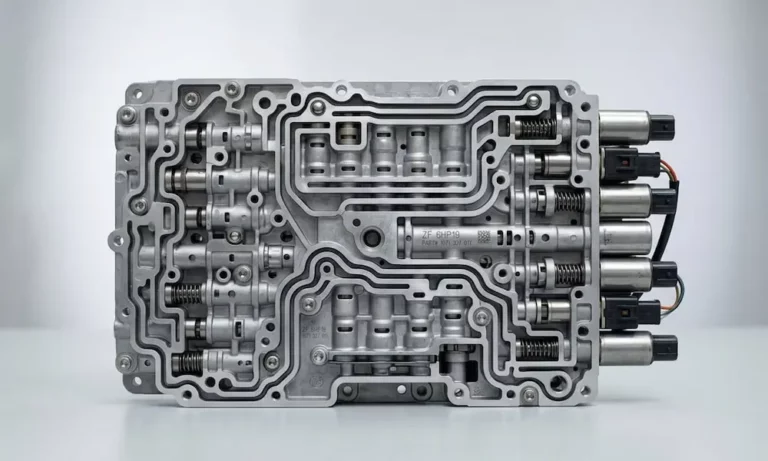
The valve body sits at the bottom of the transmission case. Think of it as the brain stem of the whole system. It routes pressurized fluid to the right clutch packs at exactly the right millisecond. Seven pulse-width modulated solenoids bridge the gap between your truck’s computer and raw hydraulic pressure.
Miss that timing by even a fraction? Clutch packs burn up or the planetary gearset shatters. That’s a $5,000+ rebuild versus a $1,500 valve body swap.
Warning Signs Your 6R140 Valve Body Is Failing
Don’t ignore these symptoms. Catching them early saves serious money.
- Harsh or jerky shifts between any gear
- Hesitation from a stop or stumble when engaging Drive
- Torque converter hunting — locking and unlocking repeatedly on the highway
- Stalling when you first put it in gear
- Limp mode — the truck forces itself into 5th gear only
That last one is the Failure Mode Effect Management (FMEM) system doing its job. It cuts power to certain solenoids, defaulting the transmission to 5th gear and Reverse to protect the internals while you get the truck somewhere safe.
The Most Common Wear Point
The torque converter clutch boost valve wears out faster than anything else. When it goes, you lose apply pressure to the torque converter clutch. The result is slippage, heat, and eventually a destroyed converter — even if the rest of the transmission is fine.
Heavy towing accelerates this. So does running an aftermarket tuner that delays lockup for more off-the-line power. More torque plus delayed lockup equals more heat than the factory valve body was ever designed to handle.
What Actually Destroys a Valve Body
Steel valves oscillating inside aluminum bores wear the bores out over time. The aluminum gets soft. Fluid bleeds past the valve spools instead of going where it’s supposed to.
Contaminated fluid makes it worse — fast. Clutch material, metal shavings, and debris act like sandpaper on those already soft aluminum bores. Valves start sticking. Circuits lose pressure. Shifts go haywire.
Before condemning the valve body, also check:
- Aftermarket tuners — they can delay lockup and generate excess heat
- Secondary cooling loop (diesel trucks) — a failed EGR cooler or secondary water pump chokes transmission cooling entirely
- Transmission pump stator sleeve — internal leaks here create heat before fluid even reaches the cooler
How to Remove the 6R140 Valve Body
This job requires patience and clean hands. Here’s the sequence:
- Drain the transmission fluid completely
- Drop the transmission pan
- Remove the main hydraulic filter — it’s held by three bolts (yellow and orange coded)
- Carefully unplug the seven solenoid connectors — the plastic tabs are brittle from heat cycling
- Remove the color-coded valve body bolts in sequence
The Color-Coded Bolt System
Ford uses color-coded bolts of different lengths. Installing a long bolt in a short-threaded hole cracks the transmission case. There’s no fix for that except dropping the whole transmission.
| Fastener Color | Length | Torque Spec |
|---|---|---|
| Purple | 97 mm | 97 in-lbs (11 Nm) |
| Blue | 68 mm | 97 in-lbs (11 Nm) |
| Green | 63 mm | 97 in-lbs (11 Nm) |
| Yellow | 68.5 mm | 97 in-lbs (11 Nm) |
| Orange | 90 mm | 97 in-lbs (11 Nm) |
| Red | 48 mm | 97 in-lbs (11 Nm) |
When you pull the valve body away from the case, watch for the case passage plugs. They stick to the valve body face because of fluid surface tension. Losing one means a massive internal cross-leak.
Overhaul vs. Replacement: Which Path Is Right?
You’ve got three real options here.
Option 1: Sonnax ZIP Kit overhaul — The 6R140-ZIP kit replaces factory aluminum end plugs with billet aluminum plugs fitted with heat-resistant O-rings. It fixes factory hydraulic flaws without replacing the casting. Cost-effective. Works well if the bores aren’t too worn.
Option 2: OEM or remanufactured valve body swap — Faster than an overhaul. Costs $500–$1,500 for the part. Requires strategy code reprogramming (more on that below).
Option 3: Performance aftermarket valve body — Companies like ATS Diesel build units with billet channel plates and higher line pressure capability. Runs $800–$1,250. The right call for tuned diesels or serious towing rigs.
Bore Prep — Don’t Skip This Step
If you’re overhauling with a ZIP kit, you must prep the bores first. There are three spots per bore where an O-ring gets sheared during install:
- A sharp ridge right at the bore entry
- The top inboard edge where the retainer clip sits
- The bottom inboard edge
Use a 3/8-inch abrasive flap wheel on a die grinder to break those edges. Don’t alter the bore diameter — just knock off the sharpness. If you skip this, the O-ring slices on insertion. The circuit leaks. The truck goes straight back into limp mode.
2011–2016 vs. 2017+ Thermal Management
These two generations use different thermal bypass circuits. Mix them up and you destroy the cooling circuit.
- 2011–2016: Uses a dedicated thermal bypass valve assembly. Requires a Sonnax sleeve to restore the converter limit circuit.
- 2017+: Thermal bypass valve is gone. Replaced by a simplified blocker valve setup. The factory blocker valve gets replaced with an upgraded drop-in unit secured by a flat steel retainer.
Identify your generation before you order parts.
Solenoid Calibration: The Most Critical Step
This is where most DIY repairs go wrong.
The seven solenoids aren’t interchangeable. Each one gets flow-tested at the factory and assigned a band number from 1 to 5. The replacement solenoid must match the band number of the one it’s replacing.
They also come in two types — and mixing them up causes immediate mechanical damage:
| Solenoid | Circuit | Type | Snout Color | O-Ring Colors |
|---|---|---|---|---|
| Solenoid A | Forward (1-2-3-4) Clutch | Normally Low | Brown | Green & Red |
| Solenoid B | Direct (3-5-R) Clutch | Normally High | Black | Orange & Red |
| Solenoid C | Intermediate (2-6) Clutch | Normally Low | Brown | Green & Red |
| Solenoid D | Low/Reverse (1-R) Clutch | Normally Low | Brown | Green & Red |
| Solenoid E | Overdrive (4-5-6) Clutch | Normally High | Black | Orange & Red |
| TCC Solenoid | Torque Converter Clutch | Normally Low | Brown | Green & Red |
| LPC Solenoid | Main Line Pressure Control | Normally High | Black | Orange & Red |
Swap a Normally High solenoid into a Normally Low bore and the truck applies opposing clutch packs the second the engine starts. That’s a broken planetary gearset — instantly.
Programming the Strategy Code After 6R140 Valve Body Replacement
This step is non-negotiable. Skip it and you’ll destroy the new valve body before you pull out of the driveway.
When you install a new valve body, the solenoid body tag on the transmission case has a 13-digit strategy code and a 12-digit ID code. The new valve body ships with updated codes on the casting or a data card.
You need to program those new codes into the PCM or TCM using:
- Ford IDS (dealer-level diagnostic system), or
- Forscan with a proper OBD adapter
Standard OBD2 readers can’t access these calibration files. Period. Without correct programming, the computer uses old pressure tables to control new solenoids. The result is severe shift flares, harsh engagements, or a complete no-movement condition.
After programming, reset the Transmission Control Module’s Keep Alive Memory (KAM) and wipe the adaptive shift tables completely.
The Adaptive Relearn Drive Cycle
Clean memory means nothing without teaching the computer how the new valve body actually behaves. Here’s the exact sequence:
Stationary engagement sequence (fluid temp must be 180–200°F):
With the engine running and brakes applied, move the selector through: N → R → N → D → R → D → N. Hold four seconds in each position. Repeat this three times.
Dynamic relearn — moderate acceleration (repeat 3 times):
Accelerate smoothly to 65 mph with upshifts occurring at:
- Gas engine: ~2,000 RPM
- Diesel: ~1,500 RPM
Then brake moderately to a stop.
Dynamic relearn — firm acceleration (repeat 3 times):
Accelerate firmly to 65 mph with upshifts at:
- Gas engine: ~3,000 RPM
- Diesel: ~2,250 RPM
That’s it. The computer now has solid baseline pressure values to work from.
Checking Fluid Level After 6R140 Valve Body Replacement
Most 6R140 transmissions have no dipstick. The only way to check level is from underneath, using the standpipe method.
Only use Ford Motorcraft Mercon LV — nothing else. Overfilling aerates the fluid because the planetary gears slap the excess fluid sitting in the sump. Aerated fluid can’t build pressure. Clutches slip. Transmission dies.
Here’s the correct procedure:
- Drive the truck approximately 19 miles to reach operating temperature
- Target fluid temp: 195–215°F — watch it on the scan tool or gauge cluster
- Park on a perfectly level surface with the parking brake set
- Engine running, foot on brake — cycle through all gear ranges
- Return to Park, engine still running
- Remove the standpipe plug on the passenger side of the case (near the exhaust — be careful)
- Fluid should slowly trickle out — not gush, not nothing
If it gushes, it’s overfilled. Let it drain. If nothing comes out, add Mercon LV in 8-oz increments until it trickles.
How Much Does 6R140 Valve Body Replacement Actually Cost?
| Repair Path | Part Cost | Labor | Reliability Outlook |
|---|---|---|---|
| OEM Valve Body Replacement | $500–$1,500 | Moderate | Excellent if no clutch/pump damage occurred |
| Performance Aftermarket Valve Body | $800–$1,250 | Moderate | Superior for towing — needs PCM reprogram |
| Local Shop Full Rebuild | $3,500–$5,500 | ~12 hours R&R + rebuild | Variable — depends on builder quality |
| Fully Remanufactured Transmission | $5,500–$6,000 | ~12 hours R&R | Exceptional — usually includes national warranty |
| Heavy-Duty Billet Transmission | $6,500–$8,500+ | ~12 hours R&R | Maximum durability for tuned diesel builds |
For extreme-duty builds, BD Power offers tiered packages — RoadMaster (500 hp), TowMaster (600 hp with interlocking pressure plates), and TorqueMaster (700 hp with a billet intermediate shaft and 4-disc torque converter). Those top-tier units push well past $7,500 before installation.
PTO Units: A Failure Mode You Need to Know About
If your Super Duty runs a Power Take-Off unit, there’s one specific failure that doesn’t affect standard trucks at all.
The internal bushing where the PTO gear rides can walk out of position under heavy continuous load. When it migrates, it blocks the hydraulic feed hole to the torque converter. The TCC can’t engage. Continuous fluid shear generates extreme heat. The transmission cooks itself from the inside out.
If you have a PTO unit and you’re seeing thermal failures with no obvious cause, inspect that bushing before touching the valve body.
Frequently Asked Questions
Can you program the 13-digit strategy code with a standard aftermarket OBD2 reader?
No. Entry-level and mid-tier OBD2 readers don’t have the software permissions to write to the PCM or TCM calibration files. You need Ford IDS or Forscan on a laptop with a proper OBD adapter. Driving without correct strategy programming causes erratic, destructive shifting and voids any warranty on the new parts immediately.
Do you need to replace the internal lead frame wiring harness during a valve body replacement?
It’s not always required by the service manual, but experienced rebuilders treat it as essential. The harness holds the turbine speed sensor, output speed sensor, transmission range sensor, and fluid temp sensor. Years of heat and chemical exposure make the plastic connectors brittle. Disturbing them during removal causes microfractures that trigger intermittent sensor failures and limp mode shortly after the repair. Replacing it while the pan is already down avoids a duplicate labor bill later.
What are the real benefits of an aftermarket deep transmission pan?
Two things: more fluid capacity and active cooling. Deep pans typically add three to four quarts of Mercon LV, which takes longer to heat up during long tows. Most aftermarket deep pans are cast aluminum with external cooling fins that shed heat into the air stream under the truck — something the thin stamped-steel factory pan can’t do.
How does limp mode physically work in the 6R140?
When the computer triggers FMEM, it cuts power to the solenoids. The Normally Low solenoids close (they need power to flow fluid), cutting pressure to the Forward, Intermediate, and Low/Reverse clutches. The Normally High solenoids default open (they flow fluid without power), sending pressure to the Direct and Overdrive clutches. That combination mechanically locks the transmission into 5th gear forward and Reverse — no matter what the selector says.
How often should you change the Mercon LV fluid and filter?
Every 30,000 to 60,000 miles if you tow regularly, operate in heat, or idle a lot. The factory schedule suggests longer intervals under “normal” driving conditions — but normal for a Super Duty is still pretty demanding. Fresh fluid restores friction modifiers for smooth engagement and flushes out abrasive clutch material that wears your valve body bores. Waiting for 100,000 miles to service it dramatically increases your chances of ending up right back at a 6R140 valve body replacement.