You’re cruising down the highway when—beep beep beep—your dashboard lights up like a Christmas tree. “Adaptive Light Defective” flashes across your screen, and your headlights suddenly point at the ground. Before you panic about a four-figure dealer bill, let’s dig into what’s actually broken, what it’ll cost, and whether you can fix it yourself.
What Is the Audi Adaptive Light System Anyway?
Think of your Audi’s adaptive front-lighting system as headlights that actually think. Instead of staring straight ahead like a zombie, they swivel to follow the road as you turn. The system reads your steering angle, checks your speed, and adjusts the beam pattern in real-time.
Here’s the clever part: below about 10-15 mph, the system activates static cornering lights—those are just extra halogen bulbs angled to the side. Above that speed, the main Xenon projector actually pivots up to 15 degrees (inside wheel) or 7.5 degrees (outside wheel) to light up the apex of the corner.
The system also handles automatic leveling. When you load cargo in the trunk or brake hard, sensors on the suspension detect the pitch change and adjust the beam angle. It’s legally required for Xenon lights because blinding oncoming drivers isn’t just annoying—it’s dangerous.
Why Your Adaptive Lights Failed (The Real Culprits)
The Biodegradable Wire Disaster
If you’ve got a 2005-2010 A4 (B6/B7), A6 (C6), or Q7, buckle up. Your headlights contain what I call “eco-friendly self-destruct wiring.” To meet European recycling mandates, Valeo and other suppliers used wire insulation with biodegradable plasticizers.
Noble idea, terrible execution.
Inside your sealed headlight housing, the Xenon bulb generates serious heat. Over years of cooking, that insulation turns brittle and literally crumbles into dust. The dynamic swiveling motion flexes these wires thousands of times, and eventually, bare copper touches bare copper. Short circuit. Error code 02629 appears, your car thinks the position sensor is drunk, and the whole system shuts down.
This isn’t a sensor failure—it’s a wiring failure wearing a sensor’s name tag.
Water Turned Your Electronics Into Soup
The B8 A4 (2009-2012), A5, and Q5 introduced sleeker headlight designs with a fatal flaw: terrible sealing. Ventilation tubes get clogged, condensation builds up, and gravity does its thing.
Where does the water go? Straight into the ballast and AFS power output stage sitting at the bottom of the housing. These modules (J667 for left, J668 for right) control the stepper motors. Water + electrical contacts = corrosion and death. You’ll see error codes 02233 or 02234 (no communication with headlight module), often with non-functioning turn signals thrown in for fun.
The Rusty Ball Joint That Costs You $1,500
Every Audi generation shares this weakness: suspension level sensors mounted in your wheel wells. These sensors (G78 front, G289 rear) have a little arm connected to the control arm via a ball joint.
Road salt + moisture + time = one seized ball joint.
When the suspension moves and the joint won’t, the plastic arm snaps. The sensor arm flops to a random position, the computer sees impossible data (your car can’t be doing a wheelie while parked), and it kills the system with error code 00496.
The $5 Bulb That Triggers a $2,000 Scare
Here’s the thing that’ll make you laugh or cry: a burnt-out cornering light bulb—literally a $5 H7 or H11 halogen—can trigger the full “Adaptive Light Defective” warning on some software versions. The system monitors current draw, detects zero amps flowing to the cornering bulb, and freaks out.
Check your cornering bulbs before you do anything else. It’s the cheapest possible fix.
Diagnostic Codes: What Your Car Is Actually Saying
| Error Code | What It Means | The Real Problem |
|---|---|---|
| 02629/02628 | Swivel position sensor fault (left/right) | 95% chance it’s crumbled wire insulation shorting out, not a bad sensor |
| 02627/02626 | Swivel motor fault | Motor might be fine—check for shorted wiring first |
| 02233/02234 | Can’t talk to power output stage | Water damage killed J667/J668, or the fuse blew |
| 00496/00497 | Front/rear level sensor problem | Snapped plastic arm or corroded connector in wheel well |
| 01539 | Headlights not adjusted | You replaced something but skipped the calibration ritual |
| 02747 | Bi-Xenon shutter solenoid | Wiring break or failed solenoid for high-beam function |
You need a VAG-specific scanner (VCDS or OBDeleven) to pull these codes from Address 55 (Xenon Range Control). Generic OBD2 scanners won’t cut it.
DIY Repair: The Wiring Surgery
If you’ve got codes pointing to internal wiring and you’re mechanically inclined, you can attempt the headlight rebuild. Fair warning: it’s tedious, but it beats a $1,200 replacement.
Step 1: Get That Headlight Out
A4 B8/A5: You don’t need to fully remove the bumper, but you’ll need to loosen it significantly. Remove wheel well liner screws, bumper-to-fender bolts, and pull the bumper forward a few inches to access the lower headlight mounting bolts. Budget 1-2 hours.
A6 C6: The bumper’s coming off. Full removal requires dropping the radiator cover, wheel well fasteners, and underbody tray. It’s a 2-hour job minimum.
Step 2: Opening the Headlight
Older models (pre-2009) use butyl sealant. Preheat your oven to 215°F, stick the headlight on cardboard, bake for 15-20 minutes, and gently pry the lens off while the sealant is soft.
Newer models use Permaseal, which doesn’t soften. You’ll either need a Dremel to cut the seal or work through the rear access ports (challenging but possible).
Step 3: Fix the Wiring
Once inside, you’ll see the bundle of black wires running to the swivel motor. Look for:
- Exposed copper wire
- Cracked, flaking insulation
- Wires pulled too tight when the projector swivels
Quick fix: Paint liquid electrical tape over minor cracks. It’ll hold for a while but isn’t permanent.
Better fix: De-pin the connector using a terminal removal tool, slide high-temperature silicone heat shrink tubing over the damaged section, and shrink it. This restores flexibility and insulation.
Best fix: Replace the entire wire with new repair wire and terminals (part number 000 979 009 E). Requires soldering but lasts forever.
Replacing External Components
Level Sensors: The $50 Fix That Saves $1,500
Swapping a wheel well sensor is mechanically simple. The sensor mounts to the chassis with two 10mm bolts and connects to the control arm with another 10mm nut.
Critical step: The sensor arm has an elbow that must point in the correct direction (usually toward the wheel). Install it backward, and the voltage signal inverts—your headlights will aim down when they should aim up. Check your service manual for orientation.
Inspect the connector for green corrosion. If it’s crusty, replace the connector housing (1J0 973 703) and terminals (000 979 025 E). A corroded pin will cause intermittent faults that’ll drive you insane.
Power Output Stage: The Water Victim
If J667 or J668 drowned, replacement involves:
- Unbolt the module from the headlight housing (usually 3 screws)
- Install the new module (Valeo 7L6 941 329 B or equivalent)
- Do NOT skip coding: The new module is blank. Access Address 55 in VCDS, select “Coding – 07,” re-enter the existing code string, and click “Do It!” This pushes configuration data to the slave module.
Skip coding, and you’ll get error 02656 (module not coded).
The Calibration Ritual You Can’t Skip
Replace any sensor or module, and the system loses its “zero point.” You must run Basic Settings, or the warning light stays on.
Requirements
- Perfectly level surface (use a carpenter’s level to verify)
- Empty car (driver only) or proper weight compensation
- Full fuel tank (or add weight to simulate it)
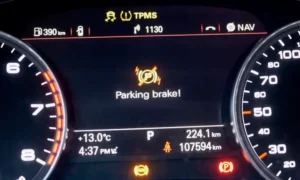
- Parking brake OFF
- Headlights ON
The VCDS Procedure
- Connect VCDS → Address 55 → Basic Settings – 04
- Enter Group 001 → Click Go!
- Motors will move to adjustment position
- When it says “Adjust Headlights,” manually turn the hex screws on the headlight housing to aim the beam correctly (use wall marks or aiming tool)
- Enter Group 002 → Click Go!
- The screen will say “Reg. Position Learned”
- This saves current sensor voltages as the new zero reference
- Click Done → Clear codes
Error 01539 will now clear. If Group 001 says “Not Available,” your sensor voltage is out of acceptable range (common on lowered cars). You’ll need to adjust the sensor mounting bracket to bring voltage into the 2.0V-3.0V sweet spot.
Cost Breakdown: What You’re Actually Looking At
| Part/Service | Dealer OEM | Aftermarket/OES | Used | DIY Labor |
|---|---|---|---|---|
| Complete Bi-Xenon headlight | $1,200-$1,600 | $600-$800 (Valeo) | $250-$400 | 2-3 hours |
| Level sensor (G78) | $250-$320 | $90-$150 | $30-$60 (risky) | 1 hour |
| Power output stage (J667) | $500-$700 | $150-$250 | $50-$100 | 0.5-1 hour |
| Cornering bulb (H7/H11) | $30 | $15 | $5 | 15 minutes |
| Internal wiring repair | N/A | Wire/tools: $20-40 | N/A | 4-6 hours |
The smart money goes to OES (Original Equipment Supplier) parts. A Valeo-branded headlight is physically identical to the Audi version (often made in the same factory) but costs 50% less. Skip Chinese aftermarket junk—their stepper motors don’t communicate properly with Audi modules.
The “Delete” Option: When to Walk Away
Some owners code out the AFS system entirely. It requires recoding the Central Electronics (Address 09) and Gateway (Address 19) to change headlight type to “Xenon without AFS.”
The error light disappears, and lights work as static Xenons. But here’s the catch: you usually lose auto-leveling too. That’s illegal in most European countries (UK MOT, German TÜV won’t pass you) and technically illegal in the US, though enforcement is rare.
More importantly, you lose safety. Static Xenons aimed for empty car ride height will blind oncoming traffic when you load the trunk. Not cool.
What Actually Works: The Smart Approach
Start cheap and work up:
- Check cornering bulbs ($5, 15 minutes)
- Scan for codes (borrow a VCDS or pay a shop $50)
- Inspect level sensor arms (free—just look in the wheel well)
- Clean/replace corroded connectors ($10-30)
- Replace failed sensors ($50-150)
- Attempt wiring repair ($20-40 plus your weekend)
- Replace modules/headlights (last resort)
The biodegradable wiring issue on B7/C6 cars is well-documented. If you’ve got one of these and error 02629, assume wiring failure until you physically verify otherwise. Don’t throw parts at it.
The Bottom Line
The “Adaptive Light Defective” warning isn’t a death sentence—it’s a puzzle. The system relies on multiple sensors, modules, and wiring that all have to agree on reality. When one piece gives bad data, the whole thing shuts down to prevent blinding other drivers.
Most failures trace back to three things: crumbled wiring insulation (older cars), water damage (B8 generation), or snapped sensor arms (all generations). A methodical diagnosis with a proper scanner will tell you exactly what failed.
Don’t let a dealer scare you into replacing everything. A burnt $5 bulb and a $50 sensor cause the same scary warning. Figure out what’s actually broken, fix that specific thing, run the calibration, and get back to enjoying lights that actually follow the road.
Your wallet will thank you.