Heard a humming noise that gets louder the faster you drive? Your F-150 might be telling you something important. A failing wheel bearing isn’t just annoying — it can seriously damage your brakes, steering, and drivetrain if you ignore it. This guide covers everything you need to know about Ford F-150 wheel bearing replacement, from spotting the symptoms to torquing the final bolt. Stick around — the details really do matter here.
How to Know Your Wheel Bearing Is Failing
The most obvious sign is a humming, roaring, or rhythmic thumping sound that rises with vehicle speed but has nothing to do with engine RPM.
Here’s a quick diagnostic trick mechanics use: swerve gently on an empty road.
- Swerve left and the noise gets louder? Your right bearing is failing.
- Swerve right and the noise gets louder? Your left bearing is the problem.
Load shifts to the opposite side during a swerve, which loads the bad bearing more and amplifies the sound.
Other symptoms to watch for:
- Steering wheel vibration — classic front bearing failure
- Floor/seat vibration — often points to rear axle bearings
- ABS or traction control warning lights — the speed sensor lives inside the hub assembly. As the bearing wears and wobbles, it throws off the sensor signal and can disable your ABS and traction control systems entirely
Don’t confuse wheel bearing noise with cupped tires or differential wear — both can mimic the same hum.
2WD vs. 4WD: Why It Changes Everything
This is where most DIYers get into trouble. Ford F-150 front suspension is completely different between two-wheel-drive and four-wheel-drive models — and the parts are not interchangeable.
On 2WD models, the front wheels don’t receive power. Older generations integrate the bearing directly into the brake rotor or onto a fixed spindle. The bearing races press into the rotor hub, and the whole assembly mounts to the spindle via a large retaining nut.
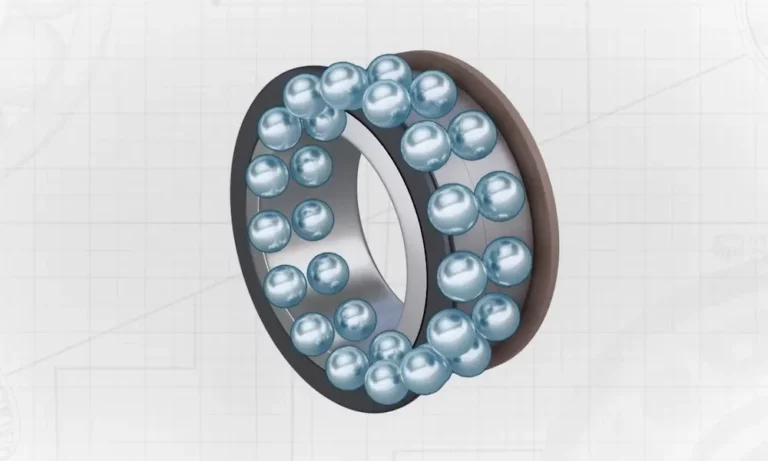
On 4WD models, you get a sealed, unitized hub assembly that bolts to the steering knuckle. A hollow splined center accepts the CV axle shaft. The bearing is a double-row angular contact unit — sealed for life, non-serviceable, and when it’s done, you replace the whole hub.
Installing a 4WD hub on a 2WD truck will cause immediate mechanical failure. The 4WD hub needs the CV axle running through its center to hold itself together. Without it, the hub falls apart while the truck is moving.
Understanding the Integrated Wheel End (IWE) System
If your F-150 is a 4WD model from 2004 onward, you need to understand the Integrated Wheel End system before touching the hub.
The IWE is a vacuum-actuated clutch that sits between the CV axle and the wheel hub. Here’s how it works:
- Default position (spring-loaded): Engaged — front axle connects to hub, ready for 4WD
- 2WD mode: Engine vacuum pulls the internal gear back, disconnecting the axle from the hub so the front wheels spin freely
When the vacuum system fails — and it does fail, often due to cracked vinyl vacuum lines — the gear only partially engages while the axle is spinning. The result is a loud grinding or ratcheting noise that sounds exactly like a destroyed wheel bearing.
Before you condemn a hub, test the vacuum system with a hand pump. Apply vacuum directly to the actuator fitting:
- Actuator won’t hold vacuum? The internal diaphragm is torn — replace the actuator
- Actuator holds vacuum fine? Trace the lines back to the engine bay, check the check valves, and pull any 4WD-related trouble codes (P1832, P1876)
Many mechanics skip this step and replace expensive hubs for nothing. Upgrading to high-temperature silicone vacuum lines instead of the factory vinyl tubing prevents this headache from coming back.
Front Wheel Bearing Replacement by Generation
1997–2003 F-150 (10th Generation)
These trucks use a bolt-on unitized hub assembly on 4WD models. The process is straightforward — but corrosion makes it brutal in practice.
Key steps:
- Lift the truck safely on jack stands, remove wheel
- Pull the brake caliper (two 18mm bolts) — hang it from the control arm, never from the brake hose
- Slide the rotor off
- Straighten and remove the cotter pin, then crack the 35mm axle nut loose using a breaker bar — wedge a pry bar between the wheel studs to stop the hub from spinning
- Remove the three 15mm hub-to-knuckle bolts from the rear — expect heavy rust; use penetrating oil or a heat gun
- Break the rust bond between hub and knuckle with firm hammer strikes through a protective cloth
Before installing the new hub:
- Wire brush the knuckle bore and CV axle splines
- Apply anti-seize to the knuckle bore
- Apply spline grease to the CV axle
Torque specs (1997–2003):
| Fastener | Torque Spec |
|---|---|
| Axle nut (35mm) | 188–254 ft-lbs |
| Hub-to-knuckle bolts (15mm) | 110–148 ft-lbs |
| Caliper bracket bolts | 136 ft-lbs |
| Lug nuts | 100–112 ft-lbs |
Always install a new cotter pin through the axle shaft hole. Never reuse the old one.
2004–2008 F-150 (11th Generation) — 2WD Models
These trucks integrate the wheel bearing directly into the brake rotor hub casting. Replacing the bearing means replacing the whole rotor assembly.
The critical detail here is the spindle nut torque procedure — get this wrong and you’ll destroy the new bearing fast.
Exact procedure:
- Torque the new spindle nut to 295 ft-lbs
- Rotate the rotor assembly counterclockwise five full turns — this seats the tapered roller bearings properly
- Retorque the nut to verify it still reads 295 ft-lbs
Use a brand-new spindle nut every time. These nuts are single-use — they deform on first installation to lock in place. Reusing the old nut means the rotor assembly can vibrate loose.
2009–2020 F-150 (12th and 13th Generation)
These generations use aluminum steering knuckles and revised IWE setups. The process changes in two important ways.
First: The anti-lock braking system speed sensor wiring runs along the knuckle and lower control arm. Unclip every bracket carefully before you start pulling on the hub — tearing the harness means an expensive ABS sensor replacement on top of your bearing job.
Second: The center axle nut on these trucks does not preload the bearing. It only holds the CV axle from sliding backward. The torque spec drops dramatically to just 30 ft-lbs. Over-torquing it can stretch the CV axle threads or bind the outer joint.
Critical IWE step during reassembly: Connect a hand vacuum pump to the actuator fitting and apply steady vacuum before sliding the hub onto the axle splines. This retracts the internal gear so it doesn’t get crushed between the hub and the axle during installation. Release the vacuum once the hub bolts are fully torqued.
Torque specs (2015–2020):
| Fastener | Torque Spec |
|---|---|
| Center axle nut | 30 ft-lbs |
| Hub-to-knuckle bolts (21mm) | 129 ft-lbs |
| Caliper bracket bolts | 184 ft-lbs |
| Lug nuts | 150 ft-lbs |
Rear Wheel Bearing Replacement on the F-150
The rear bearing job is messier and more involved than the front. Ford’s 8.8-inch and 9.75-inch rear axles use a C-clip retention system, which means you’re opening the differential to get the axle shaft out.
Step-by-Step Rear Axle Bearing Removal
- Remove the wheel and brake assembly
- Drain the differential by pulling the cover — catch about three quarts of gear oil
- Put the transmission in neutral, rotate the driveshaft until the cross pin lock bolt is accessible, and remove it
- Push the cross pin out of the carrier
- Push the axle shaft inward toward the center of the truck — this exposes the C-clip inside the differential
- Pull the C-clip out with a magnetic pickup tool
- Slide the axle shaft straight out, supporting its weight so the splined end doesn’t score the axle tube
To pull the bearing and seal from the axle tube, you need a dedicated rear axle bearing puller with a slide hammer — the OEMTOOLS 57129 set handles adapter sizes from 1-1/4 to 1-3/4 inches and pulls the bearing and seal in one shot.
The Grooved Axle Problem
High-mileage F-150s often have a groove worn into the axle shaft where the bearing rides. If you install a standard bearing over that groove, it fails fast and leaks gear oil onto your brakes immediately.
The fix: use an axle repair bearing. This combined bearing-and-seal unit positions the rollers slightly outboard, landing on fresh, unmarked shaft surface. It saves you from buying a new rear axle shaft — which costs significantly more.
Reassembly Notes
- Drive the new bearing and seal in with an aluminum bearing race driver — even hammer strikes prevent cocking
- Feed the axle back in, reinstall the C-clip, pull the shaft outward to seat the clip firmly
- Apply thread-locking compound to the new cross pin lock bolt
- Clean the diff cover surface completely, apply a fresh bead of RTV gasket maker, and bolt it back in a star pattern
- Refill with 75W-140 synthetic gear oil
- If your truck has a limited-slip differential, add the required friction modifier — skipping it causes violent shuddering in tight turns
What Does Ford F-150 Wheel Bearing Replacement Cost?
Here’s the reality of what you’re looking at, whether you DIY or head to a shop.
| Repair Scenario | Parts Cost | Labor Cost | Total Estimate |
|---|---|---|---|
| Front hub, professional (modern gen) | $439–$497 | $149–$219 | $589–$717 |
| Front bearing, 1997–2003 DIY | ~$17–$50 | $0 | $17–$50 |
| Rear axle bearing, professional | Varies by shop | Varies | See current estimates |
The “rust tax” is real — shops in salt belt states will bill extra hours for seized bolts and fused splines. If you’re DIYing, the tooling investment (torque wrench rated to 300+ ft-lbs, slide hammer, vacuum pump) can match or exceed the labor cost if you’re buying from scratch.
Tools You Absolutely Need
Don’t attempt this job without the right equipment. Improvising with undersized tools leads to rounded fasteners and broken components.
| Tool | Why You Need It |
|---|---|
| Heavy-duty floor jack + 3-ton stands | Safe support for a heavy steel ladder frame |
| Socket set (8mm–35mm) | Covers everything from diff lock bolts to axle nuts |
| Dual-range torque wrenches | Low range (30 ft-lbs) for modern axle nuts; high range (300+ ft-lbs) for spindle nuts |
| Pry bar + breaker bar | Breaking factory torque and preventing hub spin |
| Slide hammer + bearing pullers (1-1/4″–1-3/4″) | Rear axle bearing extraction |
| Manual vacuum pump | Retracting IWE gear on 2009–2020 4WD models |
Frequently Asked Questions
Does replacing the wheel bearing on a Ford F-150 require a wheel alignment afterward?
Usually no — a standard hub or axle bearing swap doesn’t change your suspension geometry. But if you disconnected tie rod ends, adjusted control arm pivot points, or used heavy percussive force that could have shifted the knuckle, get an alignment check to prevent uneven tire wear.
Do aftermarket wheels with aggressive offsets wear out wheel bearings faster?
Yes, significantly. Negative offsets push the wheel centerline further outward, dramatically increasing the leverage and radial load on the bearing. Bearings that last 100,000 miles on factory wheels can start failing under 40,000 miles with heavy off-road tires and offset wheels.
Can a bad wheel bearing trigger ABS or traction control warning lights?
Absolutely. The ABS speed sensor tone ring is built into the wheel hub. As the bearing develops lateral play, the tone ring wobbles relative to the sensor, sending erratic speed signals. The vehicle computer disables ABS and traction control entirely and lights up the dashboard.
Do you need a break-in period after installing a new wheel hub assembly?
Modern sealed hubs come pre-greased and need no formal break-in. That said, it’s smart to avoid heavy towing, maximum payload, or aggressive mountain driving for the first 100 miles — let the internal lubricant coat the raceways evenly under normal heat before you push it hard.
Should you always replace wheel bearings in pairs?
You don’t have to, but you really should. Both sides on the same axle have lived through identical mileage and conditions. If one failed, the other is close behind. Replacing both at the same time saves a second round of labor within a few months.