Ever turned your key in your GM vehicle only to be met with a frustrating security light and an engine that refuses to start? That’s a GM security lockout—a safety feature that’s great for preventing theft but incredibly inconvenient when it activates unexpectedly.
Whether your lockout was triggered by a dying battery, electrical work, or just seemed to happen randomly, I’ll walk you through the reset procedures for all GM security systems. By the end of this guide, you’ll have the know-how to get back on the road without an expensive trip to the dealership.
Understanding GM Vehicle Theft Deterrent (VTD) Systems
GM has implemented several different anti-theft systems in vehicles manufactured since 1995. The first step in solving your lockout issue is identifying which system your vehicle has.
How to Identify Your GM Security System
Your vehicle’s year, make, and model typically determine which security system it uses:
| Years | Common Security System | Key Features |
|---|---|---|
| 1986-1996 | VATS/Passkey | Black or gray key with resistor chip |
| 1992-1999 | Passkey II | Similar to VATS but integrated with BCM |
| 1996-2005 | Passlock | No chip in key, uses lock cylinder sensor |
| 1997-present | Passkey III | Black head key with transponder |
Check your owner’s manual if you’re unsure which system you have. The reset procedure differs based on the specific system in your vehicle.
VATS and Basic Passkey Systems Explained
The Vehicle Anti-Theft System (VATS) and early Passkey systems were GM’s first electronic anti-theft measures. These systems use a resistive pellet embedded in the ignition key.
How VATS/Passkey Works
When you insert and turn your key, a small electrical current passes through the resistor pellet. If the resistance value matches what the Theft Deterrent Module (TDM) expects, the system allows your engine to start.
Do VATS/Passkey Systems Need Reset Procedures?
Good news! VATS and basic Passkey systems don’t typically require relearn procedures. If your engine won’t start with these systems, the issue is likely not security-related but could be:
- A damaged key pellet
- Worn ignition contacts
- Faulty ignition switch
- Other mechanical or electrical issues
If your vehicle has this system and won’t start, try using your spare key. If that doesn’t work, you may need to consult a mechanic for non-security-related issues.
Passkey II System Reset Procedure
Passkey II systems integrated the theft deterrent function into the Body Control Module (BCM). This system requires a specific 30-minute reset procedure.
Requirements for Passkey II Reset
Before beginning, ensure:
- Your battery is fully charged (or connect a battery charger)
- You have approximately 30 minutes of uninterrupted time
- You’re using a key that previously worked with the vehicle
Step-by-Step Passkey II Reset Procedure
- Insert your key and turn to the “ON” position (don’t start the engine)
- Watch the security light—leave the key in this position for about 11 minutes until the light stops flashing
- Turn the ignition to “OFF” for 30 seconds
- Repeat the 11-minute “ON” cycle followed by 30 seconds “OFF” two more times (completing three cycles total)
- Turn the ignition to “ON” for 30 seconds
- Turn the ignition to “OFF”
- Now try starting your engine
This procedure allows the BCM to relearn your key’s resistance value and communicate properly with the PCM. According to reliable sources, this method has a high success rate for Passkey II vehicles experiencing security lockouts.
Passlock System Reset Procedure
The Passlock system was introduced around 1996 and doesn’t use a chip in the key. Instead, it relies on a coded lock cylinder with a Hall effect sensor.
How Passlock Works
When you turn your key, a magnet in the lock cylinder creates a signal pulse. The system then sends a coded signal to the Instrument Panel Cluster (IPC) or BCM. If the code is recognized, your vehicle will start normally.
Detailed Passlock Reset Steps
For this procedure, ensure your battery is fully charged:
- Turn your ignition to the “ON” position
- Attempt to start the engine, then release the key back to “ON” (don’t hold in start)
- Watch the security light and wait approximately 10 minutes until it turns off
- Turn the ignition to “OFF” for 10 seconds
- Repeat steps 2-4 two more times (three complete cycles)
- The vehicle should now have learned the new password
- Try starting the engine
- If successful, use a scan tool to clear any remaining trouble codes
Many GM owners have reported that for passenger cars, sometimes just one 10-minute cycle is sufficient, while trucks typically require all three cycles. If your first attempt is unsuccessful, try the entire procedure again.
Passkey III System Reset Procedure
Introduced around 1997 and still used in many modern GM vehicles, Passkey III (or VATS III) uses a transponder embedded in the key head.
Passkey III Features and Identification
Passkey III keys have black heads and contain an electronic transponder chip rather than a resistor pellet. This system offers improved security over previous versions.
Passkey III Reset Steps
- Insert a master key (black head) into the ignition
- Turn to the “ON” position without starting the engine
- The security light or Driver Information Center will display a security message
- Wait 10 minutes until the security indicator turns off
- Turn the key to “OFF” for 5 seconds
- Repeat steps 2-5 two more times (three cycles total)
- Turn the key to “OFF”
- The transponder information will be relearned on the next start cycle
- Try starting the vehicle
Programming Additional Passkey III Keys
If you need to program additional keys for a Passkey III system:
- Turn the master key to “OFF” and remove it
- Insert the next key and turn to “ON” within 10 seconds
- Wait for the security light to turn off (this usually happens quickly)
- Remove the key and repeat for any additional keys (up to 4 total keys)
Quick 10-Minute Reset Method for Common GM Lockouts
For many GM vehicles manufactured between 1999-2005, a simplified reset procedure often resolves common security lockouts:
- Insert your key and turn to the “ON” position without starting
- Wait approximately 10 minutes until the security light stops flashing
- Turn the key to “OFF”
- Turn the key back to “ON” and attempt to start your vehicle
This shorter procedure often works for typical security lockouts without requiring the full relearn process. It’s worth trying this method first before committing to the longer procedures.
Troubleshooting GM Security Lockouts Triggered by Physical Issues
Sometimes security lockouts aren’t caused by electronic glitches but by physical problems with your vehicle’s components.
Common Physical Triggers for Security Lockouts
- Loose or disconnected fuse box connections
- Poor battery terminal connections
- Faulty ignition switch contacts
- Shifter not fully in park position
Real-World Example
In one documented case, a security lockout occurred after front-end work when the fuse box was disconnected. The solution involved ensuring the fuse box was properly reconnected and the mounting screws were tightened.
Physical Troubleshooting Steps
If your lockout occurred after mechanical work or battery disconnection:
- Check that all electrical connections are secure
- Verify the fuse box is properly seated and tightened
- Ensure the shifter is fully in park position
- Confirm the battery has sufficient charge
- Clean battery terminals if they show corrosion
- Inspect the ignition switch for damage or wear
Advanced GM Security Lockout Solutions
If the standard reset procedures don’t resolve your lockout issue, consider these additional approaches:
Battery Disconnect Method
Some owners report success with this method:
- Disconnect the negative battery terminal
- Wait 15 minutes (allows systems to fully power down)
- Reconnect the battery terminal
- Attempt to start the vehicle normally
Scan Tool Solutions
If you have access to a professional-grade scan tool:
- Connect the scan tool to the OBD-II port
- Navigate to the security system module
- Select “reset security system” or similar option
- Follow prompts to complete the reset process
- Clear any security-related trouble codes
This approach is particularly effective for newer GM vehicles with more advanced security systems.
Preventing Future GM Security Lockouts
Once you’ve resolved your current lockout, take these steps to prevent future occurrences:
Maintenance Best Practices
- Keep your battery in good condition—security lockouts often happen with weak batteries
- When disconnecting the battery for maintenance, use a memory saver device
- Have at least two working keys for your vehicle
- Avoid turning the key to the start position for extended periods
- Keep electrical connections clean and tight
- Address check engine lights promptly as some can trigger security concerns
Key Care and Handling
- Avoid exposing keys to extreme temperatures
- Don’t keep keys near strong magnets or electronic devices
- Replace keys with worn chips or transponders
- If using a key fob, replace the battery before it completely fails
GM Security Systems by Vehicle Model
Different GM models typically use specific security systems. This reference table can help you identify which system your vehicle likely has:
| Vehicle Model | Years | Typical Security System |
|---|---|---|
| Chevrolet Silverado/GMC Sierra | 1999-2005 | Passlock |
| Chevrolet Silverado/GMC Sierra | 2006+ | Passkey III |
| Chevrolet Malibu | 1997-2003 | Passlock |
| Chevrolet Malibu | 2004+ | Passkey III |
| Chevrolet Impala | 2000-2005 | Passlock |
| Chevrolet Impala | 2006+ | Passkey III |
| Chevrolet Tahoe/Suburban | 1996-2005 | Passlock |
| Chevrolet Tahoe/Suburban | 2006+ | Passkey III |
| Pontiac Grand Am/Grand Prix | 1996-2005 | Passlock |
| Cadillac Models | 1986-1995 | VATS |
| Cadillac Models | 1996+ | Passkey III |
Always verify your specific model’s system through your owner’s manual for the most accurate information.
Tools That Can Help With GM Security Resets
Having the right tools can make resolving a GM security lockout much easier:
- Battery charger or jumper pack to maintain voltage during lengthy reset procedures
- OBD-II scan tool capable of accessing BCM/security modules
- Digital multimeter for testing battery voltage and key resistances (for VATS/Passkey)
- Memory saver device for maintaining settings during battery disconnection
- Key programmer (for professionals or dedicated DIYers)
A quality battery charger is particularly important, as many reset procedures fail due to battery voltage dropping during the lengthy reset cycles.
The Evolution of GM Security Systems
Understanding how GM security systems have evolved helps explain why different reset procedures are required:
- Early 1980s: Basic steering column locks with no electronics
- Mid-1980s: Introduction of VATS with resistor pellets in keys
- Early 1990s: Passkey systems integrated with engine controls
- Mid-1990s: Passlock systems moved away from special keys
- Late 1990s: Passkey III introduced transponder technology
- 2000s onward: Integration with remote keyless entry and push-button start systems
Each evolution added security but also introduced new potential points of failure and lockout scenarios.
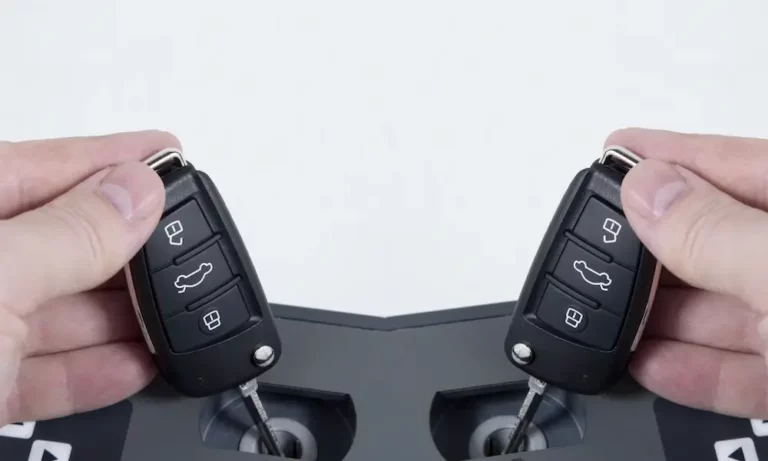
Handling Worn or Damaged Keys
Key wear is a common cause of GM security lockouts. If your key is worn or damaged:
- Try using your spare key if available
- Have a new key cut by a qualified automotive locksmith
- For transponder keys, ensure proper programming after cutting
- Consider replacing worn ignition cylinders that may cause intermittent security issues
Keys with resistor pellets (VATS/Passkey) are particularly susceptible to wear, as the electrical contacts can become dirty or damaged over time.
With this comprehensive guide to GM security lockout reset procedures, you should be equipped to handle most security system issues with your GM vehicle. Remember that patience is key—these systems are designed to prevent unauthorized starts, so the reset procedures intentionally require time to complete.