
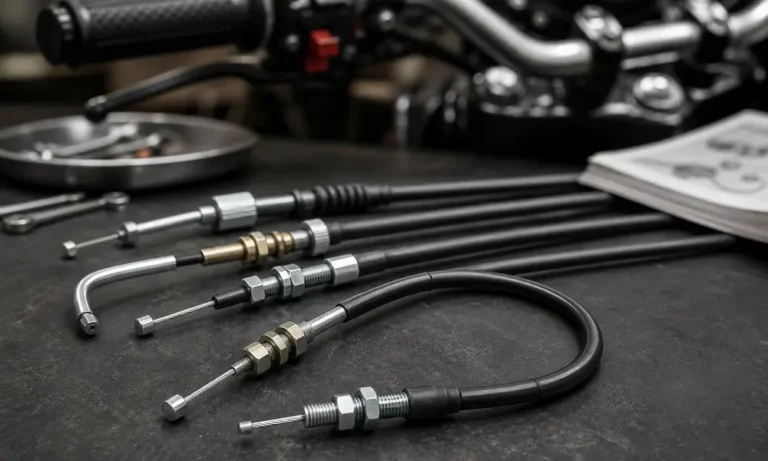
Got a sluggish throttle response or an engine that won’t stop revving? A misadjusted accelerator cable is usually the culprit. The good news? You can fix it yourself with basic tools in under an hour. This guide walks you through every adjustment method — cars, trucks, motorcycles, and boats — so you get it right the first time. Stick around to the end.
What Does an Accelerator Cable Actually Do?
The accelerator cable is a Bowden cable — a braided steel wire inside a protective housing. When you press the gas pedal, it pulls the wire, which physically rotates the throttle plate open. Release the pedal, and a spring snaps it shut.
Simple. Effective. But over time, that wire stretches and the housing shifts, throwing everything off.
Does your vehicle even have a cable? Modern cars use drive-by-wire systems — no cable at all, just sensors and a motor. You can’t adjust those manually. If your car was built after 2005, check your owner’s manual first.
Older vehicles, motorcycles, ATVs, hot rods, and most marine engines? They almost certainly use a mechanical cable you can adjust today.
Signs Your Accelerator Cable Needs Adjusting
Don’t skip this section. Knowing exactly what’s wrong saves you time.
| Symptom | Likely Cause | What’s Happening |
|---|---|---|
| Dead zone at the start of pedal travel | Too much slack | Wire isn’t pulling the throttle yet |
| Weak acceleration, no full power | Cable too loose | Throttle never fully opens |
| High idle when foot’s off the pedal | Cable too tight | Throttle plate can’t fully close |
| Transmission shifts too early | Slack in detent cable | Transmission reads wrong throttle position |
| Harsh, delayed gear changes | Tension in TV cable | Transmission pressure is off |
The Dead Pedal Problem
Push the gas and nothing happens for the first inch? That’s classic cable stretch. The wire has elongated from thousands of tension cycles, leaving dead pedal travel before the throttle plate even starts to move.
You’ll also notice sluggish passing power and reduced top speed. The engine literally can’t breathe fully because the throttle never opens all the way.
The High Idle Problem
An engine that races at 1,500–2,000 RPM with your foot off the gas is a clear sign of excessive cable tension. The tight cable holds the throttle plate slightly open, letting unmetered air into the engine.
Before adjusting anything, disconnect the cable from the throttle body. If the idle drops immediately, the cable is your problem. If it stays high, you’re dealing with a vacuum leak or idle air control valve issue — not the cable.
Inspect Before You Adjust
Adjusting a damaged cable is dangerous. Spend five minutes checking these things first.
| Inspection Point | What You’re Looking For | Fail = Replace Immediately |
|---|---|---|
| Inner wire (near pedal + throttle ends) | Smooth, no broken strands | Any fraying, rust, or bird-caging |
| Outer housing | No kinks, cracks, or crushed sections | Sharp bends or melted plastic |
| Heat clearance | 2 inches minimum from exhaust | Discoloration, melted areas |
| Mounting brackets | Solid, no flex | Missing clips, cracked grommets |
A single frayed wire strand means full replacement — no exceptions. A frayed wire can snag inside the housing and lock your throttle wide open. That’s a runaway vehicle. Don’t patch it, solder it, or tape it.
Also check that the cable clears exhaust manifolds by at least two inches. High-density polyethylene liners melt fast near heat sources, fusing the wire to the housing and creating a stuck throttle.
Safety Setup Before You Touch Anything
Work on a cold engine only — throttle bodies and manifolds hold serious heat. Follow these steps every time:
- Remove the ignition key — no accidental starts
- Engage the parking brake and chock the wheels
- Disconnect the battery ground if you’re near electrical terminals
- Wear safety glasses — springs snap and metal splinters
Tools you’ll need: metric open-end wrenches (10mm, 12mm, 14mm are common), needle-nose pliers, penetrating lubricant, a shop rag, and a flashlight.
How to Adjust Accelerator Cable: Car & Truck Methods
Method 1: Threaded Bracket System (Most Imported Vehicles)
This is the most common design on Japanese and European vehicles. Two nuts clamp the cable housing to a fixed bracket near the throttle body — one adjustment nut, one lock nut.
Here’s how to do it:
- Spray penetrating lubricant on the threaded section and let it soak for two minutes. Years of grease and grit on those threads will strip the nuts if you rush.
- Place one wrench on the lock nut (furthest from the throttle). Place a second wrench on the adjustment nut (closest to the throttle).
- Hold the lock nut still and rotate the adjustment nut counter-clockwise to break the clamping force.
- To remove slack: Turn the adjustment nut so the housing moves away from the throttle body — this tightens the inner wire.
- To add slack: Turn the adjustment nut so the housing moves toward the throttle body.
- Target 1–3mm of free play — the inner cable should have just a hair of slack when the pedal is fully released.
- Hold the adjustment nut steady and tighten the lock nut firmly against it.
- Manually rotate the throttle cam to wide-open and let go. It should snap shut with an audible click against the idle stop.
That click matters. No click means the cable is still holding the throttle open.
Method 2: Ratcheting Slip-Clip System (Many Domestic Vehicles)
Ford, GM, and Chrysler vehicles often use a plastic ratcheting block with a D-shaped release button. It’s toolless but requires the right sequence.
- Mark your starting position with a marker on the cable housing where it exits the block. This gives you a reference point if you overshoot.
- Make sure nothing is pressing the accelerator pedal — floor mats often push the pedal slightly up and throw off the adjustment.
- Press and hold the release tab firmly.
- While holding it, push the cable housing toward the firewall to tighten, or toward the throttle body to loosen.
- Release the button to lock the housing in the new position.
Some versions of this system are self-calibrating. Press the release tab, push the housing fully back toward the firewall, then release. Have someone press the accelerator pedal to the floor — the tension will ratchet the housing forward to the exact correct position automatically.
The Ford Ranger Zip-Tie Fix
Ranger owners from the ’90s and early 2000s know this one well. The factory cable stretches significantly, but there’s no adjustment mechanism in the engine bay to compensate.
The fix happens under the dashboard at the pedal assembly:
- Pull the accelerator pedal upward by hand. You’ll see a gap of exposed inner wire between the pedal arm and the cable stopper.
- Wrap heavy-duty nylon zip-ties around that exposed wire section, right between the pedal arm and the stopper.
- Trim the tails flush.
The zip-ties act as spacers, filling the gap and restoring full throttle travel. Ranger owners consistently report the truck drives like new after this simple fix.
One critical warning: don’t stack too many zip-ties. Over-tensioning the cable will hold the throttle open at idle. Always verify a small amount of free play remains after the mod.
How to Adjust Transmission TV Cable (700R4, 200-4R, Ford AOD)
This is the most critical cable adjustment in the vehicle. Get it wrong and you can destroy the transmission in minutes.
The throttle valve (TV) cable controls internal hydraulic line pressure. At idle, the transmission needs roughly 90–100 PSI. At wide-open throttle, it needs nearly 200 PSI to clamp the clutch packs. A loose cable starves the clutches of pressure — they slip, overheat, and burn up fast.
The calibration procedure:
- Locate the ratcheting adjustment block near the throttle body.
- Press the metal locking tab and push the entire outer housing as far toward the firewall as it will go. Release the tab to lock it in this zero-tension position.
- Now force the throttle to wide-open — either by hand at the throttle cam or by having someone floor the pedal.
- As the throttle opens fully, the tension overcomes the slip-clutch and the block clicks loudly as it calibrates to the correct stroke.
- Release the throttle. Verify the cable is completely taut at wide-open throttle with zero remaining slack.
Fine-tune with a test drive:
- Shifts too early or feel soft? Cable is slightly loose. Push the housing back 1mm and retest.
- Shifts too late or feel harsh at light throttle? Cable is slightly tight. Move the housing forward 1mm.
If you’ve installed an aftermarket carburetor like a Holley or Edelbrock, you’ll need specific geometry correctors bolted to the throttle arm. Without them, the cable travels through the wrong arc and burns the clutches regardless of how careful your adjustment was.
How to Adjust Motorcycle Throttle Cable
Single vs. Push-Pull Systems
Older bikes use a single pull cable. The carburetor’s return spring snaps the throttle shut when you release the grip.
Modern four-strokes use a dual push-pull system — one cable opens the throttle, one physically forces it closed. This redundancy exists because massive intake vacuum can suction-lock the throttle slide open, overcoming a weak return spring. If you own a modern four-stroke, both cables need adjustment.
Adjusting at the Handlebar Inline Adjuster
- Slide the rubber dust boot down to expose the barrel adjuster and lock nut.
- Crack the lock nut loose.
- Rotate the barrel adjuster outward to remove slack (tightens the cable). Rotate inward to add slack.
- Target 2–3mm of rotational free play at the twist grip before the engine load is felt. Mark the grip flange with a pen to measure this accurately.
- Tighten the lock nut.
On dual-cable systems: Adjust the decelerator cable first. Set it to zero play with the grip fully closed. Then adjust the accelerator cable to your 2–3mm free play target.
The Lock-to-Lock Safety Check — Don’t Skip This
Start the engine and let it idle in neutral. Slowly sweep the handlebars from full left lock to full right lock. If the idle rises at any point during that sweep, the cable is routed incorrectly or adjusted too tight. A tight turn during traffic could trigger uncontrolled acceleration. Fix it before riding.
How to Adjust Marine Throttle Cable
Marine cables run from the helm binnacle back to the engine, covering long distances in a corrosive saltwater environment. They use splined inner cores inside polymer liners for smooth, low-friction operation.
The golden rule: Always adjust the shift cable before the throttle cable. Throttle opening before full gear engagement grinds the clutch dogs in the lower unit. That’s an expensive fix.
Throttle cable procedure:
- Set the helm control to neutral. Confirm the engine’s throttle linkage rests against the idle stop screw.
- Loosen the retaining lock nut on the brass trunnion barrel at the engine end.
- Rotate the barrel until the cable eyelet slips over the mounting post without pushing or pulling the throttle lever away from idle.
- Set 1–2mm of free play — essential for clean idle return during docking.
- Push the helm control to full throttle. The throttle cam must reach its wide-open mechanical stop. If the helm bottoms out first, readjust the trunnion or relocate the pin to an alternate hole on the control arm.
When ordering replacement marine cables, add two feet of extra length for outboard motors. That loop lets the engine tilt and steer without binding.
Verify Your Work Every Time
No matter which vehicle you’re working on, these three checks confirm a safe, correct adjustment:
- Idle check — With your foot completely off the pedal, the engine idles at its normal RPM. No racing.
- Full throttle check — The throttle cam physically reaches its wide-open stop when the pedal hits the floor. No gap.
- Snap return test — Manually push the throttle open and release it. It snaps shut instantly with a clean click against the idle stop. Any hesitation means binding — check your routing.
A properly adjusted accelerator cable delivers instant, proportional response every time you press the pedal. Take the extra five minutes to verify all three points. Your engine — and your safety — depend on it.













