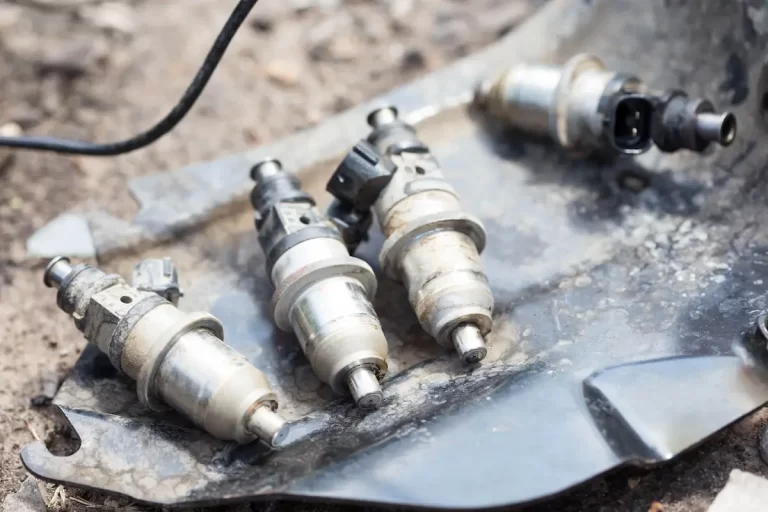
Your 6.0 Powerstroke is misfiring, smoking, or refusing to start. You suspect the injectors. Now what? This guide walks you through everything — diagnostics, tools, teardown, torque specs, and the upgrades that actually protect your new injectors. Read to the end before you touch a single bolt.
How the 6.0 Powerstroke Fuel Injection System Actually Works
Before you start swapping parts, you need to understand what you’re dealing with. The 6.0 Powerstroke uses a Hydraulic Electronic Unit Injection (HEUI) system. It doesn’t use a traditional high-pressure fuel pump. Instead, it uses pressurized engine oil to physically fire the injectors.
Here’s the short version of how it works:
- A gear-driven high-pressure oil pump pressurizes engine oil from 500 psi at idle up to nearly 4,000 psi under load
- That oil slams into the top of each injector via cast-iron oil rails
- The oil pushes an internal plunger, multiplying fuel pressure to roughly 26,000 psi
- That atomized fuel blasts directly into the combustion chamber
The Fuel Injection Control Module (FICM) steps up your 12-volt battery power to 48 volts to trigger each injector’s solenoid. Three things must work perfectly together: base fuel pressure, clean high-pressure oil, and a solid 48-volt electrical signal. If any one of these fails, your injectors suffer.
Early vs. Late: Which Injectors Does Your Engine Need?
This is the most critical parts question you’ll face. The cutoff date is September 22, 2003.
- Early injectors (pre-September 22, 2003): Part number suffix ending in ECRM
- Late injectors (September 30, 2003 and beyond): Part number suffix ending in BRM
Never mix early and late injectors in the same engine. The internal flow dynamics are completely different. You’ll get severe cylinder imbalances and a truck that barely runs, even though the parts physically fit.
Late-model injectors also got a big upgrade: a diamond-like carbon (DLC) coating on the internal plunger to combat wear from ultra-low sulfur diesel fuel. Late 2004–2007 engines also received redesigned “wavy” cast-iron oil rails with 15 more cubic inches of internal volume — better pressure stability, less noise, and longer injector life.
How to Diagnose a Bad Injector on a 6.0 Powerstroke
Don’t just throw injectors at the problem. Replacing injectors without fixing the root cause destroys the new ones immediately. Here are the five failure modes you need to rule out first.
Stiction: The Cold-Start Misfire That Disappears When Warm
Stiction is static friction. Degraded engine oil leaves a sticky carbon varnish on the injector’s internal spool valve. When the engine is cold, that varnish binds the valve. The FICM fires the solenoid, but the valve doesn’t open fast enough. Result: misfires, rough idle, and thick smoke on startup.
Once the engine warms up and the oil thins out, it runs fine. That masking effect fools a lot of owners into waiting too long to fix it.
How to verify: Run a buzz test with the engine cold. Each injector should produce a sharp, crisp click. A muffled or absent click points directly to stiction or solenoid failure.
FICM Voltage Drop: The Electrical Killer Nobody Checks
Your FICM must hold at least 45 volts during cranking. If it drops below that threshold, the solenoids can’t generate enough magnetic force to open the spool valves quickly. The injectors overheat internally and die fast.
Monitor FICM voltage at three stages: key-on/engine-off, cranking, and running. Ideal range is 47.5–49 volts. Anything below 45 volts during cranking is a problem you must fix before installing new injectors.
Low Fuel Pressure: The Silent Injector Killer
Fuel pressure starving below 45 psi under load causes the injector’s internal plunger to operate without a fluid boundary layer. Metal hits metal. The check balls and plunger retainers erode fast, and you’ll have a dead cylinder.
The factory fuel pressure regulator spring weakens over time and lets pressure sag to 30–40 psi. That’s not enough. More on the fix below.
Copper Combustion Washer and O-Ring Failure
The copper washer at the injector nozzle tip seals the combustion chamber. When it fails — from improper torque or a dirty bore — exhaust gases blow past the injector tip and melt the lower fuel O-ring. You’ll see a black, soot-contaminated fuel filter and rapid fuel rail pressure loss.
Cracked Injector Cup
The injector sits in a brass or stainless steel sleeve pressed into the cylinder head. When that cup develops a hairline crack, fuel enters the cooling system. Dead giveaways: your degas bottle smells like diesel, it’s bubbling aggressively, or you’re losing coolant with no visible leak.
| Symptom | Probable Cause | How to Verify |
|---|---|---|
| Hard cold start, clears when warm | Stiction on spool valve | Buzz test when cold — listen for muffled click |
| Hot no-start, fine when cold | High-pressure oil leak (standpipes, dummy plugs) | Monitor ICP during hot crank — needs 500+ psi |
| Cranks but won’t fire, voltage codes | FICM failure | Check Main Power voltage — must stay above 45V cranking |
| Degas bottle bubbling, smells like diesel | Cracked injector cup | Pressurize cooling system; check for cross-contamination |
| Black fuel filter, raw fuel smell at exhaust | Blown copper washer, melted fuel O-ring | Inspect fuel bowl for soot intrusion and air bubbles |
Tools You Actually Need for 6.0 Powerstroke Injector Replacement
Don’t attempt this job with a basic socket set. The wrong tools will break harnesses, strip fasteners, and destroy new injectors before they even run.
| Tool | What It Does | Why It Matters |
|---|---|---|
| Extended-shank T40/T45 Torx driver | Torques the injector hold-down bolt | Standard short bits hit the injector body — you get false torque and a loose injector |
| Glow plug harness removal tool | Extracts seized glow plug connectors | Pulling the wire by hand tears the harness instantly |
| Injector connector release tool (303-1115) | Unplugs the injector harness from the rocker arm carrier | Prevents shattering the plastic retaining clips |
| Oil rail nipple cup socket and centering guide | Removes and reinstalls nipple cup retaining nuts | Misalignment destroys the injector’s upper oil seal immediately |
F-Series Truck vs. E-Series Van: Why the Cost Gap Is Huge
The chassis your engine lives in dramatically changes the cost of this job.
On an F-250, F-350, F-450, or F-550, the engine sits in a standard forward engine bay. A skilled diesel tech can pull and replace all eight injectors in 8–10 hours. Total job cost typically runs $2,200–$4,200.
The Ford E-Series van is a completely different animal. The engine is buried under the cabin floor between the seats. Getting to the rear cylinders requires tearing apart the dashboard, pulling the interior doghouse cover, and often unbolting the engine mounts to drop the block for clearance. That balloons labor to 14–16 hours. At $150–$190/hour at dealerships, labor alone can exceed $2,500. Total E-Series replacement jobs typically run $5,000–$6,500.
The economic lesson here is simple: if one injector fails on an E-Series van, replace all eight at once. Doing it twice costs you 32 hours of labor. That’s a painful lesson to learn the hard way.
| Variable | F-Series Super Duty | E-Series Commercial Van |
|---|---|---|
| Engine access | Standard forward hood | Buried under dash and interior cowl |
| Labor hours (full set) | 8–10 hours | 14–16 hours |
| Required teardown | Intake and piping | Dashboard, doghouse, engine mounts |
| Estimated total cost | $2,200–$4,200 | $5,000–$6,500 |
Step-by-Step Injector Removal
Park on level ground. Let the engine cool completely. Disconnect both negative battery cables. Never apply external voltage to the injectors during any part of this process — you’ll burn the solenoids out instantly.
Remove the Top End and Harnesses
Pull the air intake, intercooler piping, and coolant degas bottle. On the passenger side, the heater core lines and A/C housing create tight clearance. The passenger-side valve cover often needs to be twisted and carefully maneuvered out to avoid cracking it.
Once both valve covers are off, extract the glow plug harnesses. They seize from heat exposure. Soak the O-ring bores with penetrating lubricant first. Use the harness removal tool — never yank the wire. If a harness breaks flush with the head, fish it out with a pick or knock it free from the underside using a 13mm socket.
Use the injector connector release tool (303-1115) to unplug the injector electrical connectors from the rocker arm carrier without cracking the plastic clips.
Remove the High-Pressure Oil Rail Safely
Before you lift the oil rail, stuff clean shop rags into every oil drain hole in the cylinder head next to the glow plugs. This step is non-negotiable. If a snap ring or socket falls down one of those holes, you’re pulling the engine to retrieve it.
Disconnect the high-pressure oil supply lines. On late-model wavy rail engines, pull the vertical standpipe first before unbolting the rail. Skipping this step damages the internal PTFE seals as the rail lifts. Remove the rail mounting bolts, then lift the rail straight up. Have rags ready — significant oil will drain out.
Pull the Injectors and Check the Copper Washer
Use only hand tools to loosen the injector hold-down bolts. Air tools will chatter the fastener, dislodge retaining clips, and send metal fragments into the engine.
Remove the hold-down bracket and bolt with the injector as a unit. Use a dedicated injector puller or a gentle pry at the injector base to break the O-ring suction.
After pulling each injector, immediately check that the copper combustion washer is still on the nozzle tip. If it stayed behind in the cylinder head cup, fish it out with a long pick before proceeding. Installing a new injector (which has its own new washer) on top of an old leftover washer creates a “stacked washer” scenario. The hold-down bolt will give you a false torque reading. The injector won’t seat properly. The engine will hydro-lock on startup and destroy itself.
Step-by-Step Injector Installation
Blow Out the Bolt Holes First
The injector hold-down bolt holes are blind — they don’t pass through the block. During disassembly, engine oil and diesel fuel pool in these holes. If you thread a bolt into a fluid-filled hole, the liquid hydraulically locks before the bolt head clamps down on the injector. Your torque wrench clicks. The injector is loose. Combustion gases blow out the copper washer within a few heat cycles.
Blast every single bolt hole with compressed air before installing anything.
Seat and Torque the New Injectors
Use quality remanufactured injectors. PurePOWER Technologies was the original builder of these injectors — their reman units meet OEM specs. Motorcraft and Alliant Power are also solid choices. Cheap rebuilds often just clean the worn internals without replacing solenoids and nozzles. True OEM reman injectors typically show laser etching on the upper body and a barcode on the connector.
Coat the upper and lower rubber O-rings heavily with clean engine oil. Verify the copper combustion washer is present and undamaged. Slide the hold-down collar and bolt onto the injector. Push it down into the bore by hand — no hammering.
Thread the hold-down bolt in by hand for the first several turns to prevent cross-threading in the aluminum head. Then use your calibrated torque wrench with the extended-shank Torx bit:
- Early engines (T40): 24 lb-ft
- Late engines (T45): 25.8 lb-ft
Reinstall the Oil Rail and Torque Everything
Lubricate the steel nipple cups on the underside of the rail heavily with clean engine oil. Lower the rail straight down, ensuring every nipple cup aligns with the oil inlet seal on each injector. Tighten the rail mounting bolts starting at the center and working outward in a crossing pattern — this prevents binding and pinching the O-rings.
Here’s the full torque spec chart for the job:
| Component | Fastener | Torque Spec | Notes |
|---|---|---|---|
| Early injector hold-down | T40 Torx (extended shank) | 24 lb-ft | Blow out blind hole first |
| Late injector hold-down | T45 Torx (extended shank) | 25.8 lb-ft | Blow out blind hole first |
| Updated dummy plugs | 12mm hex socket | 60 lb-ft | Lubricate PTFE seals before insertion |
| Updated standpipes | 12mm hex socket | 60 lb-ft | Lubricate PTFE seals before insertion |
| High-pressure oil rail (late wavy) | T30 Torx | 10 lb-ft (120 lb-in) | Tighten center outward in crossing pattern |
| Valve cover bolts | Standard socket | 71 lb-in | Verify gasket is seated |
| Glow plugs | 10mm deep socket | 14 lb-ft (168 lb-in) | Hand thread first — aluminum head strips easily |
| Oil rail nipple cup retaining nut | Specialized socket | 100 lb-ft | Use centering tool during torque |
Critical note: The difference between lb-ft and lb-in is not a typo. Applying foot-pounds to an inch-pound fastener snaps the bolt off inside the engine block. Double-check your torque wrench setting before every fastener.
Mandatory Upgrades to Do at the Same Time
The engine is already torn apart. This is the smartest time to fix the design flaws that kill injectors in the first place.
The Blue Spring Fuel Pressure Regulator Upgrade
The factory fuel pressure regulator spring is weak by design. It allows base fuel pressure to sag to 30–40 psi under heavy load — well below the 45 psi minimum the injectors need for internal lubrication and cooling.
The “Blue Spring” kit — named for its distinctive blue coating — replaces the weak spring, brass plunger, and degraded rubber seals with upgraded components. It locks fuel pressure at 60–65 psi under all conditions. That’s the optimal range where your injectors stay properly lubricated, cooled, and protected against check-ball cavitation.
Installing this kit takes about 20 minutes while the intake is already off. It’s the single most important thing you can do to protect your new injectors. Every 6.0 Powerstroke injector job should include a Blue Spring.
High-Pressure Oil Rail Nipple Cup Seal Rebuild
The nipple cups connecting the oil rail to each injector rely on internal O-rings to hold pressure. After years of 3,000+ psi oil pressure and heat cycles, those O-rings harden and blow out. When they fail, the rail can’t maintain the 500 psi minimum needed to actuate the injectors. You get a classic hot no-start.
You don’t need a new oil rail. Aftermarket rebuild kits let you replace just the seals with heavy-duty Viton O-rings. You’ll need the proprietary hardened steel extraction tool to unthread the retaining nut inside the rail. Torque the nut back to 100 lb-ft using the alignment centering guide. Without the centering guide, the nipple cup sits crooked and destroys the new injector’s upper seal the moment you install it.
Updated Standpipes and Dummy Plugs
On 2004.5–2007 engines with the wavy oil rails, the factory standpipes and dummy plugs use single rubber O-rings that blow out under high hydraulic pressure. Updated versions add a white PTFE backup ring alongside the rubber seal. That backup ring stops the rubber from extruding out of its groove. Since the valve covers and oil rails are already off, install the updated standpipes and dummy plugs every single time.
Priming and Bleeding the System After Installation
Air is now trapped in both the oil circuit and the fuel circuit. Running the engine dry even briefly causes internal barrel scuffing. Don’t skip this step.
Priming the High-Pressure Oil System
You need to spin the engine without firing the injectors. On the passenger side fender, near the vacuum pump, there’s a dedicated remote starter trigger wire wrapped in a black sheath. Touch the female connector end to the positive battery terminal. The starter cranks the engine without the FICM firing the injectors.
Crank for 20–30 seconds, then pause to let the starter cool. Repeat 3–4 times. This fills the oil rails and pushes trapped air out of the injector seals.
Bleeding the Fuel System
Turn the key to ON (don’t crank). The electric fuel pump runs for about 20 seconds. Cycle the key 3–5 times to fill the secondary fuel filter bowl and pressurize the cylinder head fuel galleries.
For a thorough bleed, attach a rubber hose to the fuel pressure test port on the secondary filter housing and route it into a catch bucket. Cycle the key until you see a steady, bubble-free stream of clean diesel with no sputtering or foaming.
Once both systems are primed, start the engine. It’ll crank longer than usual the first time — that’s normal. It’ll run rough and smoke for the first few miles while microscopic air purges from the spool valves. Drive it hard for 10–20 highway miles before judging how it runs.
The Hidden Connection Between Oil Changes and FICM Failure
Here’s something most owners miss entirely: bad oil maintenance destroys the FICM, not just the injectors.
When engine oil breaks down past its service interval, it loses anti-foaming agents and shears thin. This creates more stiction on the injector spool valves. The FICM has to sustain higher amperage for longer to force the valves open. That extra electrical load overheats the FICM’s circuit board, melts solder joints, and destroys capacitors. Extending your oil change interval doesn’t just wear out injectors — it thermally kills your engine computer.
Change your oil on schedule, use a quality synthetic, and the injectors and FICM both live much longer.
Under optimal conditions — synthetic oil, regular filter changes, consistent fuel pressure via the Blue Spring — quality OEM remanufactured injectors typically last 100,000–150,000 miles. Skip the maintenance and that lifespan drops dramatically.