Got a 6.0 Powerstroke that’s running hot, losing coolant, or puffing white smoke? You’re probably staring down a failed oil cooler — the most notorious weak point on Ford’s 2003–2007 Super Duty diesel. This guide walks you through every critical step of the 6.0 Powerstroke oil cooler replacement process, from diagnosis to final torque specs. Read to the end — skipping any part of this could cost you thousands.
Why the 6.0 Powerstroke Oil Cooler Fails in the First Place
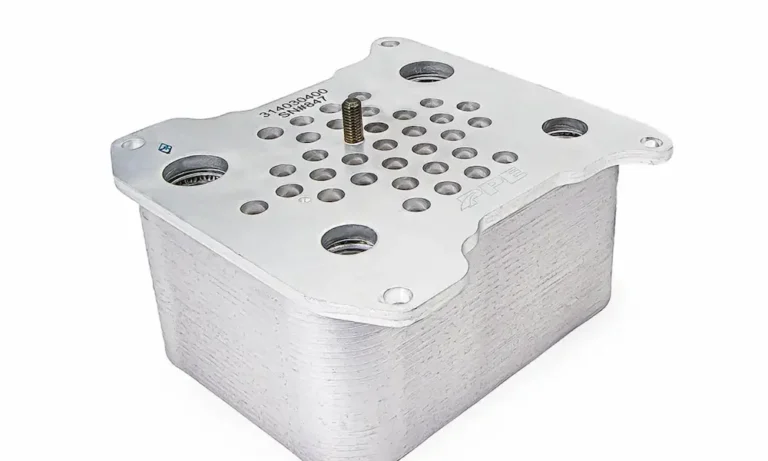
The 6.0 Powerstroke uses engine oil as a hydraulic fluid to fire its injectors. That oil absorbs enormous heat and needs to be cooled constantly. The oil cooler sits deep in the engine’s lifter valley, submerged in an aluminum housing beneath the intake manifold. Engine coolant flows through narrow passages — often less than one millimeter wide — to pull heat away from the oil.
Here’s the problem. The iron engine block was sand-cast during manufacturing. Microscopic silica particles stayed trapped inside the water jackets. Over time, vibration and heat knock them loose. They circulate freely through the cooling system.
On top of that, the factory gold coolant relied heavily on silicates for corrosion protection. Under extreme diesel heat, those silicates drop out of suspension and form a thick gel that looks like petroleum jelly. The oil cooler’s tiny passages act like an unintentional filter. Sand and silicate gel pack those channels solid. Coolant flow slows to a trickle, then stops completely.
This isn’t a maintenance failure. It’s a fundamental design flaw baked into the platform.
The Failure Cascade: What Happens Next
A blocked oil cooler doesn’t just hurt itself. It triggers a chain reaction that can total the entire engine.
Phase 1: Oil Overheating
Without coolant flow, oil temperatures spike dramatically. Once oil temps exceed 255°F, the engine’s computer cuts fuel delivery and forces the truck into limp mode. Injector performance drops, seals wear faster, and bearings start deteriorating.
Phase 2: EGR Cooler Rupture
Coolant flows from the oil cooler directly into the EGR cooler. With restricted flow upstream, the EGR cooler flash-boils whatever coolant remains. Exhaust gases hitting over 1,200°F destroy the thin brazed stainless steel tubes inside. They crack. Coolant pours into the exhaust stream.
Phase 3: Hydrostatic Lock and Head Gasket Failure
Coolant floods the intake manifold and the cylinders. If the engine sits with liquid inside a cylinder, then you crank it over, the starter can’t compress the liquid. Connecting rods bend. The engine destroys itself. Meanwhile, the localized overheating stretches the factory head bolts, head gaskets blow, and you’re looking at a full engine rebuild.
How to Diagnose a Failing Oil Cooler Before It’s Too Late
Visual inspection won’t catch this. The restriction is entirely internal. You need a scan tool that reads live manufacturer-specific data parameters — not just trouble codes. Tools like the ScanGauge II or FORScan software give you real-time access to the critical readings listed below.
Critical Live Data Parameters to Monitor
| Parameter | Normal Range | What It Means If It’s Off |
|---|---|---|
| Engine Coolant Temperature | Under 235°F | Above 235°F triggers limp mode; possible head gasket or severe overheating |
| Engine Oil Temperature | Under 255°F | Above 255°F causes fuel cutoff; oil cooler is severely clogged |
| Injection Control Pressure | 500–4,000 PSI | Below 500 PSI means high-pressure oil leak or pump failure |
| Injection Pressure Regulator Duty Cycle | 14–85% | Hitting 85% while cranking without starting indicates massive HP oil leak |
| FICM Voltage | 45–48 volts | Below 45V mimics bad injectors and destroys injector coils |
| Cam/Crank Sync | Reads “1” or “Yes” | “0” or “No” prevents starting; sensor or wiring failure |
The Temperature Differential Test
This is the single most important diagnostic test for the 6.0 Powerstroke. Here’s exactly how you run it:
- Drive the truck for at least 20 minutes to fully heat-soak all fluids
- Get on a flat highway at a steady 65 mph — no trailer, no hills, no hard acceleration
- Subtract your Engine Coolant Temperature from your Engine Oil Temperature
Here’s how to read the results:
- 5–10°F difference: Oil cooler is healthy
- 15°F difference: Oil cooler is significantly restricted and failing
- 20°F or more: Critical failure territory — EGR cooler rupture is imminent
Don’t run this test while towing or climbing grades. Heavy load naturally widens the temperature gap even on a healthy cooler, giving you a false reading.
Secondary Warning Signs
Watch for these physical symptoms alongside your scan data:
- Unexplained coolant loss with no puddles under the truck — it’s burning internally
- Sweet-smelling white smoke from the exhaust, especially on cold starts — EGR cooler has already ruptured
- Pressurized degas bottle that vents violently or bubbles constantly — combustion gases are entering the cooling system
- Milkshake-colored coolant — oil is cross-contaminating the cooling system through a ruptured cooler core
The Chemical Flush: Don’t Skip This Step
Installing a new oil cooler into a contaminated cooling system guarantees repeat failure. The block, radiator, and heater core are still packed with sand, rust, and silicate gel. A simple drain-and-fill doesn’t touch it.
You need a multi-stage chemical flush:
Stage 1 — Alkaline Flush: Fill the system with an alkaline cleaner like Fleetguard Restore or a heavy dose of dish soap mixed with water. Run the engine at high idle for one to two hours. This breaks down silicate gel, sludge, and oil contamination.
Stage 2 — Acid Flush: After fully evacuating Stage 1 with clean water, add an acid-based cleaner like Fleetguard Restore Plus. Run another extended high-idle session. This dissolves rust, iron oxide scale, and hardened mineral deposits baked into the iron block.
Drain the block properly. The radiator petcock alone doesn’t cut it. Heavy debris settles at the very bottom of the block. Remove the threaded block drain plugs on both the driver and passenger sides using an 8mm Allen socket. Pour out everything.
Flush with distilled water repeatedly until the discharge runs completely clear. This takes multiple gallons and a full day of labor. It’s the only way to guarantee your new parts survive.
6.0 Powerstroke Oil Cooler Replacement Options
Three engineering paths exist for the actual replacement, each with different tradeoffs.
| Option | Description | Estimated Parts Cost | Best For |
|---|---|---|---|
| OEM-Style Replacement | Identical design to factory | $300–$500 | Budget builds with perfect flush and bypass filter |
| Billet Drop-In Upgrade | Enlarged internal passages, reinforced construction | $600–$1,000 | High-mileage or modified engines needing better flow |
| Remote Air-to-Oil Relocation | Eliminates the liquid-to-liquid cooler entirely; mounts an air-cooled radiator behind the bumper | $2,500+ (parts only) | Maximum reliability, heavy towers, permanent fix |
The remote relocation system completely eliminates the possibility of oil contaminating the cooling system. It also removes the thermal burden from the liquid cooling circuit, protecting the EGR cooler during extreme towing. It’s the most expensive path, but it permanently solves the foundational flaw.
Avoid cheap generic copies of the OEM design. Porous castings and poor quality control cause catastrophic failures within 20,000 miles on these units.
Teardown, Torque Specs, and Reassembly
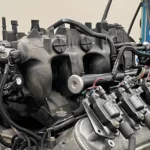
The oil cooler lives deep in the engine valley. You’ll need to remove the intake manifold, turbocharger, alternator, FICM module, EGR system, and multiple fuel and oil components to reach it. Plan for 8–12 real-world labor hours.
A few critical warnings during teardown:
- Disconnect both negative battery terminals. This platform runs dual batteries. Leave one connected and you’re working live next to energized starter circuits with metal tools in hand.
- Tag every bolt by location. The intake manifold uses multiple bolt lengths. A long bolt in a short hole punctures the water jacket or strips the aluminum threads permanently.
- Use brass scrapers only on sealing surfaces. Steel razor blades gouge the aluminum block and cause permanent sealing failures.
- Replace the factory HPOP filter screen. The plastic frame cracks and gets sucked into the high-pressure oil pump. Install the heavy-duty stainless steel upgrade.
Critical Torque Specifications
| Component | Fastener | Torque |
|---|---|---|
| Oil Cooler Cover Bolts (M6) | M6 | 89 in-lbs |
| Oil Cooler Cover Bolts (M8) | M8 | 16 ft-lbs |
| Intake Manifold Bolts | Standard | 8 ft-lbs — tighten in outward cross-pattern |
| Turbocharger Pedestal Bolts | 10mm | 28 ft-lbs |
| Turbocharger Oil Supply Bolts | M8 | 18 ft-lbs |
| EGR Cooler Bracket Bolts | Flange | 10 ft-lbs |
| Oil Filter Housing Bolts | Housing | 11 ft-lbs — lubricate O-rings first |
| Exhaust Up-Pipe Flange Bolts | Flange | 20 ft-lbs — use anti-seize |
What Else to Fix While You’re In There
Since you’re already 8+ hours deep in the engine, address these known failure points at the same time. Skipping them now means paying double labor later.
- Upgraded EGR Cooler: Don’t reinstall the factory unit after a restricted oil cooler. Install a fully TIG-welded stainless steel replacement with thick-walled tubes that won’t crack from thermal shock.
- STC Fitting Update (2005–2007): The factory snap-to-connect fitting on the high-pressure oil pump vibrates apart and causes a sudden engine stall. Install Ford’s updated bracket-style fitting (part# 4C3Z-9B246-F) while the turbo is already off.
- Standpipes and Dummy Plugs: The rubber O-rings on these components degrade and cause hot no-start conditions. Replace them with the updated white Teflon-backed units (part# 6E7Z-9A332-B).
- Blue Spring Fuel Pressure Kit: The factory fuel pressure regulator spring weakens over time, dropping pressure below safe thresholds and destroying injectors. The blue spring kit (part# 3C3Z-9T517-AG) raises base fuel pressure to a steady 60 PSI.
- Bypass Coolant Filter: Install an aftermarket bypass coolant filter that taps into the heater core lines. It continuously scrubs residual casting sand and scale before they reach your new oil cooler.
Post-Repair Fluids and Maintenance
Never put the factory gold coolant back in this engine. Refill exclusively with a Heavy Duty Extended Life Coolant meeting Caterpillar EC-1 specs. These Organic Acid Technology coolants contain zero silicates. Use concentrated coolant — not pre-mixed — since the block still holds distilled water from the flush.
Use a pneumatic vacuum refill tool like the AirLift system to pull a deep vacuum on the system before drawing in fresh coolant. Air pockets trapped in the block cause localized overheating and immediately stress the new components.
For engine oil, use a 15W-40 meeting CJ-4 or CK-4 standards in standard climates. In cold climates below freezing, run a full synthetic 5W-40. The thinner cold-flow properties pressurize the injection system faster on cold starts, reducing injector stiction and misfire.
Frequently Asked Questions
What’s the total cost for a 6.0 Powerstroke oil cooler replacement?
Labor runs 8–12 hours at $100–$150 per hour at most shops — that’s $1,000 to $1,800 in labor alone. Add an OEM replacement cooler, upgraded EGR cooler, gaskets, premium coolant, and synthetic oil, and the total typically lands between $2,500 and $4,000. A remote air-to-oil relocation system with full concurrent repairs pushes total installed cost toward $4,000 to $6,000.
Does the cab need to come off for this repair?
No. Most 6.0 Powerstroke oil cooler replacements happen in-frame with the engine in the truck. The technician removes the upper components and works from above. Cab removal is generally reserved for simultaneous head gasket replacement due to the torque requirements of the head studs.
Will a new oil cooler fix a hot no-start?
No. A hot no-start is a completely separate problem. When hot oil thins out, it escapes past degraded seals on the standpipes, dummy plugs, or STC fitting. The high-pressure oil pump can’t reach the 500 PSI minimum needed to fire the injectors. Fixing a hot no-start requires replacing those high-pressure seals — not the oil cooler.
How often should I flush the cooling system after this repair?
Diesel experts recommend a chemical flush and full coolant replacement every 50,000 miles — not the factory 100,000-mile interval. Change the bypass coolant filter element annually or every 15,000 miles. This keeps residual debris from quietly building up in the new oil cooler and starting the whole failure cycle again.