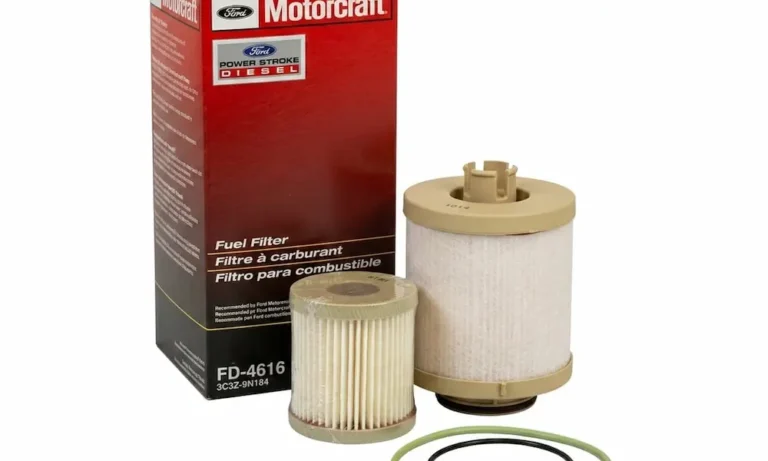
Changing the fuel filter on your 7.3 Powerstroke sounds simple—until you crack the cap, diesel spills everywhere, and the truck still won’t start. This guide covers the full replacement process, common mistakes, and the upgrades worth doing while you’re in there. Read to the end before you grab a wrench.
Why the Fuel Filter Matters So Much on a 7.3 Powerstroke
The 7.3 Powerstroke runs on a Hydraulic Electronic Unit Injection (HEUI) system. High-pressure engine oil fires the injectors, not a traditional fuel rail. That means the fuel side operates at a relatively low 40–70 PSI.
Don’t let that fool you into skipping filter changes.
The fuel bowl—that big assembly sitting in the engine valley—does a lot of heavy lifting. It:
- Filters dirt and debris from your diesel
- Separates water before it reaches the injectors
- Heats fuel to prevent cold-weather gelling
- Regulates fuel pressure to the cylinder heads
- Houses sensors that talk to your PCM
When the filter clogs or the bowl components fail, your whole fuel delivery system suffers. Change the filter every 10,000–15,000 miles, or every other oil change.
Know Your Truck Before You Start
The 7.3 Powerstroke ran from 1994.5 to 2003, but it’s not one-size-fits-all. Two generations exist, and they service differently.
| Generation | Years | Fuel Pump Type | Filter Part Number |
|---|---|---|---|
| Old Body Style (OBS) | 1994.5–1997 | Mechanical (cam-driven) | Motorcraft FD-4595 |
| Super Duty | 1999–2003 | Electric (frame-mounted) | Motorcraft FD-4596 |
E-Series vans (E-250, E-350, E-450) use the same engine but require interior cabin access through the “doghouse” cover. Pickup trucks give you top-down access once you pull the engine cover.
Get the right filter for your truck before you start draining anything.
What You Need for the Job
Don’t wing this with random tools from your garage. Using the wrong wrench on the fuel bowl cap cracks the composite housing—and that turns a $20 job into a $200 headache.
Required tools and supplies:
- Specialized fuel filter cap wrench or strap wrench designed for the 7.3 fuel bowl cap
- 13mm socket and ratchet (engine cover removal and battery terminals)
- Flexible 3/8″ ID hose for draining the bowl
- Drain catch container (minimum 16 oz capacity)
- T20 Torx bits
- Clean diesel fuel for lubricating O-rings
- New filter element with O-ring kit
If you’re servicing the Injection Pressure Regulator (IPR) valve at the same time, you’ll also need a 1-1/8″ deep socket with a 3/8″ drive.
The Fuel Filter Replacement Itself: F-Series Super Duty (1999–2003)
A complete filter change on an F-Series Super Duty takes about 36 minutes for an experienced technician. Give yourself an hour the first time.
Step 1: Kill the Power and Pull the Engine Cover
Park on a level surface. Turn the engine off and let it cool. Disconnect both batteries—negative cables first, then positive—using your 13mm socket.
Remove the two 13mm nuts securing the plastic engine cover. Lift it off. You’ll see the fuel bowl front and center.
Step 2: Drain the Fuel Bowl First
This step saves you from a diesel shower. Locate the yellow drain lever on the side or rear of the fuel bowl. The metal drain tube exits near the passenger-side front of the engine block.
Attach your flexible hose to the drain tube outlet. Route the other end into your catch container. Rotate the yellow lever 90 degrees clockwise to open the valve. Wait until the flow stops completely, then close the valve.
Skip this step and you’ll wear that diesel.
Step 3: Remove the Cap and Old Filter
Apply your cap wrench to the fuel bowl cap. Turn counterclockwise. The cap may resist due to heat cycling and O-ring swelling—apply steady pressure, not impact force.
Once loose, unscrew by hand. Lift the cap and filter straight up and out. Set the assembly in your drain pan. Pull the old filter off the cap and discard it along with the old O-rings.
Step 4: Inspect the Bowl Interior
Look inside the housing before installing anything new. Check for:
- Sediment or rust at the bottom
- Damage to the central standpipe
- Buildup around the heating element at the base
Gently flush any debris out through the open drain valve using clean diesel fuel. Don’t poke around the heating element—it’s fragile.
Step 5: Lubricate and Install the New Filter
This step is where most DIYers cause leaks. Both O-rings must be soaked in clean diesel fuel before installation. Dry rubber O-rings tear, bind, and leak under heat.
- Install the small O-ring onto the top neck of the new filter
- Install the large beveled O-ring onto the housing lip (bevel facing the correct direction per the filter kit instructions)
- Snap the new filter into the reusable cap
- Lower the assembly into the bowl, aligning the filter base with the standpipe
- Thread the cap clockwise by hand first, then snug with your cap wrench
Don’t overtighten. Firm is enough. Crushing the O-ring or cracking the cap costs more to fix than the filter itself.
Step 6: Prime the System and Check for Leaks
Reconnect the batteries. Turn the key to ON without cranking. The electric fuel pump runs for 20–30 seconds. Turn the key off. Repeat this 6 times minimum.
This fills the bowl, pushes trapped air through the return line, and pressurizes the system before you start the engine.
Start the truck. Watch the cap perimeter and drain valve for any seeping fuel. If it’s dry, reinstall the engine cover. You’re done.
Replacing the Fuel Filter on an E-Series Van
The engine is buried under the dashboard cowl on E-Series vans. You can’t reach it from the hood. Access comes from inside the cab.
Remove the insulated “doghouse” engine cover between the driver and passenger seats. Unlatch the clamps, pull it rearward, and lift it out. You may also need to move air intake ducting for enough clearance.
From this angle, the replacement steps match the F-Series procedure exactly. The difference is ergonomics—you’re working at an awkward angle from inside the cab.
Extra caution here: Any spilled diesel drains into the engine valley and creates persistent odors in the closed cabin. Drain the bowl completely before cracking the cap. Take your time.
After finishing, make sure the doghouse rubber seals seat fully against the firewall. Poor sealing lets heat and exhaust fumes into the cabin.
Replacing the Fuel Filter on OBS Trucks (1994.5–1997)
OBS trucks use a mechanical lift pump driven by a camshaft lobe, sitting just behind the fuel bowl. The engine valley is noticeably more crowded than a Super Duty.
The filter replacement procedure is the same. The priming process is completely different.
On an OBS, turning the key to ON does not run a pump. You must crank the engine to actuate the mechanical pump and draw fuel into the bowl. Expect extended cranking time after a filter change.
Protect your starter motor: Crank in 15–20 second intervals. Let it rest between attempts. Extended cranking overheats the starter windings.
If your mechanical pump is original and high-mileage, inspect the base O-rings while you’re in there. These pumps commonly develop seeps at the base seal, and many OBS owners retrofit an electric frame-rail pump system to eliminate the problem entirely.
Two Upgrades Worth Doing at the Same Time
While the bowl is open and the tools are out, consider these two well-documented improvements.
The Blue Spring Fuel Pressure Regulator Upgrade
The factory pressure regulator spring fatigues over time. Weak spring tension lets the poppet valve open too early, dropping fuel pressure below 40 PSI under load. That starves your injectors and causes rough running, poor throttle response, and—over time—injector cavitation damage.
The Blue Spring upgrade kit (part numbers CM-5016 / F81Z-9H323-BB) replaces the weak spring with a stiffer calibrated unit, plus a new poppet valve and billet aluminum cap. It raises baseline fuel pressure by 10–15 PSI and protects the injectors from starvation.
Installation note: The regulator cap is under spring tension. Hold it firmly while removing the Torx screws or it will pop off hard.
Drain Valve Fluorosilicone O-Ring Rebuild
The yellow drain valve is the most common fuel leak point on the 7.3 fuel bowl. The factory rubber O-rings on the valve shaft harden and shrink, letting diesel seep continuously down the engine block.
Upgrading to fluorosilicone O-rings dramatically extends seal life. Fluorosilicone handles modern ultra-low sulfur diesel and biodiesel blends far better than standard rubber. Rebuild the valve while the bowl is accessible, and torque the four T20 Torx screws to 22 inch-pounds—no more.
One Filter Design to Avoid
Aftermarket unibody filters—where the filter media and plastic cap are fused into one disposable piece—look convenient but cause real problems.
Dimensional variances in unibody filters often result in a poor seal on the central standpipe. Even a small gap lets unfiltered diesel bypass the media entirely and head straight to your injectors. That’s exactly what the filter exists to prevent.
Stick with the two-piece system: a reusable Motorcraft or billet aluminum cap paired with a separate filter element. It fits correctly, seals properly, and costs less over time since you’re only replacing the filter media.
Fuel Filter Micron Rating for the 7.3 Powerstroke
The correct micron rating for the 7.3 Powerstroke is 10 microns absolute. This differs from modern common-rail diesels that need 2–4 micron filtration due to injection pressures exceeding 20,000 PSI.
The HEUI system’s fuel side runs at 40–70 PSI. The internal clearances inside the injectors are larger, tolerating particles up to 10 microns without accelerated wear. A quality 10-micron absolute filter—like the Motorcraft FD-4596—captures contaminants effectively while allowing adequate flow from the lift pump.
Don’t go finer than 10 microns thinking it’s “better.” It restricts flow and creates a pressure drop that hurts performance.
Diagnosing the Fuel Bowl Heater Fuse Failure
If your 7.3 cranks but won’t start and your Wait to Start light doesn’t illuminate, suspect the fuel bowl heater element before anything else.
The heater element sits at the bottom of the fuel bowl interior. When its internal wiring shorts to the bowl casing, it instantly blows a 30-amp fuse in the power distribution box—the same fuse that powers your PCM. No PCM power, no start.
Emergency roadside fix:
- Locate the electrical connector on the rear exterior of the fuel bowl
- Unplug it
- Replace the blown 30-amp fuse
- Start the truck—it’ll run fine without the heater until you replace the element
Plan a permanent repair as soon as you’re home. Install a new heater element inside the bowl with the proper bowl-open procedure.
FAQs: 7.3 Powerstroke Fuel Filter Replacement
Is the Blue Spring upgrade actually necessary?
It’s not required if your truck runs perfectly under all load conditions. But it’s universally recommended as preventative maintenance. Factory regulator springs lose tension over decades of heat cycling, causing fuel pressure to sag during hard acceleration. The Blue Spring raises baseline pressure by 10–15 PSI, keeps injectors properly fueled, and prevents cavitation damage to expensive injector internals.
My fuel bowl cap won’t budge. What should I do?
Don’t grab adjustable pliers or hammer a screwdriver onto it. That cracks the composite cap and creates a leak. Use a purpose-built strap wrench or fitted cap socket and apply steady torque with a cold engine. Thermal expansion from heat makes seized caps much harder to break loose.
Why does my truck need a 10-micron filter instead of a finer one?
The HEUI system runs fuel at 40–70 PSI, which is low compared to modern common-rail systems. The injector’s fuel-side clearances are slightly larger and can tolerate particles up to 10 microns without damage. A 10-micron absolute filter provides full protection without restricting flow from the lift pump.
Should I use an aftermarket unibody filter?
No. Aftermarket unibody filters frequently don’t seal correctly on the fuel bowl standpipe, allowing unfiltered fuel to bypass the media. Stick with the two-piece system: a reusable cap paired with a proper separate filter element. The fitment is precise, the seal is reliable, and it’s the setup the fuel bowl was engineered for.
How do I prime the fuel system after changing the filter on a Super Duty?
Cycle the ignition key to ON (no cranking) for 20–30 seconds, turn it off, wait briefly, and repeat at least six times. The electric frame-mounted pump fills the bowl and purges trapped air through the return line with each cycle. Then start the engine and check for leaks at the bowl cap.