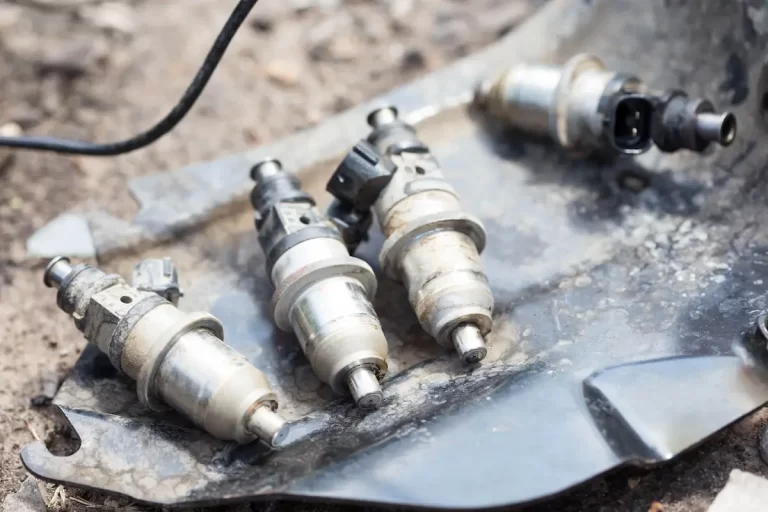
Got a 7.3 Powerstroke that’s misfiring, smoking, or barely waking up on cold mornings? It might be time for a 7.3 Powerstroke injector replacement. This guide walks you through everything — from spotting bad injectors to torquing the hold-down bolts correctly. Stick around to the end, because skipping even one step here can cost you an engine.
What Makes the 7.3 Powerstroke Injector System Unique
The 7.3 Powerstroke doesn’t use a traditional high-pressure fuel pump. Instead, it runs a Hydraulically Actuated Electronically Controlled Unit Injector (HEUI) system. High-pressure engine oil — not fuel — fires the injectors.
Here’s the clever part: each injector has an internal intensifier piston with a 7:1 surface area ratio. So when the high-pressure oil pump delivers 3,000 PSI of oil pressure, the piston multiplies that force to generate up to 21,000 PSI of fuel injection pressure — even at idle speed.
That design gave the 7.3 extraordinary low-end torque and clean combustion for its era. But after hundreds of thousands of miles, the internal poppet valves, armature plates, and nozzle springs wear down. That wear leads to “stiction” (sticky internal components caused by thick oil clinging to worn metal surfaces) and eventually full injector failure.
How to Tell Your Injectors Are Failing
Don’t just throw parts at it. Watch for these specific symptoms first:
- Rough idle that smooths out when warm — classic cold stiction from worn armature plates
- Hard cold starts with white or blue smoke — fuel isn’t atomizing properly
- Power loss under load — weak injectors can’t keep up at wide-open throttle
- Violent shaking on startup — one or more cylinders misfiring
- Check engine light with codes P0261–P0284 or P1316 — electrical faults in the injector circuit
The temperature-dependent behavior is the big tell. If your 7.3 runs terribly when cold but irons itself out after 10 minutes of idling, that’s worn armatures and cold oil stiction — almost every time.
Run the Buzz Test Before You Touch a Wrench
Before tearing into this engine, run a Key-On Engine-Off Injector Buzz Test using FORScan. This free or low-cost diagnostic software pairs with an OBD-II adapter and commands the Injector Driver Module to fire each injector individually.
What to listen for:
- Healthy injector → sharp, crisp metallic buzz
- Worn or failing injector → dull thud or complete silence
Critical rule: Run this test on a cold engine only. When oil is thick and cold, it creates a vacuum seal under worn armature plates. A bad injector that fails when cold may buzz fine once the engine warms up and the oil thins out. Cold engine = honest test results.
After the buzz test, run a Cylinder Contribution Test on a warm engine. The Powertrain Control Module watches crankshaft acceleration as each cylinder fires. A cylinder that doesn’t accelerate the crank normally gets flagged — and that’s your weak injector.
Know Your Injector Code Before You Buy Anything
This is where a lot of people make expensive mistakes. The 7.3 Powerstroke used several injector generations across its production run (1994–2003), and mixing codes in the same engine causes real damage.
Here’s the breakdown:
| Injector Code | Years | Flow Rate | Injection Style | Notes |
|---|---|---|---|---|
| AA | 1994–1997 (Federal) | 90 cc | Single-Shot | OBS F-Series and Econoline standard equipment |
| AB | 1997 (CA) / Early 1999 (Federal) | 120–130 cc | Split-Shot | First California emissions-compliant injector |
| AC | Navistar T444E Commercial | 160 cc | Single-Shot | Never stock in Ford light-duty trucks; popular performance upgrade |
| AD | Late 1999–2003 (Federal) | 135–140 cc | Split-Shot | Most common Super Duty and Excursion injector |
| AE | 2001–2003 (Cylinder 8 Only) | 120–140 cc | Split-Shot (Long Lead) | Fixes the cylinder 8 “cackle” caused by pressure drop at the end of the fuel rail |
The code is engraved directly on the solenoid assembly at the top of each injector. You must match it exactly unless you’re running custom PCM tuning software. Mixing single-shot and split-shot injectors in the same engine creates dangerous cylinder imbalances.
If you’re considering aftermarket performance injectors with dual-number designations like “238/80,” your PCM needs a custom tune to handle the extra fuel. Skip the tune and you’ll smoke the engine.
Check the Injector Driver Module and Valve Cover Harness First
A P1316 code doesn’t automatically mean your injectors are dead. The Injector Driver Module (IDM) steps battery voltage up to 110–115 volts to fire the injectors against 3,000+ PSI of oil pressure. If the IDM has an internal fault, it mimics a dead injector perfectly.
More often though, the real culprit is the Under Valve Cover Harness (UVCH). This harness carries high-voltage signals through the valve cover gasket to each injector and glow plug. After years of heat cycles and diesel vibration, the plastic retaining clips on the harness connectors get brittle and pop loose.
When that happens, you lose electrical continuity to entire cylinder banks. The engine misfires, the IDM may shut down a bank to prevent an electrical fire, and you’ll swear the injectors are toast.
Quick test: Pull the 42-pin connector above the driver-side valve cover and measure resistance from the injector power feed pin to the ground pins. Anything under 5 ohms is healthy. Infinite resistance means a broken harness or dead solenoid.
The famous quarter coin fix — wedging a US quarter into the connector locking clip — can restore electrical continuity without replacing the full harness, as long as the metal pins aren’t burnt.
Smart Upgrades to Do While You’re Already In There
Since the engine is fully torn apart anyway, tackle these at the same time:
Fuel Pressure Regulator Spring
Factory base fuel pressure runs 50–55 PSI at idle. Under heavy load, a tired regulator spring drops pressure below 40 PSI. That starves the injectors of fuel and causes internal cavitation — the plunger slams metal-to-metal with no hydraulic cushion. New injectors die fast from that.
Drop in an upgraded “blue” regulator spring to push base pressure up to 65–80 PSI. It’s a cheap part that protects expensive injectors.
IDM Voltage Upgrade
Some remanufacturers offer a high-voltage/high-current IDM that outputs 140 volts instead of the factory 110–115 volts. The stronger electromagnetic pulse opens the poppet valve faster, which delivers crisper throttle response and a smoother idle. Performance-focused owners love it. Fleet operators usually stick with stock-voltage units for long-term reliability.
Glow Plugs — Don’t Cheap Out
You’re already pulling the valve covers. Replace the glow plugs now and save yourself from doing this job twice. Only use Motorcraft ZD-11 or ZD-30 plugs — manufactured in Europe by Beru. Cheap aftermarket glow plugs swell at the tip during heat cycles. When you try to remove them, the tip snaps off inside the cylinder head. Getting it out means pulling the entire cylinder head — a brutal consequence of saving $30 on parts.
Injector Cups: Replace or Leave Alone?
The 7.3 uses thin brass sleeves (called injector cups) pressed into the cylinder head. Each cup has engine coolant on the outside and high-pressure fuel/oil on the inside. Over time, brass cups crack from vibration fatigue or get eaten by acidic coolant.
A cracked cup forces raw diesel fuel into the cooling system. You’ll smell fuel in the degas bottle, lose coolant mysteriously, and eventually risk hydro-locking the engine.
Check your degas bottle. If it smells like diesel or shows fuel contamination, replace the cups during this job. Billet stainless steel cups outlast brass by a wide margin and resist both vibration fatigue and coolant corrosion.
When installing new cups, the bore must be surgically clean. Apply Loctite 620 retaining compound generously, drive the cup in with a proper expansion tool, and let it cure for a full 24 hours before filling the cooling system. Start the engine early and you’ll push the cup right back out.
Step-by-Step 7.3 Powerstroke Injector Replacement
Here’s the essential sequence:
Phase 1: Tear Down
- Disconnect both negative battery cables — the dual-battery setup carries serious amperage
- Remove air intake ducting from air filter to turbocharger inlet
- Loosen charge air cooler boot clamps at the intake manifold and intercooler flanges
- Pull all intercooler plumbing out of the engine bay
- Unbolt and tuck the 42-pin engine harness connector away from the driver-side valve cover
- Disconnect the MAP sensor hose and any heater hose brackets
- Remove all 10 valve cover bolts per side; pull covers carefully
- Disconnect the Under Valve Cover Harness from all 8 injectors and 8 glow plugs
- Lift the valve cover gasket assembly away
Phase 2: Fluid Evacuation — Non-Negotiable
Remove the oil drain plugs and fuel drain plugs at the front and rear faces of both cylinder heads. Let the internal galleys drain completely into catch pans. This step isn’t optional.
Here’s why: When you pull an injector, the O-ring seal breaks instantly. Without draining first, a massive volume of oil and fuel floods the empty injector bore and pools directly on the piston crown. Crank the engine with that fluid trapped there and you hydro-lock — which bends connecting rods, shatters pistons, or cracks the block outright.
Phase 3: Injector Extraction
- Remove the small oil deflector spout bolt from the top of each injector
- Remove the lower outboard hold-down clamp bolt
- Use a dedicated injector puller — apply straight upward pressure only; no rocking or lateral movement
- Work rearmost injectors first for clearance
- Check the nozzle tip immediately — verify the copper sealing washer came out with the injector. If it’s missing, it’s still in the cup. Fish it out with a pick before proceeding. Installing a new injector on top of an old copper washer destroys the new injector.
Phase 4: Clear the Cylinders
Remove all 8 glow plugs. Insert a flexible suction tube through each glow plug bore and vacuum out every drop of pooled fluid with a fluid extractor. Then loosely set the valve covers in place, and use a socket wrench on the crankshaft harmonic balancer bolt to manually rotate the engine two or three full turns. The compression stroke will blast any remaining fluid out the open glow plug holes. Only continue once every cylinder is completely dry.
Phase 5: Install New Injectors
- Coat all three O-rings on each new injector with fresh engine oil — dry O-rings will roll, pinch, and tear on the way in
- Slide the injector straight down into the bore with the hold-down clamp properly oriented
- Apply firm, even downward hand pressure
- Tap the steel collar of the injector (never the plastic solenoid) with a rubber mallet until the sound changes from a dull thud to a sharp metallic ping — that ping confirms the copper washer has bottomed out
Phase 6: Torque Specs
Don’t guess on these. Use a calibrated inch-pound torque wrench:
| Component | Torque | Equivalent |
|---|---|---|
| Injector hold-down bolts | 120 in-lbs | 10 ft-lbs |
| Oil spill deflectors | 108 in-lbs | 9 ft-lbs |
| Glow plugs | 168 in-lbs | 14 ft-lbs |
| Valve cover bolts | 98 in-lbs | ~8 ft-lbs |
| Charge air cooler boots | 60 in-lbs | 5 ft-lbs |
Overtighten the hold-down bolt and it snaps inside the cylinder head. Undertighten it and the injector vibrates loose, destroying the copper washer and losing cylinder compression.
Reinstall the UVCH, making sure every clip fully locks. Reinstall valve covers, intercooler plumbing, intake ducting, and reconnect both batteries.
Priming and First Startup After Replacement
The engine will not start immediately. Don’t panic — this is expected.
Prime the fuel system first: Cycle the ignition to ON for 30 seconds, then OFF. Repeat 4–5 times without engaging the starter. This lets the electric fuel pump fill the empty fuel rails and push trapped air through the return lines.
Fill the HPOP reservoir: Find the small access plug at the front of the engine valley (3/16″ Allen wrench). If the reservoir is low or empty, manually fill it with clean engine oil to about one inch below the top threads. A dry high-pressure oil pump will score its own bearings during the first extended crank.
Cranking protocol: Crank for a maximum of 30 seconds, then rest the starter for at least 2 minutes. Expect up to 6 cranking cycles before the engine fires. The HPOP needs to build 450–500 PSI of oil pressure before the PCM will command injector firing.
When it starts: Expect rough idling, violent shaking, and billowing white smoke. This is completely normal. The high-pressure oil rails are still full of air, and compressed air cushions the injector intensifier pistons, preventing a full stroke. It takes approximately 50 miles of varied driving to fully purge the aerated oil from the system. No heavy towing, no wide-open throttle during that break-in window.
Once the air is purged, the idle smooths out, the smoke disappears, and the full power of the 7.3 returns.
Frequently Asked Questions
What are the main symptoms of failing 7.3 Powerstroke injectors?
Rough idle, cold-start misfires, white or blue smoke on startup, and loss of power under load. The most telling sign is an engine that runs terribly when cold but smooths out as it warms up — that’s classic cold stiction from worn armature plates.
Do I have to use the exact same injector code?
Yes, absolutely — unless you’re running custom PCM tuning software. Mixing codes (especially single-shot with split-shot) causes severe cylinder imbalance, transmission shift errors, and engine damage.
What happens if I don’t drain the cylinder head fluid galleys before pulling injectors?
Massive volumes of oil and fuel flood the cylinder bore. If you crank the engine with that incompressible fluid trapped above the piston, you hydro-lock. That bends connecting rods, shatters pistons, or cracks the block — total engine destruction.
Should I replace the injector cups at the same time?
Not mandatory if your coolant shows zero diesel contamination and you have no unexplained coolant loss. But since you’re already this deep in the job, many experienced techs replace the brass cups with billet stainless steel cups proactively. It guarantees another 200,000 miles of leak-free service.
Why does the engine smoke and shake so badly right after new injectors are installed?
The oil galleys in the cylinder head are full of air. Air compresses, which prevents the injector intensifier pistons from completing their full stroke. After about 50 miles of driving, the aerated oil is fully purged, and the engine idles cleanly.
What’s the correct torque for the injector hold-down bolt?
120 inch-pounds — exactly 10 foot-pounds. Use a calibrated inch-pound torque wrench. Overtightening snaps the bolt in the cylinder head. Undertightening lets the injector vibrate loose and wrecks the copper sealing washer.
Can I test the injectors without taking the engine apart?
Yes. Use FORScan with a compatible OBD-II adapter to run the Injector Buzz Test on a cold engine. Listen for the acoustic difference between a healthy crisp buzz and a dull thud or silence. Run it cold — that’s when worn injectors reveal themselves.