Think your 700R4 is shifting weird or burning up clutches? It’s almost certainly your throttle valve cable. This guide walks you through everything — from how the cable works to step-by-step adjustment, line pressure testing, and what happens when you get it wrong. Stick around to the end before you touch anything.
Why the 700R4 TV Cable Is Nothing Like a Kickdown Cable
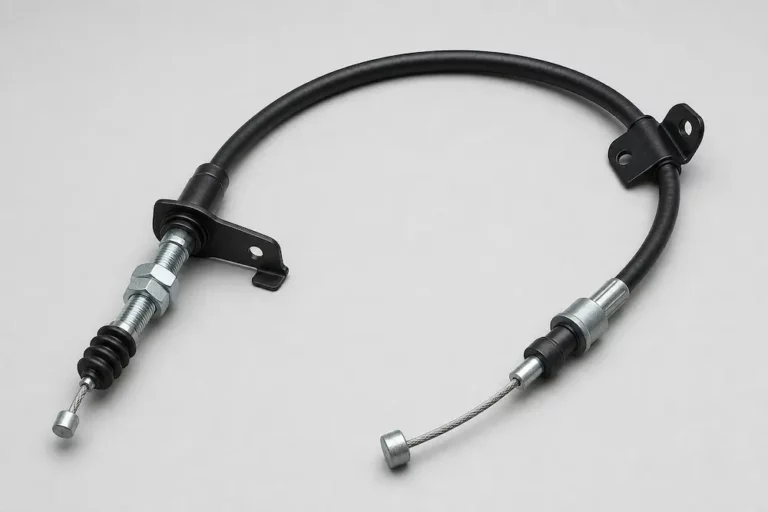
Most people make the same mistake. They treat the 700R4 throttle valve cable like a simple kickdown detent cable — the kind you’d find on a TH350. It’s not. Not even close.
This cable is the primary mechanical signal for the entire hydraulic control system. It controls:
- Internal line pressure
- Shift timing in every gear
- Part-throttle downshifts
- Full-throttle detent downshifts
When you press the gas pedal, the cable pulls an internal plunger that raises hydraulic pressure in direct proportion to engine torque. That pressure is what clamps the clutch packs and bands against the engine’s power output.
Get it wrong and your transmission destroys itself — sometimes within 5,000 miles.
What Happens Inside When You Adjust It Correctly
The 700R4 runs on a balance between two opposing pressures. Governor pressure rises with vehicle speed and commands upshifts. Throttle valve pressure rises with throttle opening and resists upshifts, holding gears longer under load.
Here’s the two-part job the cable does every time you accelerate:
- It signals the boost valve to raise overall line pressure, giving clutch packs more clamping force
- It pushes against shift valves to delay upshifts until the engine reaches proper RPM
If the cable is too loose, line pressure stays low. The clutch packs slip. Heat builds. The fluid turns dark brown and smells burnt. The three-four clutch pack is always the first casualty — it’s the most vulnerable because overdrive gives the least mechanical advantage and needs the most clamping force.
Once those clutches slip, no cable adjustment will fix it. You’re looking at a full rebuild.
The Geometry That Makes or Breaks Everything
The cable doesn’t just need to be “tight enough.” It needs to pull at an exact rate and distance that mirrors how throttle plates open on the engine.
Scribd’s 700R4 TV Cable Adjustment document spells out the engineering specs:
- The cable attachment point must sit 1.090 to 1.120 inches from the exact centerline of the throttle shaft
- The throttle lever must travel through exactly 78 degrees of arc from closed throttle to wide-open throttle
That arc isn’t arbitrary. A steep initial pull right off idle spikes line pressure just as engine torque hits the drivetrain from a standstill. As the throttle approaches wide-open, the pull rate eases slightly to hit peak pressure without damaging the internal mechanism.
Move that attachment point by even a fraction of an inch and the line pressure curve separates from the engine’s torque curve. That’s when shift quality falls apart and wear accelerates.
Adapting the TV Cable to Aftermarket Carbs and EFI
This is where most swap builds go sideways. Factory GM induction systems have that geometry built in. Aftermarket setups don’t.
Aftermarket Carburetors
Holley, Edelbrock, and Carter carburetors are typically designed for TH350 kickdown cables or Ford kickdown systems. Their throttle arm attachment points use the wrong radius. Connect a 700R4 cable there and the cable won’t travel far enough to command full line pressure at wide-open throttle.
The fix is a geometry corrector bracket. Sonnax, Holley, and Edelbrock all make them. The Sonnax cable corrector plate bolts to the primary carburetor mounting bolt and repositions the cable stud to the exact 1.090–1.120 inch radius with the correct 78-degree arc. It’s a simple bolt-on that eliminates the need for custom fabrication.
Skipping this bracket on an aftermarket carburetor practically guarantees a failed transmission.
Braided Aftermarket Cable Systems
If you’re running a Lokar high-tech kickdown cable, the adjustment method differs from the factory ratcheting cable. You:
- Route the housing to the adjuster bracket with a small extra margin
- Cut the outer housing cleanly with a fine-tooth hacksaw
- Install the inner cable through the aluminum slide fitting
- Position the primary cable stop approximately 1.5 inches from the hex fitting and tighten the set screw
- Hold the throttle wide-open, pull the inner cable tight by hand, slide the stop against the fitting, and lock it
At wide-open throttle, there must be zero slack in the inner wire.
EFI Throttle Bodies
Aftermarket EFI systems like Holley Sniper and FiTech add another layer of complexity. Many use simultaneous throttle blade actuation — all four blades open at once — instead of the progressive secondary opening on most carburetors.
That means the engine produces far more torque at lower throttle percentages. Standard geometry won’t command enough line pressure fast enough to handle it.
Before touching any cable geometry on an EFI setup, FiTech’s setup instructions make clear that idle air control steps must read between 3 and 10 at warm idle. If the throttle blades are resting in the wrong position, your baseline cable adjustment starts from a corrupted reference point.
For a cleaner solution, the Bowler Tru-Shift kit uses a custom cam profile and auto-adjusting bracket to mechanically match cable pull to aggressive EFI torque curves. Push the pedal to wide-open throttle once during install and it self-aligns. Worth noting: it’s not compatible with Rochester Quadrajet carbs or dual-quad injection setups, so verify fitment first.
How to Do the Standard OEM Adjustment
This procedure covers stock or correctly adapted setups with the factory ratcheting cable. Engine off for the entire process.
Gasoline Engines — Step-by-Step
Before you start, confirm two things: the accelerator pedal opens the throttle completely to wide-open throttle without binding on carpet, and the return springs snap the throttle back to idle without hesitation.
- Locate the adjuster on the engine bracket — look for the D-shaped locking tab on the adjustment block
- Press and hold the D-shaped tab firmly
- Push the outer slider tube all the way back toward the firewall as far as it’ll go
- Release the tab — the slider is now unlocked and ready to ratchet
- Have an assistant press the accelerator pedal to the floor, or manually rotate the throttle lever to wide-open throttle by hand
- As the throttle opens fully, tension pulls the slider forward — you’ll hear several distinct audible clicks as it ratchets to the correct length
- Release the throttle back to idle
That’s it for the coarse adjustment. The clicking is critical — if you don’t hear clicks, the cable isn’t engaging the ratchet mechanism and the adjustment didn’t set correctly.
Diesel Engines (6.2L GM)
The diesel procedure works differently because the cable attaches to a mechanical fuel injection pump rather than a carburetor throttle body. The full sequence:
- Engine off, cruise control rod removed if equipped
- Disconnect the transmission cable from the injection pump throttle lever
- Loosen the injection pump rod locknut and shorten the rod several turns
- Manually rotate the injection pump lever to wide-open throttle and temporarily tighten the locknut
- Lengthen the pump rod until the lever contacts the internal full-throttle hard stop
- Tighten the pump rod locknut securely
- Reconnect the transmission cable
- Press the D-tab, push the slider back to the firewall, release, then rotate the lever to wide-open throttle
- Let the slider ratchet forward with audible clicks, then reconnect the cruise control rod
Dynamic Road Testing and Fine-Tuning
Static adjustment gets you close. Road testing confirms it’s right.
Mark your baseline slider position with a paint pen before driving — you need that reference point if adjustments are needed.
Here are the shift speed targets to watch during a light-to-moderate acceleration test on flat ground:
| Shift Transition | Throttle | Target Speed |
|---|---|---|
| 1st → 2nd | Light to Moderate | 15–20 mph |
| 2nd → 3rd | Light to Moderate | 25–30 mph |
| 3rd → 4th (OD) | Light to Moderate | 40–45 mph |
Shifts too early or feels soft? The cable is too loose. Pull over immediately. Press the D-tab, pull the slider back one or two clicks toward the firewall, re-test.
Shifts too late, harsh, and neck-snapping? The cable is too tight. Press the tab and push the slider forward one or two clicks toward the radiator.
Never adjust more than one or two clicks at a time. Large changes wreck the hydraulic balance fast.
The final test: Drive in second gear at 25–30 mph and mash the throttle to the floor. The transmission must immediately downshift to first gear. If it doesn’t, tighten the cable one click at a time until it does. A transmission that refuses a full-throttle kickdown isn’t generating enough line pressure under load, and it won’t last long.
Cold weather note: cable housing contracts in freezing temperatures and can tighten the effective cable length. If your shifts get suddenly harsh in winter, loosen by one click and retest.
Line Pressure Testing: The Only Way to Know for Sure
Road testing tells you how it feels. A pressure gauge tells you what’s actually happening inside.
Finding the Test Port
The main line pressure test port sits on the driver’s side of the transmission case, just above the manual shift linkage. It’s plugged from the factory with a 1/8-inch NPT threaded plug. Thread in a brass adapter carefully — over-tightening cracks the aluminum case. Connect a high-pressure hose to a gauge rated for at least 300 psi, route it safely into the cabin, and keep it away from rotating parts, fans, and exhaust.
All readings must be taken at full operating temperature. Cold fluid is thicker and reads artificially high, hiding real pressure loss issues.
Target Pressure Ranges
| Condition | RPM | Gear | Expected Pressure |
|---|---|---|---|
| Base Idle | ~1000–1200 | Park / Neutral | 70–90 psi |
| Base Idle | ~1000–1200 | Drive / OD | 70–90 psi |
| Base Idle | ~1000–1200 | Reverse | 120–140 psi |
| Full Throttle Stall | Max Stall | Forward Gears | 150–225 psi |
| Full Throttle Stall | Max Stall | Reverse | 200–250+ psi |
At wide-open throttle, line pressure must hit at least 150 psi in forward gears. Optimal range sits between 190 and 225 psi. Transmissions with performance valve bodies or upgraded pump regulator springs may push toward 250–300 psi. TCI Auto’s line pressure specifications confirm these as standard diagnostic benchmarks.
What Low or High Readings Mean
Low pressure across all gears: Restricted filter, worn front pump, or a worn pressure regulator valve bleeding fluid back to the sump.
Low pressure in forward gears only, normal in Park/Neutral: Massive leak in the forward clutch circuit or failed accumulator piston seals.
Acceptable idle pressure but won’t rise under load: The cable system is the first suspect. Loose cable, bad geometry, sticking plunger, or broken internal spring. If external geometry checks out, the valve body needs to come out for internal inspection.
High idle pressure that won’t drop when you disconnect the cable: The internal plunger is jammed open by debris, or the main pressure regulator valve is seized in its bore.
What a Misadjusted TV Cable Actually Does to Your Transmission
Too Loose: The Fast Path to a Rebuild
Early, stacked shifts. The vehicle lumbers into overdrive before 30 mph. The engine lugs. The three-four clutch pack slips. The fluid turns dark brown and smells burnt. Once slippage starts, you’re past the point of cable adjustment saving anything — the friction material is gone.
Too Tight: Hard Parts Take the Beating
Bone-jarring shifts at low speeds. The transmission refuses to upshift at cruise RPM. Violent gear engagement over thousands of miles cracks the sun gear shell, destroys the forward sprag clutch, blows out rubber lip seals, and eats the pump vanes. The car also becomes unpredictable to drive — it kicks down aggressively at the slightest throttle input.
Internal Upgrades That Protect the System Long-Term
Fixing a Sticking Throttle Valve Plunger
High-mileage 700R4s develop a nasty habit: the steel plunger galls against the soft aluminum valve body bore. The cable can pull it out fine, but the weak return spring can’t push it back when you lift off the throttle. The transmission gets stuck at full line pressure, shifting erratically no matter how perfectly the external cable is set.
The Sonnax plunger sleeve kit fixes this permanently. It installs a precision steel sleeve and an improved plunger with better fluid routing that flushes debris and prevents galling. You’ll need to drop the pan, remove the small roll pin securing the plunger assembly, and swap it in.
Critical warning: During valve body service, don’t install the three-four shift valve backward. A reversed valve means no fourth gear, ever — regardless of cable adjustment.
Upgrading the Boost Valve
While the pan is off, swap the stock 0.395-inch boost valve for a larger 0.500-inch O-ringed aftermarket boost valve. This simple change increases pump capacity and raises overall line pressure across the board — building in a safety margin for the friction materials and firming up shifts noticeably. It compensates for wear that accumulates naturally over high mileage.
The 700r4 Throttle Valve Cable Adjustment Checklist
Before you call the job done, run through this list:
- Throttle opens 100% to wide-open throttle without binding
- Throttle returns to idle fully without hesitation
- Cable attachment point sits 1.090–1.120 inches from throttle shaft centerline
- Throttle lever travels through 78 degrees of arc
- Geometry corrector bracket installed if using aftermarket carb or EFI
- Audible ratchet clicks heard during wide-open throttle coarse adjustment
- 1→2 upshift occurs between 15–20 mph under light throttle
- 2→3 upshift occurs between 25–30 mph under light throttle
- 3→4 upshift occurs between 40–45 mph under light throttle
- Full-throttle kickdown from 2nd to 1st confirmed at 25–30 mph
- Line pressure reads 70–90 psi at idle in drive
- Line pressure reaches 150+ psi at full throttle stall
The 700R4 is a tough, capable transmission. But it doesn’t forgive a lazy cable adjustment — especially in a swap build paired with a modern engine. Nail the geometry, set the cable precisely, test it on the road, and verify it with a gauge. That’s the whole job.