Got a ticking Chevy 350 that’s driving you crazy? Or maybe you’re building one from scratch and don’t want to trash it on the first startup? Either way, a proper Chevy 350 valve adjustment is one of the most important things you can do for this engine. Get it wrong, and you’ll burn valves, lose power, or destroy a lifter. Get it right, and the thing runs like a sewing machine. Read every section — the details matter here.
Why the Chevy 350 Valvetrain Needs Precise Adjustment
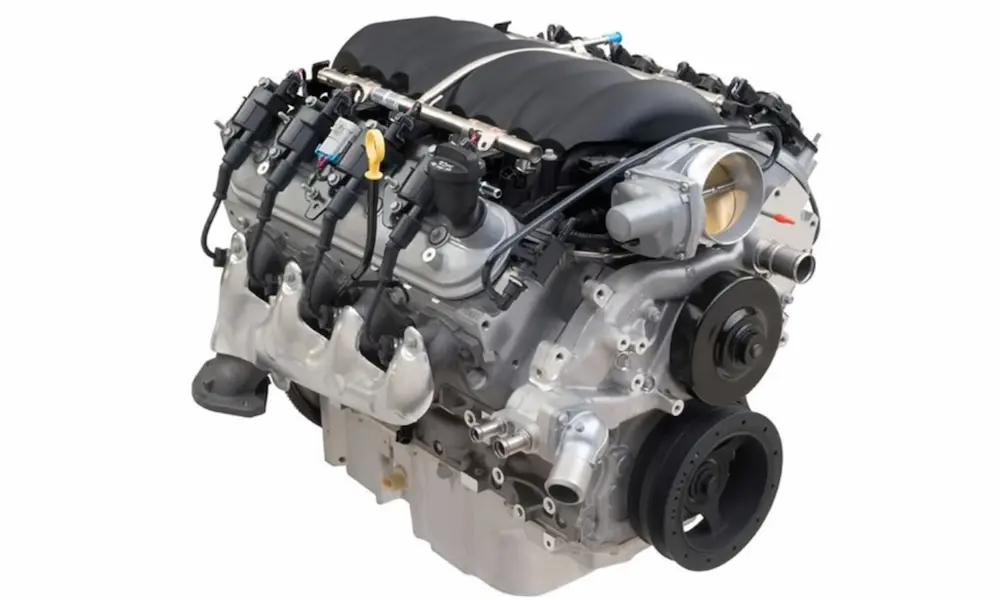
The small block Chevy 350 uses an overhead valve design. The camshaft sits in the block, and pushrods carry the cam’s motion up to the rocker arms, which then open and close the valves.
There’s no fancy variable timing here. No hydraulic cam phasers. Just metal parts moving in a very specific sequence — and they need to be set up correctly.
Too loose? You get valve lash noise, worn valve tips, and power loss. Too tight? You hold the valves open, burn the seats, and lose compression fast.
One thing worth knowing: the 350’s cylinder heads place the center two exhaust valves right next to each other. That creates a concentrated heat zone. Those center exhaust valves run hotter than the rest, so even a small error in adjustment can burn a seat there faster than anywhere else on the engine.
Hydraulic vs. Solid Lifters: Two Very Different Adjustments
Before you touch a wrench, you need to know what kind of lifters your engine has. The adjustment process is completely different between the two types.
Hydraulic Lifters
Hydraulic lifters use engine oil pressure to automatically take up slack in the valvetrain. They have an internal plunger, a check valve, and a return spring inside a hollow body. When the engine runs, pressurized oil fills the lifter and locks it solid — then it transfers the full cam lift to the pushrod.
Because they self-adjust with oil pressure, hydraulic lifters don’t need a physical gap (lash). Instead, they need lifter preload — a specific amount of plunger compression measured in turns of the rocker nut past zero lash.
Set it too shallow, and the plunger bottoms out against its retaining clip, causing a tick. Set it too deep, and high-pressure oil pumps the lifter up at high RPM, holding the valve open. That’s valve float — and it can send a piston into an open valve.
Solid (Mechanical) Lifters
Solid lifters are exactly what the name says: a solid metal cylinder with no internal hydraulics. They transfer cam motion with zero give.
Because the engine’s metal parts expand when hot, a solid lifter valvetrain requires a physical gap between the rocker arm and valve stem tip. Without it, thermal expansion would force the valves open during combustion — and burn them fast.
You set this gap with a feeler gauge. It’s called valve lash, and it’s measured in thousandths of an inch.
| Feature | Hydraulic Lifters | Solid Lifters |
|---|---|---|
| Adjustment type | Lifter preload (turns past zero lash) | Valve lash (feeler gauge gap) |
| Internal mechanism | Oil plunger, check valve, spring | Rigid metal cylinder |
| Maintenance | Near zero after initial setup | Periodic re-adjustment required |
| Noise level | Quiet — no gap | Audible mechanical clatter |
| High RPM performance | Limited by pump-up risk | Excellent — limited by valve spring only |
What You Need Before You Start
Don’t skip prep. The right tools and engine positioning make this job clean and accurate.
Tools you’ll need:
- Valve cover gaskets (new ones — don’t reuse)
- Feeler gauge set (for solid lifters)
- Torque wrench and ratchet set
- Breaker bar with a 5/8-inch socket — not 16mm
That last point matters. The harmonic balancer bolt on the Chevy 350 is a 7/16-inch fine-thread imperial fastener. A 16mm metric socket is close but not exact. Use a breaker bar with a loose socket on that bolt, and you’ll round it off. Use the correct 5/8-inch imperial socket every time.
Remove before adjusting:
- Both valve covers
- All spark plugs (makes rotating the engine much easier)
With the plugs out, the engine rotates smoothly by hand using the breaker bar on the harmonic balancer bolt. You’ll rotate it clockwise — always clockwise when viewed from the front.
Finding Top Dead Center on Cylinder One
Every static valve adjustment starts at the same place: Top Dead Center (TDC) on the compression stroke for cylinder number one.
Cylinder one sits at the front of the driver’s side bank. The driver’s side contains cylinders 1, 3, 5, and 7.
Here’s the catch — the piston hits TDC twice per full engine cycle. Once on compression, once on exhaust. You need the compression stroke, not the exhaust stroke.
Here’s how to confirm you’re on compression:
Rotate the engine slowly clockwise while watching the rocker arms on cylinder one. You’ll see the exhaust valve open, then close. Right after it closes, the intake valve will open briefly, then close. Once the intake valve fully closes and your timing mark lines up with zero on the timing tab — that’s TDC compression. Both valves are closed, and both lifters sit on the base circle of the cam lobe.
Now you’re ready to adjust.
Three Methods to Sequence Your Chevy 350 Valve Adjustment
Method 1: The Two-Stop Factory Sequence
This is the method from Chevy’s original factory service manuals. It gets all 16 valves done in just two crankshaft positions.
Position 1 — Cylinder 1 at TDC compression:
| Valve Type | Cylinders to Adjust |
|---|---|
| Intake | 1, 2, 5, 7 |
| Exhaust | 1, 3, 4, 8 |
Rotate the crank one full turn (360°). Now cylinder 6 is at TDC compression.
Position 2 — Cylinder 6 at TDC compression:
| Valve Type | Cylinders to Adjust |
|---|---|
| Intake | 3, 4, 6, 8 |
| Exhaust | 2, 5, 6, 7 |
This method works great for stock engines with mild camshafts. But if you’re running an aggressive aftermarket cam with long duration lobes, skip this method. The lifters may not be fully on the base circle at these two positions — and you’ll get a sloppy, inaccurate adjustment.
Method 2: The Eight-Stop (90-Degree) Sequence
This is the most accurate method available, and it’s what professional engine builders use on high-performance builds. It follows the firing order exactly: 1-8-4-3-6-5-7-2.
Mark your harmonic balancer with chalk at four 90-degree intervals starting from the zero timing line. Then work through this sequence:
| Step | Crankshaft Position | Cylinder at TDC | Adjust Both Valves |
|---|---|---|---|
| 1 | 0° | 1 | Intake & Exhaust |
| 2 | 90° | 8 | Intake & Exhaust |
| 3 | 180° | 4 | Intake & Exhaust |
| 4 | 270° | 3 | Intake & Exhaust |
| 5 | 360° | 6 | Intake & Exhaust |
| 6 | 450° | 5 | Intake & Exhaust |
| 7 | 540° | 7 | Intake & Exhaust |
| 8 | 630° | 2 | Intake & Exhaust |
Two full crank revolutions (720°) covers every valve. Every single lifter is guaranteed to be on the base circle when adjusted.
Method 3: The EO-IC Method (Exhaust Opening / Intake Closing)
This one needs no chalk marks and no memorized firing order. You just watch the valves move.
- For the intake valve: Rotate the engine until the exhaust valve just starts to open. At that exact moment, adjust the intake valve on that same cylinder.
- For the exhaust valve: Continue rotating until the intake valve opens fully and starts closing. At that exact moment, adjust the exhaust valve on that same cylinder.
The EO-IC method is popular with builders running aggressive solid roller cams. It verifies base circle position through real mechanical movement, not a mathematical estimate.
How to Actually Set the Adjustment: Zero Lash Technique
No matter which sequence method you use, the physical act of setting each valve is the same.
Finding Zero Lash
Zero lash is the exact point where all slack in the valvetrain disappears — but before you compress the hydraulic lifter’s plunger at all.
The pushrod twirl method: Hold the pushrod between your thumb and finger while slowly tightening the rocker nut. The moment the pushrod stops spinning freely, you’ve hit zero lash.
The problem? Oily fingers can fool you. If you grip too hard, you can force the pushrod to spin even after the plunger starts compressing. That pushes you past zero lash without knowing it.
The vertical movement method: Grab the rocker arm at the pushrod seat and move it up and down rapidly while tightening the nut in small steps. When all vertical movement stops completely — that’s zero lash. Many experienced builders prefer this method because there’s no guessing with friction.
Watch Out for False Zero Lash
Three things can trick you into a wrong reading:
- Dry lifters on a fresh build — No oil means the plunger spring offers almost no resistance. The weight of your tools alone can compress it. The fix: pre-oil your lifters before assembly.
- Pumped-up lifters from a recent run — A lifter full of pressurized oil resists compression hard. Wait several minutes for it to bleed down before finalizing the adjustment.
- Varnished lifters in an old engine — Sticky deposits can cause the plunger to bind and release suddenly, mimicking zero lash. When the engine heats up and the varnish softens, the plunger collapses and the ticking returns.
Applying the Final Preload
Once you’ve confirmed true zero lash, tighten the rocker nut past that point by the specified amount:
- Factory spec (street engine): 1 full turn past zero lash — very quiet, but can cause valve float above 5,700 RPM
- Performance street engine: 1/2 turn past zero lash — good balance of quiet operation and high RPM capability
- High-performance / racing: 1/4 turn or less past zero lash — recommended by most aftermarket cam manufacturers
Locking the Adjustment: Standard Nuts vs. Poly Locks
A perfectly set adjustment is worthless if it vibrates loose under load.
Standard interference-fit nuts work fine from the factory. They have slightly distorted internal threads that create friction when installed. But every time you remove and reinstall them, the threads wear smooth and the locking action weakens. On a high-revving engine, they’ll back off.
Poly Locks are the proper choice for performance applications and any engine running solid lifters. A Poly Lock has a tall outer hex body and an internal Allen-head set screw. You set your lash with the outer hex, then drive the set screw down onto the top of the rocker stud. The opposing tension between the set screw pushing down and the hex body threading up jams the assembly permanently in place.
One critical note: tightening the set screw alone can pull the outer hex body upward and tighten your lash by 1-2 thousandths of an inch. Always hold the outer nut firmly with a wrench while you torque the Allen set screw. That keeps everything locked at exactly the spec you set.
Cold vs. Hot Lash: Thermal Expansion Matters for Solid Lifters
If you’re running solid lifters, your feeler gauge reading changes between cold and hot. Metal expands as it heats up, and different materials expand at different rates.
Most cam manufacturers give you a hot lash spec. But you need to set cold lash to start and warm the engine up first. Here’s how to adjust your cold setting based on your engine’s construction:
- Cast iron block + cast iron heads: Add +0.002″ to the hot spec for cold setting
- Cast iron block + aluminum heads: Subtract -0.006″ from the hot spec for cold setting
- Aluminum block + aluminum heads: Subtract -0.012″ from the hot spec for cold setting
Aluminum expands much faster than cast iron. Aluminum heads pull the rocker studs away from the pushrods as they heat up — opening the lash gap. So you start tighter when cold to end up right when hot.
Get this wrong and you’ll have an engine that’s quiet when cold and chatters badly at operating temperature. Or worse — one that binds the valves open when hot and burns your seats.
Diagnosing Common Valvetrain Problems
Ticking That Goes Away After Warm-Up
This is the most common complaint with aging 350 engines. The lifter bleeds down overnight when the engine sits. On startup, the plunger collapses slightly and creates a small gap — hence the tick. Once the oil pump builds pressure and refills the lifter, the noise stops.
Worn internal clearances in older lifters make this worse. Slightly heavier oil can help — thin synthetic drains out of worn lifters faster than conventional oil.
If the tick never goes away regardless of temperature, you’ve got a failed lifter, a clogged check valve, or a rocker nut that backed off. Those need to be fixed immediately, not ignored.
Valve Float at High RPM
Valve float feels like a sudden power drop and rough misfire at high engine speeds. The engine may stumble violently above a certain RPM and then recover when you back off the throttle.
Excessive preload depth is the most common cause. Too much preload leaves the plunger almost no room to absorb oil pressure spikes at high RPM. The lifter refuses to bleed down and physically holds the valve open off its seat.
In severe cases, the piston hits the open valve. That ends the engine immediately. If you suspect valve float, back the preload off to a lighter setting and retest before pushing the engine hard again.
Running Adjustment (Engine Hot): Use With Caution
Some shops still adjust valves with the engine running. It gives instant auditory feedback — you loosen the nut until the ticking starts, then tighten until it stops. That’s your zero lash baseline.
If you go this route, install metal deflector clips over the rocker arms before you start. Without them, hot pressurized oil sprays across everything — including exhaust manifolds. That’s a real fire risk.
The bigger issue: running adjustments are inherently less accurate. Oil aeration, fluctuating idle pressure, and the noise of a running engine all work against you. Always apply preload in quarter-turn stages when the engine is running, pausing between each stage to let the lifter bleed and the idle settle.
For any serious engine build, static cold adjustment is cleaner, safer, and more accurate. Save the running method for a quick field diagnosis, not a final setup.