Weak airflow, mystery smells, and foggy windows—your cabin air filter is probably the culprit. This guide covers every Honda Accord generation from 1998 to 2026, so you’ll find exactly what you need. Stick around to the end—there’s a warranty myth we need to bust that could save you serious money.
Why Your Cabin Air Filter Actually Matters
Your cabin air filter does more than clean the air you breathe. It protects the blower motor and evaporator core from dirt buildup. When debris coats the evaporator, it creates an insulating layer that kills thermal efficiency and grows mold.
A clean filter keeps your AC cold, your defroster fast, and your blower motor alive. Ignore it long enough, and you’re looking at a blower motor replacement—not a $20 filter swap.
Which Filter Fits Your Honda Accord?
Before you buy anything, find your generation in this table.
| Accord Generation | Model Years | OEM Part Number | Aftermarket Cross-Reference | Replacement Time | Tools Needed |
|---|---|---|---|---|---|
| 6th Gen | 1998–2002 | Varies | Varies | 30+ minutes | Screwdriver, sockets, utility knife |
| 7th & 8th Gen | 2003–2012 | 80292-SDA-407 | CF10134 | 10 minutes | None |
| 9th & 10th Gen | 2013–2022 | 80292-SDA-407 | CF10134 | 8 minutes | None |
| 11th Gen | 2023–2026 | 80291-TF3-E01 | CF11182 | 8 minutes | None |
The 2003–2022 models share the same part number. However, if you drive a 2018–2022 Accord, Honda superseded the original part. The newer filter is slightly firmer, so you may need to gently squeeze the sides to seat it properly.
The 2023–2026 models use a carrier tray system—the filter and tray slide in together as one unit. Don’t buy the old part number for a new car.
The 1998–2002 Accord: The Painful One
Let’s be honest—the sixth-gen is a chore. The filter hides behind the glove box, blocked by a plastic dashboard support beam.
Here’s the deal: on your first replacement, you have to cut that beam out with a utility knife. It’s a one-time destructive step that Honda didn’t exactly design for easy DIY access. After that, you still need to remove bolts, retaining clips, and lower trim panels—budget at least 30 minutes.
One more thing for JDM imports: If you bought a Japanese Domestic Market sixth-gen (like the SiR-T), there’s no filter housing at all. The blower housing is molded shut. Enthusiasts who import these vehicles often cut open the plastic outline and retrofit a US-spec filter frame—otherwise, pine needles and dust go straight into the blower.
Lost the screws? This 8-pack steel replacement set covers OEM part numbers 90091-RAA-A00 and 90091-P36-000 and keeps the air box sealed tight.
Step-by-Step: 2003–2026 Accord Replacement
This works for every Accord from 2003 to 2026. The minor differences by generation are called out as you go.
Step 1: Empty the Glove Box Completely
The filter lives behind the glove box. Once you release the retaining stops, the door drops—and anything inside falls onto the floor. Empty it first. Every single time, someone skips this and regrets it.
Step 2: Unhook the Damper Arm
On the right outer wall of the open glove box, you’ll see a small pneumatic piston or plastic strap. That’s the damper arm—it controls how gently the glove box opens.
This is the most broken part of this whole job. People assume the box is stuck and yank it. That snaps the plastic mounting post and means a new glove box assembly. Instead, press gently outward on the arm’s loop until it pops off the post. No tools. No force.
Step 3: Squeeze the Side Walls and Drop the Glove Box
Both side walls have plastic stops that sit inside dashboard channels. Press both walls inward simultaneously—the plastic flexes on purpose. Once the stops clear, the glove box swings down and hangs in the footwell, exposing the HVAC housing behind it.
Step 4: Open the Filter Housing Cover
Look at the top of the black plastic blower housing. You’ll see a rectangular access door.
- 2003–2012: Slide the cover horizontally along a track (toward the passenger door)
- 2013–2022: Press the flexible tabs on both sides inward and lift the cover off
- 2023–2026: The entire carrier tray slides straight out as one unit
Step 5: Pull Out the Old Filter Slowly
Before you touch the filter, look at the airflow arrow on its side and memorize it.
Now pull the filter out slowly and level. The top surface collects leaves, dead bugs, seeds, and grit. Yank it fast and that debris dumps into the blower motor or onto your carpet. Support it from underneath and slide it straight into a trash bag.
If anything fell into the housing, use a narrow vacuum crevice tool to clear it out before you put in the new filter.
Step 6: Install the New Filter (Arrow Pointing Down)
The arrow must point downward, toward the blower motor. Air flows from the cowl above, down through the filter, into the blower.
Install it upside down and the pleats collapse under airflow pressure. You’ll get terrible airflow, faster clogging, and a debris mess on the wrong side when you pull it next time.
- 2003–2022: Slide the bare filter into the housing rails until it’s flush
- 2023–2026: Press the filter firmly into the carrier tray first, then slide the whole unit back in
Step 7: Reseal and Test
| Common Mistake | What Happens | How to Prevent It |
|---|---|---|
| Forcing the glove box down | Snaps the damper arm post | Unhook the damper arm first |
| Installing filter upside down | Collapsed pleats, weak airflow | Arrow points down toward blower |
| Yanking old filter quickly | Debris falls into the blower fan | Pull slowly, support from below |
| Not snapping cover fully | Loud whistling from HVAC vents | Both tabs must click audibly |
Snap the cover back—both clips need to click. Lift the glove box back up until the side stops snap into the dashboard channels. Reattach the damper arm to its post until it clicks. Open and close the glove box once to confirm the damper controls the drop smoothly.
How Often Should You Actually Replace It?
Honda’s Maintenance Minder system uses engine telemetry—temperature, trip length, cold starts—to calculate when maintenance is due. When it displays Sub-Code 2, it’s requesting both air filters plus a drive belt inspection.
The problem? The software can’t see your filter. It doesn’t know about wildfire smoke, construction zones, or highway diesel traffic. Under clean commuting conditions, it triggers around 25,000–30,000 miles. That’s often too long.
| Driving Environment | Recommended Interval | Why |
|---|---|---|
| Standard commuting (system default) | Maintenance Minder Sub-Code 2 | Triggers around 25,000–30,000 miles |
| Urban driving with heavy diesel traffic | 15,000 miles | Honda’s own manual override for high-soot environments |
| Rural dirt roads / wildfire zones | 12,000 miles or 12 months | Ash and grit pack the media fast |
| Light suburban driving | 15,000 miles or 12 months | Prevents moisture retention and odor |
Pull the filter early and find it clean? Great—you spent five minutes. Wait for the algorithm and find it packed solid? Now you’re dealing with a stressed blower motor.
Signs Your Filter Needs to Go Now
Don’t wait for the Maintenance Minder if you’re noticing these symptoms:
- Weak airflow on max fan — the media is physically blocked
- Musty smell when you start the blower — organic debris is decomposing on the filter surface
- Windows fog up and stay foggy — restricted airflow can’t reach the defroster vents fast enough
- Dust on the dashboard right after cleaning — saturated media lets fine particles pass straight through
- Humming or buzzing from behind the glove box — the blower motor is laboring against backpressure, or debris got into the fan cage
That blower motor strain is worth taking seriously. A restricted filter spikes the motor’s electrical draw, generates heat, and eventually burns out the blower resistor—the component that controls fan speeds. A $20 filter beats a $150+ resistor replacement every time.
Cabin Filter vs. Engine Air Filter: Don’t Mix These Up
When Sub-Code 2 triggers, Honda asks you to replace both filters at the same time. These are two completely different parts in two completely different locations.
The engine air filter lives under the hood inside a sealed plastic air box. It protects the combustion chambers from abrasive grit that would score cylinder walls and contaminate engine oil.
The cabin air filter lives inside the dashboard. It protects the people inside the car.
These filters are not interchangeable. Confusing the terminology at a parts counter or with a service advisor can lead to the wrong part getting ordered—or worse, one of them getting skipped entirely.
Which Filter Type Should You Buy?
Not all cabin filters are the same. Here’s what the options actually do:
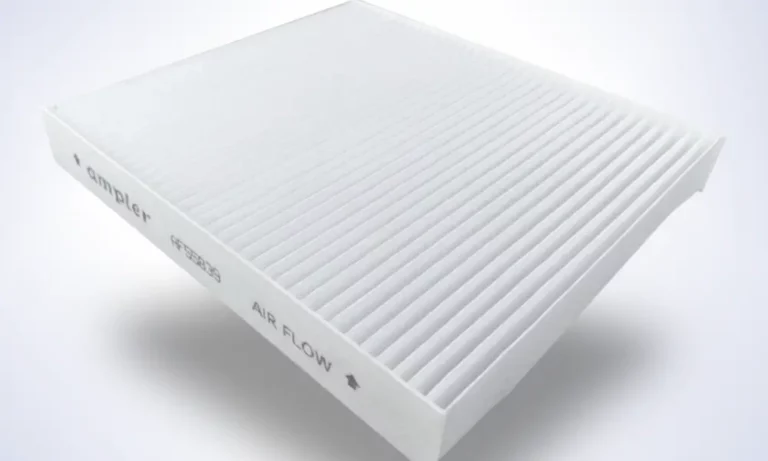
Standard particulate filters trap pollen, dust, and road debris using pleated synthetic fibers. They don’t touch gases or smells. Fine for most drivers.
Carbon-activated filters add a charcoal layer that chemically adsorbs volatile organic compounds and exhaust fumes. If you commute in heavy traffic or near industrial areas, this upgrade is worth it.
Sodium bicarbonate filters (like the Fram Fresh Breeze CF10134 and CF11182) use baking soda to neutralize acidic odor compounds. These work especially well in humid climates where musty smells are a persistent problem.
Washable reusable filters from brands like K&N use electrostatically charged synthetic mesh that traps particles and gets washed and re-oiled rather than thrown away. They’re thinner than OEM paper filters but engineered to the correct outer dimensions. If you go this route, put the warning decal on the housing—dealership technicians will throw it out during an oil change if they don’t know it’s reusable.
Does DIY Replacement Void Your Honda Warranty?
Short answer: no. The Magnuson-Moss Warranty Act is a federal law that protects you here. A dealership can’t void your warranty just because you replaced your cabin filter yourself or used an aftermarket part.
To deny a warranty claim, the dealer must prove that your specific aftermarket part directly caused the failure they’re refusing to cover. Replacing your cabin filter doesn’t affect your transmission, engine, or infotainment warranty—full stop.
Don’t let dealerships charge $60–$90 in labor for an eight-minute, no-tool job.
FAQs
Does a clogged cabin air filter hurt fuel economy?
Not directly. Your cabin filter has no link to the engine or combustion system. However, a clogged filter forces the blower motor to draw more electricity, which puts a slightly higher load on the alternator, which draws marginally more power from the engine. The real-world mpg impact is nearly invisible, but it’s a real thermodynamic effect.
Does the cabin filter work in air recirculation mode?
Yes. The recirculation flap sits upstream of the filter, so all air—fresh or recirculated—passes through the filter media. That said, if your filter smells musty from rotting debris, switching to recirculation won’t help. The air still has to pass through the contaminated filter.
Can a clogged cabin filter cause water on the passenger floor?
Indirectly, yes. Severely restricted airflow can freeze the evaporator core solid. When you shut the car off, that ice melts fast. If the condensation drain tube is even slightly clogged, the water backs up and pours onto the passenger floor carpet—which then grows mold. That’s an expensive fix for a $20 filter.
What if I find rodent nests on the old filter?
Don’t just swap the filter. Rodent urine and droppings on the media are a respiratory hazard. Drop the entire blower motor housing and clean it with enzymatic cleaner. Then block the exterior cowl intake with heavy-duty steel wire mesh before you reinstall anything. Simply replacing the filter and moving on isn’t enough.
What’s causing white dust on my Accord’s dashboard?
Usually not the cabin filter. The two most common culprits are microscopic oxidation flaking off the aluminum evaporator core fins, or an ultrasonic humidifier in your home aerosolizing tap water minerals into the air near an open car window. Cabin filters aren’t designed to capture dissolved mineral aerosols.
My 10th-gen Accord’s new filter seems too stiff to fit—is something wrong?
No. Honda superseded the original 10th-gen part number back to the 2003-spec filter. The updated filter has a slightly firmer perimeter. Just squeeze the sides gently and ease it into the housing. It’ll seat flush once it’s fully in.