Swapped a JDM engine into your Honda Civic and now it’s stuck in limp mode, refusing to rev past 3,000 RPM? You’re dealing with a missing Crankshaft Fluctuation Sensor — and there’s a clean electrical fix for it. This guide breaks down exactly why it happens, what codes you’ll see, and how to perform the Honda Civic crank sensor bypass the right way.
Why Your JDM Engine Triggers Limp Mode
When you drop a Japanese Domestic Market (JDM) engine into a US-spec 1996–2001 Honda Civic, you hit an immediate problem: the JDM engine doesn’t have a Crankshaft Fluctuation Sensor (CKF).
Here’s why that matters.
The US OBD-II regulations, which kicked in for all vehicles from the 1996 model year, required every car to actively monitor engine misfires. Japan didn’t enforce this same standard during that era. So Honda’s Japanese-market engines simply never got the CKF sensor — or the machined mounting boss on the oil pump to hold one.
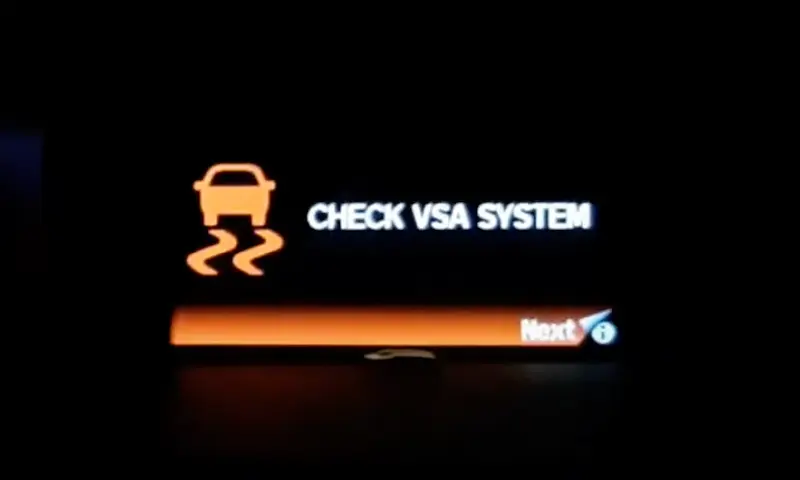
When you bolt that JDM engine in and fire it up with your US OBD-II ECU, the computer searches for the CKF signal. It finds nothing. So it throws a fault code and immediately caps your RPM at around 3,000 as a protective measure.
That’s limp mode — and it won’t go away until you sort the sensor issue.
What the CKF Sensor Actually Does
The Crankshaft Fluctuation Sensor mounts directly to the lower engine block and reads a toothed reluctor wheel fixed to the crankshaft itself. Its only job is detecting tiny speed variations in the crankshaft’s rotation.
When a cylinder fires normally, the combustion event gives the crank a microscopic kick — a brief acceleration. When a cylinder misfires, that kick disappears. The ECU catches that missing acceleration and logs a misfire.
This matters because unburned fuel dumping into your catalytic converter can destroy it fast. The CKF sensor is your engine’s early warning system.
The distributor-based sensors — the CKP, TDC, and CYP sensors — handle base ignition timing and fuel injection just fine. But they read through a timing belt, which introduces mechanical slop that masks those micro-fluctuations. The CKF sensor bypasses all that by reading the crank directly.
The Diagnostic Trouble Codes You’ll See
Knowing your codes helps you confirm exactly what’s going on before you start touching wires.
| Diagnostic Trouble Code | What It Means |
|---|---|
| P1336 / P1337 | CKF sensor circuit issue — the misfire monitor lost its input. This is the one JDM swaps trigger. |
| P0335 | Primary CKP circuit failure — total loss of signal. Engine likely won’t start. |
| P0336 | CKP signal out of range — signal exists but behaves erratically. |
| P1361 / P1362 | TDC sensor fault — causes hard starts and hesitation. |
If you’re seeing P1336 or P1337 after a JDM engine swap, you’re in the right place. A P0335, on the other hand, means your engine likely won’t run at all — that’s a different problem entirely.
Testing Your Sensors First
Don’t skip this step. Before performing any Honda Civic crank sensor bypass, verify that your existing distributor sensors are actually healthy. You’re about to rely on them for two jobs.
Resistance Test
Disconnect the sensor connector and set your multimeter to ohms. Probe the two sensor terminals directly.
A healthy Honda inductive sensor reads between 200 and 1,000 ohms. Here’s what the readings mean:
- Infinite resistance (OL): The internal wire has snapped — open circuit. Replace the sensor.
- Zero ohms: Internal short circuit. Replace the sensor.
- 200–1,000 ohms: Sensor passes this test.
Dynamic Voltage Test
Keep the connector plugged in. Back-probe the sensor terminals carefully. Set your multimeter to AC voltage on a low range (2V or less). Have someone crank the engine.
A working sensor generates a small AC voltage — around 200 millivolts during cranking. No voltage at all means a failed magnetic core or a damaged reluctor wheel.
Oscilloscope Test (Best Method)
If you have access to an automotive oscilloscope, use it. A healthy sensor produces a clean, uniform sine wave. Jagged drops, flat spots, or inconsistent spacing between peaks points to a failing sensor or damaged reluctor wheel teeth.
Your Two Options: Mechanical vs. Electrical Fix
You have two paths to solve the missing CKF problem.
Option 1: Mechanical correction
This means sourcing a US-spec oil pump with the CKF mounting boss, pressing the correct reluctor wheel onto the crank snout, and installing the physical sensor. It’s the factory-correct approach. It’s also extremely labor-intensive — requires pulling the timing belt, oil pump, and front rotating assembly.
Option 2: Honda Civic crank sensor bypass (electrical)
You feed the ECU a surrogate signal from the Cylinder Position Sensor (CYP) inside the distributor. The ECU receives a steady sine wave, interprets it as a functioning CKF signal, and deactivates limp mode. The engine runs normally with full RPM range restored.
Most people doing JDM swaps go with Option 2. It’s effective, it’s reversible, and it doesn’t require disassembling half the engine.
How the Honda Civic Crank Sensor Bypass Works
The ECU just wants to see an AC sine wave on its CKF input pins. It doesn’t care where that signal comes from.
The CYP sensor inside the distributor already generates exactly that — a continuous AC sine wave that rises in frequency as engine speed increases. By tapping the CKF input wires into the CYP output wires, you give the ECU a clean, predictable signal.
Because the distributor reads camshaft rotation (which is mechanically dampened and smooth), the signal shows zero micro-fluctuations. The ECU analyzes it, sees a mathematically perfect rotation, and concludes: no misfires detected. Check engine light off. Limp mode deactivated. Full power restored.
The Wiring: OBD2a vs. OBD2b Pinouts
Honda used two different ECU connector architectures across the 1996–2001 Civic. You need to know which one you have before you touch anything.
- OBD2a: 1996–1998 Civic
- OBD2b: 1999–2001 Civic
Both use Connector C (the blue plug) at the ECU, located behind the passenger-side kick panel. The pinouts are different — using the wrong pins will send signals to the wrong places.
| Architecture | Vehicle Years | CKF Positive (Input) | CKF Negative (Input) | CYP Positive (Donor) | CYP Negative (Donor) |
|---|---|---|---|---|---|
| OBD2a | 1996–1998 | C1 (Blue/Red) | C11 (White/Red) | C4 (Yellow) | C14 (Black) |
| OBD2b | 1999–2001 | C22 | C31 | C29 | C30 |
The actual connections:
- Splice CKF positive → CYP positive
- Splice CKF negative → CYP negative
That’s the entire bypass. Four wires, two connections.
Doing the Splice Correctly
The way you make these connections matters a lot. These sensors operate on tiny AC voltages — sometimes less than half a volt. Bad connections kill the signal.
Don’t use Scotch-Lok connectors. Those plastic insulation-displacement clips introduce resistance, vibrate loose over time, and corrode. They’re fine for speaker wires. They’re not fine for sensitive ECU sensor circuits.
Do this instead:
- Cut the dead CKF wire that runs toward the engine bay. This prevents it from acting as an antenna and feeding electrical noise back into the ECU.
- Strip both wires cleanly — about 15mm of insulation.
- Twist the conductors together firmly.
- Solder the joint with rosin-core solder.
- Cover with dual-wall, adhesive-lined heat shrink tubing.
Soldered joints with proper heat shrink stay reliable through engine heat cycles, vibration, and moisture. This is a permanent modification — do it right once.
What You Lose With This Bypass
This is important. The Honda Civic crank sensor bypass solves your limp mode problem, but it permanently disables genuine misfire detection.
Here’s what that means in practice:
You lose your safety net. If a spark plug fails, an injector clogs, or compression drops in a cylinder, the ECU won’t know. The check engine light won’t flash. No P0300-series codes. You’ll only notice if you feel the vibration or power loss yourself.
Your catalytic converter is at risk. An undetected misfire lets raw fuel dump straight into the cat. That unburned fuel ignites inside the converter, driving temperatures far beyond design limits. The ceramic substrate melts, fuses, and collapses. A destroyed cat creates an exhaust restriction that then damages the engine. It’s a chain reaction.
Emissions testing gets complicated. The bypass tricks the ECU’s internal misfire readiness monitor into showing “Pass.” In states with plug-in OBD-II inspections, the vehicle will likely pass the electronic check. However, intentionally defeating an emissions monitoring device sits in legally grey territory under various state and federal environmental frameworks. Know your local laws.
If you go this route, inspect your spark plugs, ignition wires, and fuel injectors more frequently than you normally would. You’re flying without instruments on misfire detection now.
This Fix Only Works on Specific Engines
The Honda Civic crank sensor bypass is strictly a 1990s OBD-II transitional-era solution. It works because the CKF sensor is a supplementary component — the engine runs without it, it just loses misfire monitoring.
Starting with the 2001 seventh-generation Civic and the D17 engine, Honda ditched the distributor entirely. The CKP sensor moved directly to the engine block, reading the crankshaft with a high-resolution reluctor wheel. On these engines, the CKP handles both timing and misfire detection in one unit.
On D17, K-series, and R18 engines, if you disconnect the crank sensor, the ECU has zero timing reference. It immediately cuts fuel and spark. The engine won’t start, full stop. There’s no bypass concept that applies here.
The bypass trick lives and dies in the 1996–2000 B-series and D-series ecosystem. If you’re working on anything newer, you’re in a completely different world.