Is your Honda Civic running cold, overheating, or throwing a P0128 code? A failing thermostat is likely the culprit. This guide walks you through everything — from spotting the symptoms to bleeding the system like a pro. Stick around to the end, because the bleeding process is where most DIYers go wrong.
What Does the Thermostat Actually Do?
The thermostat is a temperature-controlled valve that sits between your engine block and the radiator. When the engine is cold, it stays shut, letting the engine warm up fast. Once coolant hits around 170–190°F, the thermostat opens and sends hot fluid to the radiator to cool down.
It’s a simple device. No wires. No computer control. Just a wax pellet inside a brass cylinder that expands with heat and pushes a valve open.
One small but critical feature on genuine OEM Honda thermostats is the jiggle valve — a small pin on the flange. It lets trapped air escape past the closed thermostat, preventing air pockets from blocking heat transfer and causing localized overheating.
Signs Your Honda Civic Thermostat Is Failing
Thermostats fail in one of two ways, and each tells a different story.
Stuck Open: Engine Runs Cold
This is the most common failure. The valve won’t fully close, so coolant flows constantly to the radiator — even when the engine is freezing cold.
Symptoms:
- Temperature gauge barely moves off the cold mark
- Gauge rises in city traffic, then drops sharply on the highway
- Heater blows lukewarm or cold air
- Check Engine Light with codes P0128 or P0126
A stuck-open thermostat forces your engine control module to dump extra fuel into the cylinders. That tanks your fuel economy, increases emissions, and can destroy your catalytic converter over time.
Stuck Closed: Engine Overheats Fast
This one’s an emergency. The valve won’t open, trapping heat inside the engine with nowhere to go.
Symptoms:
- Temperature gauge shoots toward the red zone
- Coolant boils over into the reservoir or blows a hose
- Steam from under the hood
Pull over immediately if this happens. Even a few minutes of running with a stuck-closed thermostat can warp your cylinder head or seize the engine.
Honda Civic Thermostat Location by Engine Generation
The thermostat’s location changes depending on which engine you have. Here’s a quick breakdown:
| Engine Family | Common Civic Models | Displacement | Thermostat Location | Access Notes |
|---|---|---|---|---|
| R-Series (R18) | 2006–2015 Civic LX, EX, DX | 1.8L Naturally Aspirated | Lower engine block, front-facing | Move oxygen sensor wiring brackets for socket access |
| L-Series (L15B7) | 2016+ Civic EX-T, Sport, Touring | 1.5L Turbocharged | Side of engine block | Remove plastic turbo inlet tube and vacuum line brackets |
| K-Series (K20/K24) | Civic Si, engine swaps | 2.0L / 2.4L High Performance | Under intake manifold | Aftermarket swivel-neck housings available for custom radiator routing |
2006–2015 Civic (R18 Engine)
The R18 is the most DIY-friendly of the bunch. The thermostat sits at the end of the lower radiator hose on the front of the engine block. You’ll need to unbolt a small oxygen sensor wire bracket to get a clean socket angle. This is a popular first DIY job for good reason — the engine bay has plenty of room to work.
2016–Present Civic (L15B7 Turbo Engine)
The turbocharged engine bay is more cramped. To reach the thermostat housing, you’ll need to remove the rigid plastic turbocharger inlet tube and unclip a few vacuum line brackets. It’s still a doable DIY, but budget an extra 20–30 minutes for the extra disassembly. Here’s a solid walkthrough specific to this engine.
Civic Si and K-Series Engines
The K20 and K24 sit the thermostat low on the block, tucked under the intake manifold. If you’re running a K-swap in an older chassis, the aftermarket offers billet aluminum swivel-neck housings that let you rotate the water outlet 360 degrees — a lifesaver for custom radiator hose routing.
Tools You’ll Need
Don’t start this job without the right gear. Using the wrong tools on aluminum engine components gets expensive fast.
| Tool | Why You Need It |
|---|---|
| 10mm socket (standard and deep) | Removes thermostat housing bolts and wiring brackets |
| Socket extensions and swivel joint | Reaches bolts hidden behind engine components |
| Hose clamp pliers | Safely compresses spring-style radiator hose clamps |
| Calibrated torque wrench | Applies exact torque without cracking aluminum housing |
| Spill-free coolant funnel kit | Essential for bleeding air from the system properly |
| Non-abrasive cleaning pad | Preps aluminum mating surfaces without scratching |
| Drain pan and nitrile gloves | Captures toxic coolant safely |
Step-by-Step: Honda Civic Thermostat Replacement
1. Safety First — Let the Engine Go Cold
Never touch a hot cooling system. The system runs under pressure, and loosening anything while it’s hot can spray boiling coolant and cause serious burns. Let the engine sit for at least two hours, or overnight if possible.
Chock the rear wheels. Jack the front of the car up and support it on quality jack stands under the pinch welds.
2. Drain the Coolant
Remove the radiator cap to break the vacuum seal. Slide under the car and open the plastic petcock at the bottom corner of the radiator into your drain pan. Hand-tight only — no pliers on the plastic petcock or you’ll crack it and need a new radiator.
Watch the color of the draining fluid. Healthy coolant looks translucent blue or green. Brown, milky, or gritty fluid means deeper problems — flush the system thoroughly before installing anything new.
3. Access and Remove the Thermostat Housing
Trace the lower radiator hose from the radiator up to where it meets the engine block. That connection point is your thermostat housing.
Clear your workspace:
- R18 engine: Unbolt the oxygen sensor wire harness bracket
- L15B7 turbo: Remove the turbocharger plastic inlet pipe and vacuum line bracket
Use hose clamp pliers to slide the spring clamp back along the hose. Twist the hose gently to break the seal — it’s probably been bonded to the aluminum for years. Keep a rag handy for the residual coolant spill.
Remove the two or three 10mm bolts holding the housing cover, pull the cover off, and lift out the old thermostat.
4. Clean the Mating Surfaces
This step gets skipped more than it should. Use a non-abrasive synthetic pad to scrub both the engine block and housing cover mating surfaces until they’re clean bare aluminum. No razor blades, no wire brushes — even a small scratch in soft aluminum creates a coolant leak path once the system pressurizes.
5. Install the New Thermostat
Stretch the new rubber O-ring gasket around the thermostat flange. It should lock into the groove and stay put.
Orientation matters here:
- Thermal actuator (brass cylinder) faces inward toward the engine block
- Jiggle valve (small air bleed pin) sits at the 12 o’clock position — the absolute highest point
Getting the jiggle valve wrong traps air in the housing and causes overheating right after the repair. Don’t skip this.
6. Torque the Housing Bolts
Thread the bolts in by hand first — always. Cross-threading steel bolts into aluminum housing is a costly mistake.
Then torque to spec with a calibrated wrench:
| Engine | Bolt Size | Torque Spec |
|---|---|---|
| R18 (1.8L) | 10mm | 7.4 ft-lbs |
| L15B7 (1.5L Turbo) | 10mm | 18 ft-lbs |
| K20/K24 (2.0L/2.4L) | 10mm | 86 in-lbs |
Reinstall the radiator hose, snap the spring clamp back into its original indent, and bolt everything else back into place.
Refilling With the Right Coolant
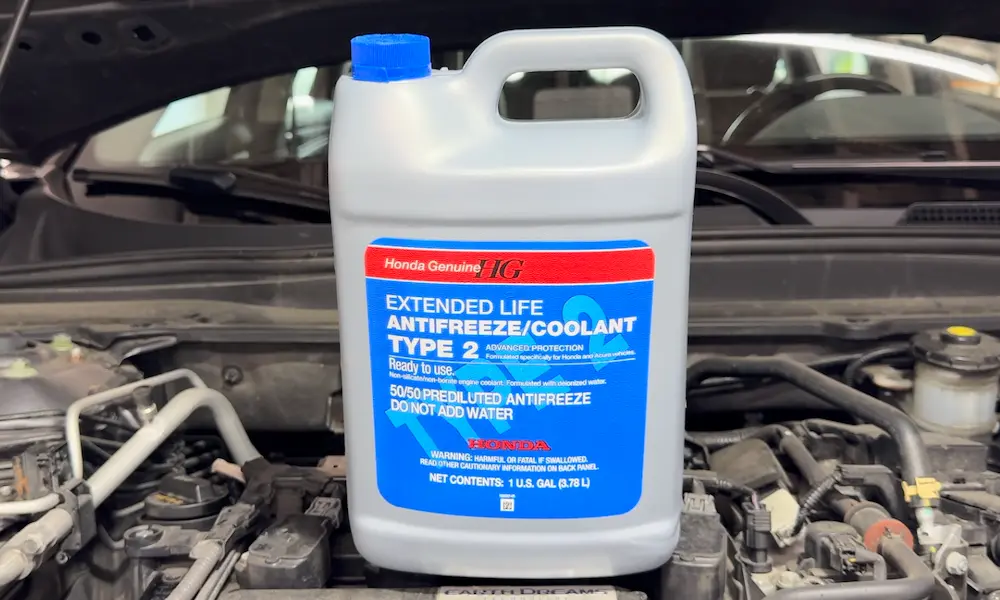
Honda specifies genuine Honda Type 2 coolant — a pre-mixed 50/50 blend of ethylene glycol and demineralized water. This formula uses organic acid technology and phosphate additives instead of silicates. That matters because silicates act as abrasives that wear out the water pump seals on Asian vehicles over time.
Don’t grab a generic universal coolant. It upsets the chemical balance and can damage your new thermostat or heater core.
Coolant is toxic. It smells sweet, which makes it dangerous to pets and kids. Wear nitrile gloves and safety glasses. Drain it into a sealed pan and dispose of it at a certified hazardous waste facility — pouring it down a drain or onto soil is illegal and contaminates local water supplies.
How to Bleed the Cooling System Properly
This is the step that separates a successful repair from a callback. When you drain the system and pull the thermostat, air fills the entire engine block, cylinder head, and radiator. Just topping off the radiator doesn’t push that air out. Trapped air causes localized overheating that can warp a cylinder head fast.
Use a spill-free coolant funnel kit. It attaches to the radiator neck via an adapter, raising the effective fill point above the engine. Physics does the work — air floats up and out while coolant fills in below.
Here’s how the bleeding process works:
- Attach the funnel adapter to the radiator neck
- Pour Honda Type 2 coolant into the funnel until it’s about one-third full
- Set the cabin heater to max heat (fan on low or off) — this opens the heater core valve and pushes air out of the cabin circuit
- Start the engine and let it idle
- Watch for steady small bubbles rising through the funnel — that’s trapped air escaping
- Occasionally rev to 2,000 RPM for two-minute intervals to increase fluid velocity and knock out stubborn air pockets
- Squeeze the upper and lower radiator hoses by hand periodically — this creates pressure waves that dislodge air clinging to hose walls
After 10–20 minutes, the thermostat opens at around 170–190°F. You’ll see a large air burp through the funnel and the fluid level will drop suddenly as the reserve liquid rushes into the engine block. The lower radiator hose will go from cold to hot almost instantly — that tells you coolant is now circulating through the full system loop.
The bleed is complete when:
- The electric cooling fans cycle on and off at least twice
- The temperature gauge holds steady just below the halfway mark
- The cabin vents blow genuinely hot air
- No more bubbles appear in the funnel
Plug the funnel, remove it, install the factory radiator cap, and top the overflow reservoir to the MAX line.
What Does Honda Civic Thermostat Replacement Cost?
Here’s the honest breakdown:
At a shop or dealership:
According to RepairPal, a thermostat replacement on a Honda Civic runs $236–$268 on average — roughly $153–$224 in labor plus parts. If the thermostat housing itself needs replacing due to cracking or corrosion, that jumps to $609–$711.
DIY cost:
A genuine OEM thermostat, gasket, and a gallon of Honda Type 2 coolant typically runs under $60 total. Add a one-time $20–$35 purchase for a spill-free funnel kit and you’re still well under $100.
The Smart Time to Replace Your Thermostat
Honda doesn’t list a standalone mileage interval for thermostat replacement, but experienced technicians treat it as a wear item. The best time to replace it is when the cooling system is already drained for a bigger job.
Two prime examples:
- Valve clearance adjustment — Honda recommends inspection around 100,000 miles on the R18, 80,000–100,000 on K-series, and ~105,000 on the 1.5T. Since the engine needs to be cold anyway, it’s the perfect time to drop in a fresh thermostat.
- Water pump replacement — The coolant is already drained. Spending an extra $30 and 30 minutes to install a new thermostat at the same time is just good sense.
Frequently Asked Questions
Can I just remove the thermostat entirely and skip replacing it?
It’s possible, but genuinely harmful. Without a thermostat, coolant flows constantly at full volume through the radiator and the engine never reaches operating temperature. The ECM stays in permanent “cold start” mode, dumping excess fuel. That washes oil off cylinder walls, destroys fuel economy, and kills the catalytic converter. Paradoxically, a thermostat-free engine can also overheat under heavy load because coolant moves too fast through the radiator to actually shed its heat.
What’s the difference between the ECT sensor and the thermostat?
They do completely different jobs. The thermostat is a mechanical valve — no wires, no signals, just wax and physics. The Engine Coolant Temperature sensor is an electrical thermistor screwed into the cylinder head that reports coolant temp to the gauge and the ECM. Replacing one won’t fix the other. A faulty ECT sensor causes gauge issues; a faulty thermostat causes actual temperature control problems.
Does altitude affect my cooling system?
Yes. At higher elevations — think Colorado or the mountain west — atmospheric pressure drops, which lowers the natural boiling point of liquids. Your radiator cap counteracts this by holding roughly 15 PSI of pressure inside the sealed system, raising the boiling point of your 50/50 coolant mix to around 270°F. That’s why a worn radiator cap is worth replacing when you’re doing this job.
Should I install a lower-temperature aftermarket thermostat for performance?
For a street-driven Civic — even a heavily modified one — no. Your engine’s clearances, ring gaps, and combustion tuning are designed for factory operating temps. Lower-temp thermostats are for dedicated track cars running at maximum RPM continuously, where sustained thermal management outweighs everything else. On the street, a cold-running engine hurts efficiency and longevity.
Why can’t I pour old coolant down the drain?
Ethylene glycol is toxic. It picks up heavy metals from inside your engine over time, making it hazardous waste. Pouring it into storm drains or on soil contaminates the water table. In the US, auto parts stores and municipal hazardous waste centers collect used coolant — it gets processed through vacuum distillation, the glycol is recovered and purified, and it gets remanufactured into new coolant. Drop it off. It’s free and it’s the right call.