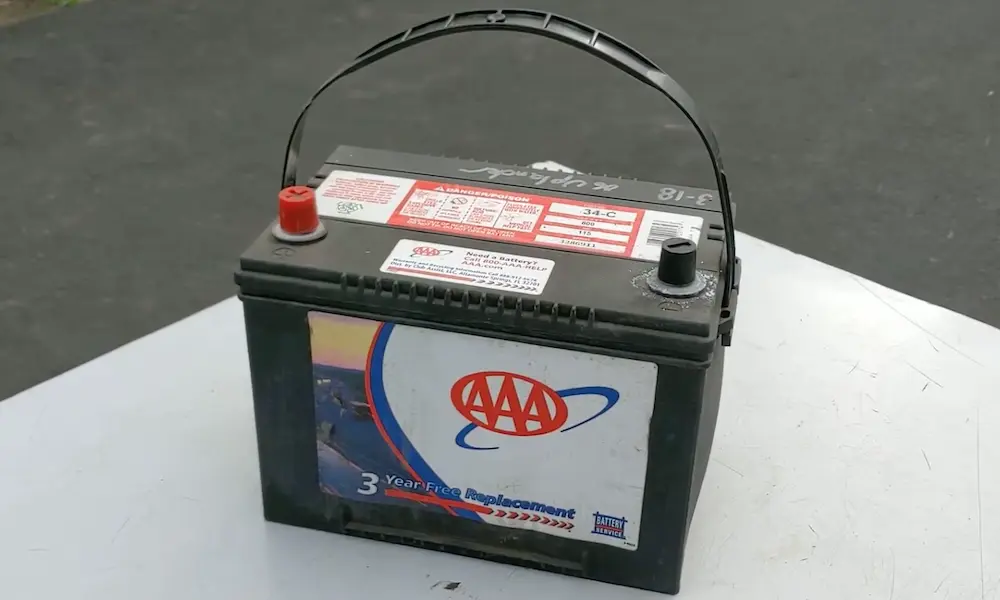
Got a dead battery and an Everstart Maxx charger sitting in your garage? You’re about to become your own battery hero. This guide walks you through every button, feature, and safety precaution you need to know to properly use your Everstart Maxx battery charger without frying your battery (or yourself).
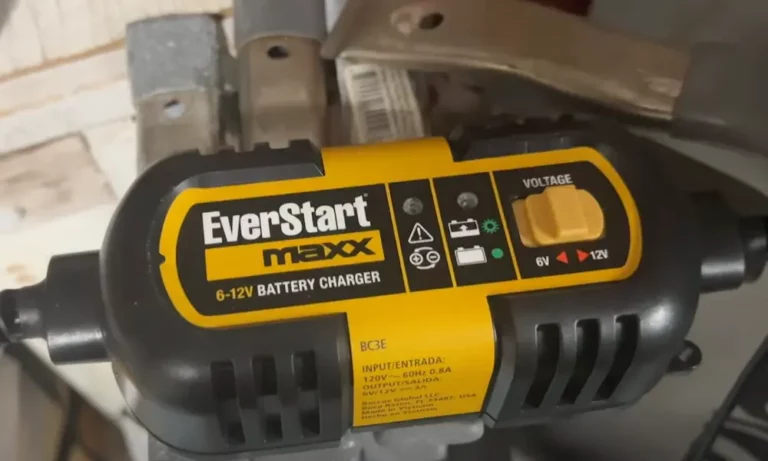
Understanding Your Everstart Maxx Battery Charger
The Everstart Maxx isn’t just a basic battery charger. It’s a smart charging system that works with 12-volt batteries for cars, motorcycles, and even lawn equipment. Before you start connecting wires, let’s get familiar with what you’re working with.
Key Components and Controls
Your Everstart Maxx features an LCD display that shows critical information like:
- Current voltage and charging status
- Battery charge level (0-100%)
- Status icons for different functions
- Warning indicators for potential problems
The main control buttons typically include:
- CHARGE/VOLTAGE: Starts charging or displays current battery voltage
- ENGINE START: Provides jump-starting assistance
- ALTERNATOR CHECK: Tests your vehicle’s charging system
- BATTERY RECOND: Runs a 24-hour reconditioning cycle for old batteries
Different models (like the BC40BE or BC50BE) have slight variations, but they all follow similar operating principles.
Essential Safety Precautions
Battery charging isn’t risk-free. Lead-acid batteries generate explosive gases during charging, so following proper safety steps is non-negotiable.
Before You Begin
- Wear safety glasses and remove all metal jewelry (rings, watches, bracelets)
- Make sure you’re working in a well-ventilated area
- Never smoke or allow sparks/flames near the battery or charger
- Place the charger at least 18 inches above the floor in garages
- Keep the charger as far from the battery as the cables allow
- Check your charger for damage before each use
Remember: You can’t charge a frozen battery, and you should never charge while your engine is running.
Step-by-Step Charging Instructions
Now that safety’s covered, let’s get your battery charged properly.
1. Initial Setup
Plug your charger into a standard 120V outlet. The LCD screen will light up and display standby mode, usually with a flashing clamp icon indicating it’s ready for connection.
2. Connect to Battery
The charger uses color-coded clamps for safety:
- Red clamp: Connect to positive (+) battery terminal
- Black clamp: Connect to negative (-) terminal or a solid metal part of the engine frame
For most vehicles with negative-ground electrical systems, connect the red clamp to the positive terminal first, then connect the black clamp to a good engine ground away from the battery.
3. Verify Connection
When properly connected, the LCD will show solid clamp icons and the battery icon. If you hear continuous beeping and see flashing warning icons, you’ve got reverse polarity—disconnect immediately and try again with correct positioning.
4. Start Charging
Press the CHARGE/VOLTAGE button to begin the charging process. The smart charger will automatically detect your battery’s voltage and select the appropriate charging mode.
If your battery voltage is extremely low (below about 2 volts), the charger may enter reconditioning mode automatically.
5. Monitor Progress
The LCD display shows:
- The charging current going to your battery
- The battery gauge indicating charge status
Charging time varies based on battery condition—a fully discharged battery might take up to 8 hours to reach full charge.
6. Charging Completion
When charging is complete, the unit automatically switches to float charge mode, displaying “FLO” on the screen with the gauge pointing to 100%. This maintenance mode keeps your battery topped up without overcharging.
7. Safe Disconnection
Always disconnect in this order:
- Unplug the AC power cord first
- Remove the black clamp (ground connection)
- Remove the red clamp (battery terminal connection)
Advanced Functions for Power Users
Your Everstart Maxx does more than basic charging. Here’s how to use its advanced features.
Engine Start Function
When you need emergency starting power, the Engine Start feature delivers high-amperage charging. This isn’t a traditional jump-start—it requires some existing battery charge to work properly.
To use Engine Start:
- Connect the charger as described earlier
- Press the ENGINE START button
- Wait for the 60-second countdown on the screen
- When the countdown reaches “00,” a beep sounds and the engine start icon flashes
- Try cranking your engine in 3-5 second bursts
- After starting, the unit automatically adjusts to 3-amp charging mode for 5 minutes
Important: Allow 4-5 minutes of cooling time between engine start attempts to prevent damaging the charger.
Battery Reconditioning
Old batteries often develop lead sulfate deposits that reduce capacity. The reconditioning function sends high-frequency pulses to break down these crystals and potentially restore performance.
To recondition a battery:
- Connect the charger as normal
- Press the BATTERY RECOND button
- The LCD will show reconditioning indicators
- Allow the full 24-hour cycle to complete (or press the button again to stop early)
Note that severely damaged batteries may not recover even after reconditioning. If five reconditioning cycles don’t improve performance, it’s time for a new battery.
Alternator Check Function
This feature tests if your vehicle’s charging system is working properly:
- Make sure the battery is fully charged before testing
- Run the engine at normal idle speed
- No-Load Test: Turn off all accessories and press the ALTERNATOR CHECK button
- Under-Load Test: Turn on maximum accessories (except A/C) and repeat the test
- The LCD will display “Good” for proper function or show fault icons for problems
Quick Voltage Check
Need a quick reading of your battery’s voltage? Press the CHARGE/VOLTAGE button briefly while in standby or charging mode to display the current battery voltage for 5 seconds.
Understanding LCD Display Indicators
Your charger communicates through various icons and messages:
Charging Status:
- Solid battery icon with bars: Normal charging in progress
- “FLO” display: Float/maintenance mode—charging complete
- Flashing fault icon: Battery or connection problem detected
Safety Alerts:
- Reverse polarity indicators: Clamps connected incorrectly
- Overheat alarm icon: Unit needs cooling and better ventilation
- Temperature icons: High or low temperature compensation active
Troubleshooting Common Issues
Even the best chargers occasionally run into problems. Here’s how to solve them:
Charger Won’t Start Charging
If your unit isn’t charging:
- Check that all connections are secure and clean
- Verify the charger is plugged into a working outlet
- If battery voltage has dropped below 2 volts, it may be too damaged to recharge
Reverse Polarity Alarm
If you hear continuous beeping with flashing warning icons:
- Disconnect all clamps immediately
- Verify battery terminal polarity (positive terminal is usually larger)
- Reconnect with proper polarity: red to positive, black to negative/ground
Overheating Issues
If the overheating alarm activates:
- Disconnect the charger immediately
- Allow several minutes of cooling time
- Ensure adequate ventilation around the unit
- Check that ambient temperature isn’t excessive
Charging Takes Forever
Normal charging can take up to 8 hours for a fully discharged battery. Factors affecting charging time include:
- Battery size and condition
- How deeply discharged the battery is
- Ambient temperature
- Age of the battery
Model Variations and Specifications
The Everstart Maxx line includes several models with different capabilities:
BC50BE (15 Amp Model)
- 15A rapid charge, 50A engine start, 3A maintenance mode
- Compatible with AGM, gel, and wet lead-acid batteries
- Not compatible with lithium batteries or deep-cycle marine batteries
BC40BE (40 Amp Engine Start Model)
- 15A charging, 40A engine start capability
- Similar features but different starting power output
All models support:
- 12-volt batteries only
- Automatic float mode when charging is complete
- Temperature compensation for extreme conditions
Maintenance and Storage
Keep your charger in top condition:
- Clean the unit casing and cords with a dry cloth only—never use water
- Inspect clamps and cords regularly for damage
- Store in a clean, dry location when not in use
Cord Care:
- Always coil charging cables loosely for storage
- Never wrap cords tightly around the unit or use tight bands
- This prevents internal wire damage and extends cord life
Important Limitations and Warnings
Know the boundaries of your Everstart Maxx:
Battery Compatibility:
- Only use with 12-volt lead-acid batteries (AGM, gel, wet cell)
- Not suitable for lithium-ion, LiFePO4, or deep-cycle marine batteries
- Don’t use on frozen batteries or while the engine is running
Environmental Restrictions:
- Indoor use only in well-ventilated areas
- Don’t expose to rain, snow, or extreme temperatures
- Keep away from flammable materials and gases
Electrical Safety:
- Use only with properly grounded outlets
- Don’t modify the polarized plug
- If using extension cords, ensure proper gauge rating per manufacturer specifications
Comparing Charging Modes
| Mode | Current Output | Best For | Duration |
|---|---|---|---|
| Regular Charge | 15A | Normal battery charging | 2-8 hours |
| Float/Maintenance | 3A | Keeping battery topped up | Continuous |
| Engine Start | 40-50A | Emergency starting | 60-second prep + 5 min follow-up |
| Reconditioning | Variable | Restoring old batteries | 24 hours |
Voltage Readings and What They Mean
| Voltage Reading | Battery Status | Recommended Action |
|---|---|---|
| 12.6V+ | Fully charged (100%) | Ready to use |
| 12.4V | 75% charged | Brief charging recommended |
| 12.2V | 50% charged | Charging needed |
| 12.0V | 25% charged | Immediate charging required |
| Below 12.0V | Deeply discharged | Full charging cycle needed |
| Below 10.5V | Severely discharged | May need reconditioning |
With this comprehensive guide, you’re now equipped to safely and effectively use your Everstart Maxx battery charger for all your battery needs. Whether you’re maintaining your vehicle’s battery through the winter or recovering a deeply discharged battery, you can approach the task with confidence.
Remember that while the Everstart Maxx is designed with multiple safety features, always prioritize proper handling and connection procedures to ensure both your safety and optimal battery performance.