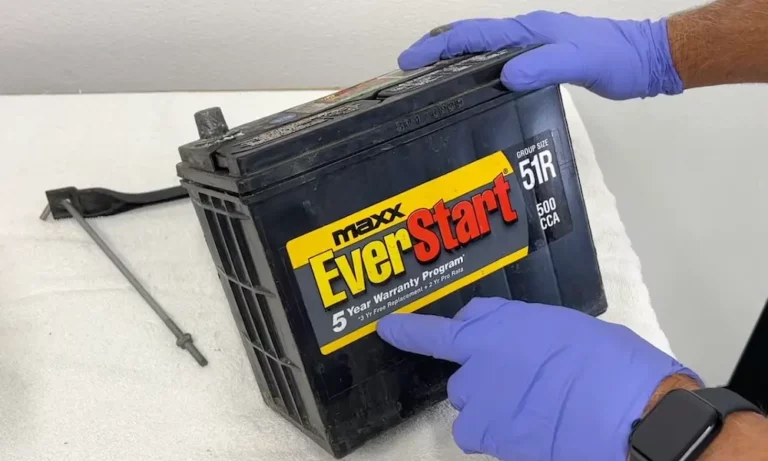
Ever found yourself with a dead battery and no one around to help? The EverStart Maxx jump starter might be your new best friend. This portable powerhouse can get you back on the road without calling for help. I’ll walk you through everything you need to know about using this device safely and effectively, from initial setup to troubleshooting common issues.
Initial Charging: Getting Your Jump Starter Ready
Before you can rescue your dead car battery, you need to make sure your jump starter has enough juice.
First-Time Setup
Your EverStart Maxx arrives partially charged, but you’ll need to give it a full charge before first use. This initial 20-hour charge is crucial for maximizing the battery’s performance and lifespan.
Charging Steps
- Find the AC charging port on the front of your jump starter
- Insert the barrel connector from the included AC adapter
- Plug the adapter into a standard 120-volt outlet
- Watch the battery status icon on the LCD screen—it’ll show bars changing from empty to solid repeatedly
- Let it charge for the full 20 hours until four solid bars appear
- When disconnecting, unplug from the wall outlet first, then from the jump starter
Remember to recharge after each use, and at least once a month during periods of non-use to keep the battery in top condition.
Understanding Your EverStart Maxx Controls
Getting familiar with your jump starter’s features will help you use it confidently in emergencies.
Key Components
The EverStart Maxx includes several important buttons and features:
- LCD Screen: Shows battery status and voltage readings
- LED Work Light Button: Controls the built-in emergency light
- USB Power Button: Activates the device charging ports
- Compressor Button: Operates the air compressor function
- Boost Cable Connection: Where you plug in the jumper cables
- Alternator Check Button: Tests your vehicle’s charging system
Battery Status Display
The LCD screen uses a four-bar system to show charge level:
- Four bars: Fully charged and ready for use
- Two-three bars: Partially charged but usually sufficient
- One bar: Low charge—recharge before your next use
- Empty bars: Completely drained—must be recharged immediately
Jump-Starting Your Vehicle Safely
When your car won’t start, follow these steps carefully to jump-start it without damaging your vehicle or the jump starter.
Safety First
Before connecting anything:
- Make sure someone’s nearby in case you need help
- Don’t smoke or create sparks near the battery
- Remove metal jewelry that could cause short circuits
- Wear safety glasses to protect your eyes
- Work in a dry, well-ventilated area
- Never try to jump-start a frozen battery
Jump-Starting Step by Step
Before You Connect:
- Turn off your vehicle and all accessories (lights, radio, A/C)
- Put your vehicle in park and engage the parking brake
- Check that your jump starter shows at least one solid bar of charge
- Connect the boost cables to the connection port on your jump starter
Connection Sequence:
- Attach the red (positive) clamp to the positive (+) terminal on your car battery
- Connect the black (negative) clamp to an unpainted metal part of the engine block or chassis—NOT directly to the negative battery terminal
Starting Your Vehicle:
- Check the LCD display—you should see the battery status, voltage, clamp icons, and a flashing jump starter icon
- Try starting your car with 5-6 second cranking attempts
- The jump starter icon will become solid when your vehicle starts
Disconnection (In This Order):
- Remove the black (negative) clamp from the engine block/chassis
- Remove the red (positive) clamp from the battery
- Store the cables properly and turn off the jump starter
Using the Additional Features
Your EverStart Maxx is more than just a jump starter—it’s a multi-purpose emergency tool.
USB Charging Ports
Need to charge your phone during a power outage? Here’s how:
- Press the USB Power Button to activate the ports
- Connect your device using a standard USB cable
- Blue indicators will light up around the active ports
- If the blue lights flash, it indicates an overload or short circuit
- Turn off USB power when charging is complete to save battery
Air Compressor Function
The built-in 120 PSI compressor can inflate tires, sports equipment, and more:
- Connect the Sure Fit nozzle to your tire’s valve stem
- Press the Compressor Power Button to activate
- Set your desired pressure using the +/- buttons (between 3-120 PSI)
- Press the Compressor Button again to start inflation
- The unit will automatically stop when it reaches your preset pressure
| Item | Recommended PSI Range |
|---|---|
| Car Tires | 30-35 PSI |
| Bicycle Tires | 40-65 PSI |
| Sports Balls | 8-15 PSI |
| Air Mattresses | 1-5 PSI |
LED Work Light
The built-in LED light provides emergency illumination:
- Press the LED Light Button to turn it on
- The light will automatically shut off after a period to preserve battery
- Unlike other functions, the light can operate during jump-starting
Troubleshooting Common Issues
Even the best tools sometimes have hiccups. Here’s how to solve common problems.
Jump Starter Won’t Work
If You Hear Beeping or See Flashing:
- Check for loose connections between the clamps and battery terminals
- Make sure your unit has enough charge (at least one solid bar)
- If the alarm sounds continuously, you may have reversed polarity—disconnect and reconnect correctly
Power Problems:
- Insufficient charge—always fully charge before attempting to jump-start
- Temperature issues—the unit works best between 50-70°F
- Overheating from excessive cranking—allow 3 minutes of rest after every 6 seconds of engine cranking
Charging Problems
If your jump starter won’t charge:
- Ensure all functions are turned off while charging
- Check that your AC outlet is working properly
- Only use the manufacturer-supplied charger
- Store and charge at moderate temperatures (50-70°F)
| Problem | Possible Solution |
|---|---|
| Unit won’t charge | Check AC adapter connections and outlet power |
| Charges slowly | Temperature too cold or too hot |
| Loses charge quickly | Battery aging or internal short |
| Display shows error | Power cycle by disconnecting from power for 30 seconds |
Maintenance Tips for Longer Life
Taking care of your jump starter ensures it’ll be ready when you need it most.
Regular Maintenance
Battery Care:
- Recharge after each use to maintain battery health
- Perform monthly charging when not regularly used
- Never let the battery completely drain for extended periods
Physical Care:
- Clean the clamps after each use, especially if they contacted battery acid
- Wipe the exterior with a soft cloth to keep it clean
- Regularly inspect cables for cracks, fraying, or other damage
- Store in a cool, dry place between 50-70°F
Best Storage Practices:
- Disconnect immediately after jump-starting—don’t leave connected to a running vehicle
- Always store the unit upright to prevent internal damage
- Keep away from extreme temperatures and direct sunlight
- Maintain a full charge during storage periods
With proper care and handling, your EverStart Maxx jump starter will be a reliable companion for roadside emergencies for years to come. Remember that a well-maintained jump starter is your best insurance against being stranded with a dead battery.