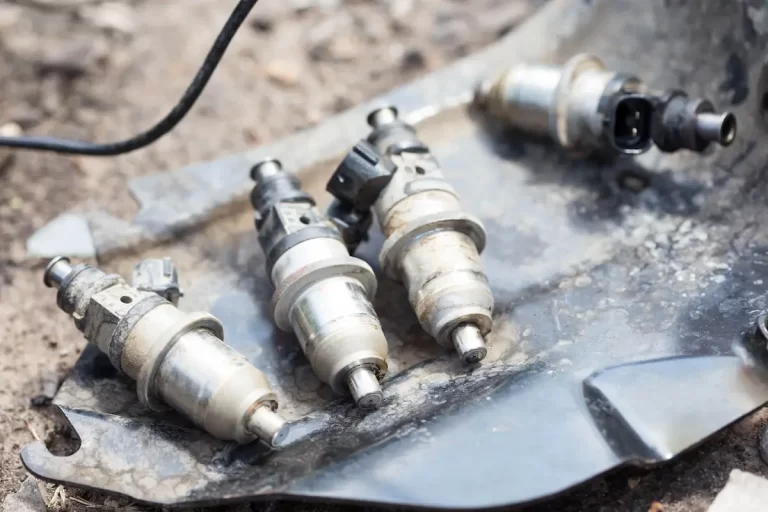
Getting this one number wrong can bend connecting rods, blow head gaskets, or destroy a perfectly good injector. The 7.3 Powerstroke injector torque spec is simple — but the consequences of ignoring it aren’t. This guide covers the exact spec, why it matters, how to install injectors correctly, and every other torque value you’ll need. Read to the end before you pick up a wrench.
Why 7.3 Powerstroke Injector Torque Is Such a Big Deal
The 7.3 Power Stroke runs a Hydraulic Electronic Unit Injection (HEUI) system. That means high-pressure engine oil — up to 3,000 PSI — slams into each injector to multiply fuel pressure up to 21,000 PSI inside the nozzle.
That’s an enormous amount of force pushing against the injector’s copper sealing washer and elastomeric rings on every single combustion event.
If the hold-down bolt isn’t torqued correctly, the injector lifts. When it lifts, combustion gases escape, fuel gets contaminated, and the injector cooks itself from the inside out.
The 7.3 Powerstroke injector torque spec is 120 inch-pounds — exactly 10 foot-pounds.
That’s it. Simple number. Critical consequences.
The One Tool You Actually Need
Most people own a foot-pound torque wrench. Don’t use it here.
A standard foot-pound wrench is wildly inaccurate at the very bottom of its scale. Trying to hit 10 ft-lbs on a wrench rated to 150 ft-lbs is like trying to pour a teaspoon of water with a fire hose. You’ll either under-torque or snap the bolt.
Buy a dedicated inch-pound torque wrench. It’s a non-negotiable tool for this job.
What Happens When You Get It Wrong
Under-Torqued Injectors
Under-torquing is the more common mistake. Here’s the chain reaction it triggers:
- The injector body lifts slightly during combustion
- The copper crush washer loses its seal
- Hot combustion gases bypass the nozzle tip
- Gases travel up into the fuel rail section of the bore
- Rubber sealing O-rings deteriorate rapidly
- Fuel becomes aerated with soot and oil
- Hard starting, white smoke, and power loss follow
- The injector eventually destroys itself
Over-Torqued Injectors
Going past 120 inch-pounds causes different damage:
- The hold-down bolt stretches beyond its yield point
- The steel clamp cracks or deforms
- The copper washer crushes too far, distorting the nozzle geometry
- Fuel spray pattern changes, causing localized piston melting
One more thing — before you remove an old hold-down bolt, check its breakaway torque. If it breaks loose with less than 25 ft-lbs of force, that bolt has fatigued through too many heat cycles. Throw it out and use new hardware.
Step-by-Step Injector Replacement Process
Prep and Access
- Disconnect both negative battery cables
- Remove valve covers (torque spec: 8 ft-lbs on reinstall)
- Unplug the under-cover wiring harnesses carefully
Fluid Management Before Removal
Pull the rearmost injector on each bank first. The engine sits at a slight rearward angle, so rear injectors are the lowest point. Pulling them first lets accumulated oil and fuel drain out of the head rails before it all dumps into your cylinders.
This matters a lot. Scribd’s injector replacement guide emphasizes this step specifically to prevent hydrostatic lock during the first crank attempt.
Removing the Injector
- Remove only the lower hold-down bolt (8mm socket)
- Leave the upper bolt loose — the clamp slides out from under it
- Loosen the oil deflector spout 2-3 turns with a 5mm tool
- Don’t skip this — the deflector will smash the solenoid on extraction
- Use a long pry bar under the clamp, fulcrum on cast iron only
- Pry straight up — never at an angle
Copper Sleeve Inspection
Once the injector is out, inspect the copper sleeve at the bottom of the bore. Wipe it clean with a lint-free cloth. Look for:
- Deep pitting or scratches
- Carbon tracking
- Cracks or deformation
Any of those? The sleeve needs to come out and be replaced before you install new injectors. A damaged sleeve prevents proper sealing no matter how perfect your torque is.
Installing the New Injector
New injectors need fresh components before they go in:
- Three new elastomeric exterior O-rings
- One new crushable copper washer at the nozzle tip
- Heavy coat of clean engine oil on all rings before installation
Push the injector straight down by hand. Some techs use a soft mallet for gentle taps. Listen for a hollow metallic ring — that means it’s bottomed out against the copper sleeve.
Do not use the hold-down bolt to pull an unseated injector into the bore. That destroys the injector immediately.
Once seated:
- Slide the clamp back under the upper bolt head
- Insert the lower hold-down bolt
- Torque to 120 inch-pounds (10 ft-lbs)
Cylinder Evacuation — Don’t Skip This
Oil and fuel drained into the cylinders during removal. Starting the engine with fluid in the cylinders causes hydrostatic lock. Ford’s injector installation guidelines are direct about this: bent rods, cracked heads, or a destroyed block follow immediately.
To clear the cylinders safely:
- Remove all eight glow plugs
- Rest valve covers loosely over the heads as a splash shield
- Crank the engine for several revolutions — fluid ejects through glow plug holes
- Reinstall glow plugs, torqued to 14 ft-lbs
System Priming
Before first start:
- Disconnect the main injector wiring harnesses
- Crank continuously for 30-40 seconds
- Let the starter cool
- Reconnect harnesses, then start
Expect rough running for up to 50 miles. Air trapped in the high-pressure oil rails needs to purge through the injectors. It’s normal. Don’t panic.
Complete 7.3 Powerstroke Torque Specs Reference
Injector and Cylinder Head Hardware
| Component | 1994.5–1997 | 1999–2003 | Notes |
|---|---|---|---|
| Injector Hold-Down Bolt | 120 in-lbs | 120 in-lbs | Use inch-pound wrench only |
| Cylinder Head Bolts (Stage 1) | 65 ft-lbs | 65 ft-lbs | Clean, lightly oiled threads |
| Cylinder Head Bolts (Stage 2) | 85 ft-lbs | 85 ft-lbs | Follow outward spiral sequence |
| Cylinder Head Bolts (Stage 3) | 105 ft-lbs | 95 ft-lbs | Super Duty is lower — don’t mix these up |
| Valve Cover Bolts | 8 ft-lbs | 8 ft-lbs | Easy to overtighten and crush gasket |
| Rocker Arm Pedestal Bolts | 20 ft-lbs | 20 ft-lbs | Tighten evenly |
| Glow Plugs | 14 ft-lbs | 14 ft-lbs | Go slow — snapping these is a nightmare |
Note the Stage 3 head bolt difference between engine generations. The Super Duty spec drops to 95 ft-lbs. Using the OBS spec on a Super Duty head is a common mistake with expensive consequences.
High-Pressure Oil System Hardware
The HPOP system operates at up to 3,000 PSI. A loose fitting here stalls the engine completely.
| Component | Torque Spec |
|---|---|
| HPOP Drive Gear Mounting Bolt | 95 ft-lbs |
| HPOP Mounting Bolts to Front Cover | 18 ft-lbs |
| High-Pressure Oil Line Connectors (at head) | 19 ft-lbs |
| Injection Pressure Regulator Valve Fastener | 55 in-lbs |
| Oil Pan Mounting Bolts | 18 ft-lbs |
Sensor Hardware
Sensors on the 7.3 thread into cast iron and aluminum. Overtighten them and you’re chasing stripped threads.
| Component | Torque Spec |
|---|---|
| Injection Control Pressure Sensor | 22 ft-lbs |
| Camshaft Position Sensor Bolt | 18 ft-lbs |
| Fuel Filter Restriction Sensor | 35–45 in-lbs |
| Water-In-Fuel Sensor | 18–24 in-lbs |
| Engine Coolant Temperature Sensor | 12–18 ft-lbs |
Single-Shot vs. Split-Shot Injectors: What You’re Working With
The injector type inside your engine depends on the year — and it changes what computer tune you need.
Diesel Resource’s spec page breaks down the injector codes by year:
- 1994.5–1996: “AA” code single-shot injectors (~95–98cc)
- 1997 Federal: “AA” code single-shot
- 1997 California / Early 1999: “AB” code split-shot (120cc)
- 1999.5–2003: “AD” code split-shot (140cc)
Split-shot injectors fire a small pilot burst, then the main charge. Quieter and cleaner for emissions — but less efficient for making power. Single-shot dumps everything at once.
Mixing injector types on the same engine without a retune causes serious drivability problems. The PCM sends specific pulse signals for whichever injector type it expects. Wrong injectors without reprogramming means bad timing, smoke, and potential damage.
Performance Injectors: What the Numbers Mean
If you’re upgrading, injectors are labeled with two numbers — like 160/30 or 238/80. Here’s what that means:
- First number: Total fuel volume capacity in cubic centimeters
- Second number: Percentage increase in nozzle orifice size over stock
Diesel World’s 500hp build guide lays out a practical breakdown of stage levels:
- Stage 1 (160cc): 40–60 RWHP gain, drop-in friendly, great for towing, no HPOP upgrade required
- Stage 2+ / Hybrid (238cc–250cc): 500+ RWHP territory, requires upgraded HPOP, bigger turbo, high-volume fuel pump, and a built transmission
Hybrid injectors use a smaller intensifier piston to lower the hydraulic multiplication ratio from 7:1 down to roughly 5:1. That means less oil volume needed per injection event — critical when you’re asking the pump to supply eight massive injectors simultaneously.
All high-performance injectors run as single-shot design. Installing them into a 1999–2003 truck without a custom chip will result in terrible performance. The PCM still tries to send split-shot signals to injectors that can’t respond to them.
FAQs
Can I swap a 1994–1997 HPOP into a 1999–2003 Super Duty?
Technically they share a similar mounting flange, but it’s not a direct upgrade in reverse. The early pump uses a 15-degree swash plate. The later pump uses a 17-degree plate, flowing 20–30% more oil volume. Putting the older, lower-volume pump into a Super Duty will cause injection pressure drops under load. The early truck benefits from the later pump — not the other way around.
How do I know if my engine has forged or powdered metal connecting rods?
Check the engine serial number. Engines below serial number 1425746 have forged rods. Engines between 1425747 and 1440712 have powdered metal rods. Forged rods handle up to ~600 RWHP. Powdered metal rods fail catastrophically above 400–450 RWHP. If the serial number is unreadable, pull the inspection plug near the oil filter and look at the rod’s parting line — forged rods show a visible line from the forging process, powdered metal rods are smooth.
What is the “fifty-cent modification” and should I do it during injector replacement?
Yes, do it while you have the valve covers off. The plastic clips holding the injector harness connectors to the valve cover gasket vibrate loose over time. A loose harness drops cylinders instantly and sends you hunting for a misfire that isn’t really a misfire. The fix involves filing down a standard quarter and wedging it under the retaining clip to lock it permanently in place. It costs nothing and prevents a lot of frustration.
Why does switching to single-shot injectors require a computer tune?
The PCM is programmed at the factory for whichever injector type came in that truck. Super Duty trucks expect split-shot signals — a pilot pulse, a pause, then a main pulse. Single-shot injectors can’t process that. Without a tune, timing is completely off. Rough idle, black smoke, hard starting, and potential engine damage follow. A custom chip from TS Performance or a Hydra unit rewrites the injection timing tables to send a clean single pulse that matches the injectors you installed.
What’s the difference between Federal and California emissions injectors on 1997 trucks?
California emissions trucks in 1997 used “AB” code split-shot injectors to meet stricter NOx limits. Federal emissions trucks that same year used “AA” single-shot injectors. If you’re ordering replacements for a 1997 truck, confirm which version you have. Mixing codes — or running the wrong injector type without a retune — creates drivability issues and potential engine damage.