When your trailer’s brake lights suddenly stop working, it’s more than just an inconvenience – it’s a serious safety hazard and potentially illegal. Whether you’re hauling a boat, camper, or utility trailer, functioning brake lights are essential for communicating your intentions to other drivers. Don’t worry – most trailer light issues have straightforward fixes you can handle yourself with basic tools and a systematic approach.
Common Causes of Trailer Brake Light Failures
When your brake lights on a trailer aren’t working, the problem typically stems from one of several key areas. Let’s tackle the most frequent culprits first:
Blown Fuses
Start with the simplest possibility – a blown fuse in your tow vehicle. Modern vehicles typically use separate fuses for trailer brake circuits, often labeled as “STOP,” “CHMSL,” or “Tow Package” in the fuse box. Check both the cabin and engine compartment fuse panels, as some manufacturers separate tow-related circuits.
To check a fuse:
- Locate your vehicle’s fuse panel (check your owner’s manual)
- Remove the suspect fuse using a fuse puller
- Hold it up to light – if the metal strip inside is broken, the fuse is blown
- Replace with a new fuse of the same amperage rating
Bad Ground Connection
About 68% of trailer lighting issues stem from poor ground connections. The electrical current needs a complete circuit to flow properly, and a bad ground prevents this.
Check for:
- Corrosion on the ground terminal at the 7-pin connector
- Loose or disconnected ground wire at the trailer tongue
- Poor connection between the trailer frame and light fixtures
For aluminum-frame trailers or those with tilt mechanisms, you may need dedicated ground wires between each light fixture and the main connector using 14AWG marine-grade cable.
Damaged Wiring
Trailer wiring takes a beating from road debris, weather exposure, and flexing. Common damage points include:
- Harness abrasion near suspension components
- Wire pinching at pivot points
- Rodent damage (especially during storage)
- Corrosion in splice connectors
Visual inspection is your first step. Look for obvious breaks, worn spots, or exposed wires. Pay special attention to areas where wires pass through metal, near moving parts, or where water might collect.
Faulty Brake Light Switch
The brake light switch converts your foot pressing the brake pedal into an electrical signal. When this switch fails, it won’t trigger your trailer brake lights.
Signs of a bad brake light switch:
- Vehicle brake lights also don’t work
- Intermittent brake light operation
- Brake lights stay on constantly
The switch is typically located near your brake pedal. Testing requires a multimeter to check for continuity when the pedal is pressed.
Testing Your Trailer’s Electrical System
Before replacing parts, perform these simple diagnostic tests to pinpoint the exact issue:
Test Your 7-Pin Connector
Use a multimeter to verify power delivery through the vehicle’s trailer connector:
| Pin Number | Function | Test Condition | Expected Reading |
|---|---|---|---|
| 2 | Electric Brakes | Brake controller active | 12V (modulated) |
| 5 | Brake Lights | Brake pedal pressed | 12V steady |
| 4 | Ground | Always | 0V |
For a more basic test, you can purchase an inexpensive trailer circuit tester that plugs into your vehicle’s connector and uses LEDs to indicate which circuits are working.
Check for Voltage at the Lights
If you have power at the connector but no brake lights, the issue lies in the trailer wiring or the lights themselves:
- Connect the trailer to your vehicle
- Have a helper press the brake pedal
- Test for voltage directly at the light fixture wires
- You should read approximately 12V between the brake light wire and ground
No voltage means a wiring issue between the connector and the lights. Proper voltage but no light indicates a bad bulb or fixture.
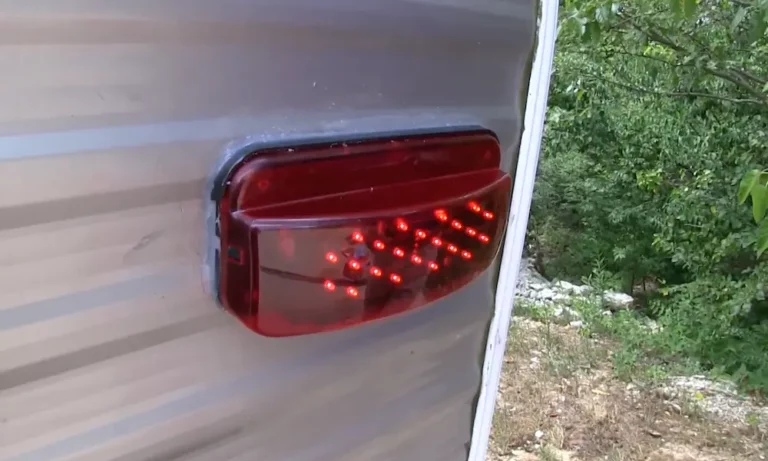
Inspect the Bulbs or LED Assemblies
Incandescent bulbs burn out regularly, while LEDs typically last much longer but can still fail:
For traditional bulbs:
- Remove the lens cover
- Inspect the filament – if broken, replace the bulb
- Check for corrosion on the bulb contacts
- Verify the bulb is seated properly in the socket
For LED assemblies:
- Look for visible damage
- Check for moisture inside the housing
- Test with a known working unit if possible
Compatibility Issues Between Vehicle and Trailer
Sometimes the problem isn’t a failure but a mismatch between your tow vehicle and trailer systems.
Connector Type Mismatches
Different trailer types use different connector standards:
- 7-way RV style (flat pin)
- 7-way commercial/semi (round pin)
- 6-way round
- 5-way flat
- 4-way flat
Using an adapter between different connector types can sometimes cause pin mapping issues, especially with brake lights. Verify your adapter is wired correctly for your specific vehicle and trailer combination.
LED vs. Incandescent Load Differences
Modern vehicles expect a certain electrical load from brake lights. When you switch from power-hungry incandescent bulbs to efficient LEDs, your vehicle might not detect the minimal current draw and fail to activate the lights or cause rapid flashing.
| Feature | Incandescent | LED |
|---|---|---|
| Current Draw | 2.1A per bulb | 0.25A per array |
| Compatibility Issues | None with older vehicles | May need load resistors |
| Heat Generation | High | Low |
| Lifespan | 1,000-2,000 hours | 50,000+ hours |
To fix this, install load resistors (6Ω 50W) in parallel with LED clusters to mimic the power draw of traditional bulbs.
Step-by-Step Repair Guide
Follow this systematic approach to fix your trailer brake lights:
Fixing Ground Connections
- Disconnect the trailer from power
- Locate the ground wire (usually white) at the trailer connector
- Clean any corrosion using a wire brush or sandpaper
- Check that the ground wire is securely attached to the trailer frame
- For persistent issues, run a new ground wire directly from the connector to the trailer frame
- Use star washers when connecting grounds to improve contact
Repairing or Replacing Wiring
For damaged wiring:
- Identify the damaged section
- Cut out the damaged portion
- Use heat-shrink solder connectors for reliable splices
- Protect repairs with additional conduit or loom
- Secure wiring to prevent future damage
For full replacement:
- Purchase a pre-made wiring harness for your trailer type
- Remove old wiring completely
- Follow the existing wire routing
- Secure with proper clips and grommets
- Apply dielectric grease to all connections
Replacing Brake Light Bulbs
- Remove the lens cover (usually screws or snap-fit)
- Remove the old bulb (twist or pull depending on type)
- Check socket for corrosion and clean if necessary
- Install new bulb of correct type and wattage
- Apply a thin layer of dielectric grease to the bulb base
- Reinstall lens cover and test
Upgrading to LED Lights
Converting to LED trailer lights offers benefits of longer life, brighter illumination, and lower power consumption:
- Purchase DOT-approved LED fixtures compatible with your trailer
- Remove old light assemblies
- Mount new LED fixtures in the same locations
- Connect wiring according to manufacturer instructions
- Test all functions
- If lights flash rapidly or don’t light, install load resistors
Preventative Maintenance Tips
Keep your trailer lights working reliably with these maintenance practices:
Routine Inspection Schedule
Before each trip:
- Test all lights (brake, turn, running)
- Visually inspect wiring for damage
- Check connector for corrosion
Seasonally:
- Clean all electrical connections
- Apply dielectric grease to connections
- Tighten any loose mounting hardware
- Check waterproof seals on light fixtures
Weather Protection Measures
Trailers face harsh conditions that accelerate electrical problems. Protect yours with:
- Dielectric grease on all connectors
- Heat-shrink solder sleeves for splices instead of tape
- Wax-based undercoating on exposed harnesses
- Annual treatment with moisture-displacing spray
For trailers used in marine environments, salt spray exposure reduces connector lifespan dramatically. Rinse thoroughly with fresh water after each use near saltwater.
Proper Storage Practices
When storing your trailer:
- Disconnect from the tow vehicle
- Cover the connector end with a waterproof cap
- Store in a covered location when possible
- Consider removing the connector and storing inside
- Use rodent deterrents if storing long-term
Regulatory Requirements for Trailer Lighting
Your trailer must meet certain standards to be legal on public roads:
- Working brake lights visible from 500 feet
- Proper light placement according to trailer width
- Correct color (red for brake/tail lights)
- Adequate brightness (minimum intensity requirements)
- Maximum activation latency (0.5-3.0 seconds)
Failure to maintain working brake lights can result in:
- Traffic citations
- Failed safety inspections
- Liability issues in case of accidents
- Insurance claim denials
Advanced Troubleshooting for Electric Brake Systems
If your trailer has electric brakes, the system becomes more complex:
Brake Controller Diagnostics
Electric brake systems use controllers that can affect brake light operation:
- Check Controller Mounting:
- Inertia-based controllers require level mounting (±3° tolerance)
- Improper mounting can cause erratic operation
- Verify Controller Output:
- Use a multimeter to measure voltage output when braking
- Most controllers produce a variable output between 0-12V
- Inspect Controller Wiring:
- Verify brake light wire is connected to correct terminal
- Check for proper ground at controller
For newer vehicles with integrated brake controllers, diagnostic trouble codes may be stored in the vehicle’s computer system and require a scanner for access.
Breakaway System Testing
Trailers with electric brakes include a safety breakaway system that applies the brakes if the trailer separates from the tow vehicle. This system can sometimes interfere with brake light operation.
To test:
- Verify breakaway battery is charged (should read 12-13V)
- Check breakaway switch for proper operation
- Ensure breakaway system is correctly wired and not affecting the brake light circuit
Troubleshooting Complex Issues
For persistent problems with no obvious cause:
- Use a tone generator and probe to map trailer wiring
- Test wire continuity end-to-end for breaks
- Check for shorts between circuits using a multimeter
- For CAN-bus equipped vehicles (most after 2018), consider professional diagnostics
For trailers with multiple axles and complex wiring, creating a detailed wiring diagram of your specific setup can be invaluable for troubleshooting.
Tools Needed for Trailer Light Repairs
Having the right tools makes trailer light repairs much easier:
- Basic Hand Tools: Screwdrivers, pliers, wire cutters/strippers
- Digital Multimeter: For testing voltage, continuity, and resistance
- Circuit Tester: Specifically designed for trailer connectors
- Crimping Tool: For making proper electrical connections
- Heat Gun: For heat-shrink tubing installation
- Dielectric Grease: Prevents corrosion in electrical connections
- Spare Parts Kit: Fuses, bulbs, wire, connectors
- Zip Ties: For securing wiring harnesses
For more complex diagnostics:
- Tone generator and probe
- Thermal imaging camera (identifies hot spots from resistance)
- OBD-II scanner (for vehicle-side diagnostics)
By methodically working through these troubleshooting steps, you’ll be able to diagnose and fix most trailer brake light problems. Remember that safety comes first – properly functioning brake lights aren’t just a convenience, they’re your communication system with other drivers and essential for safe towing.