Is your RV adventure missing homemade meals because you’re unsure how to light that Suburban oven? You’re about to master this essential camping skill with our step-by-step guide. Whether you’re baking cinnamon rolls for breakfast or roasting chicken for dinner, we’ll show you how to safely light and operate your RV oven for delicious meals on the road.
Understanding Your Suburban RV Oven
Unlike your home oven with its convenient electronic ignition, most Suburban RV ovens feature a manual pilot light system. This design works well for off-grid camping but requires a specific lighting process.
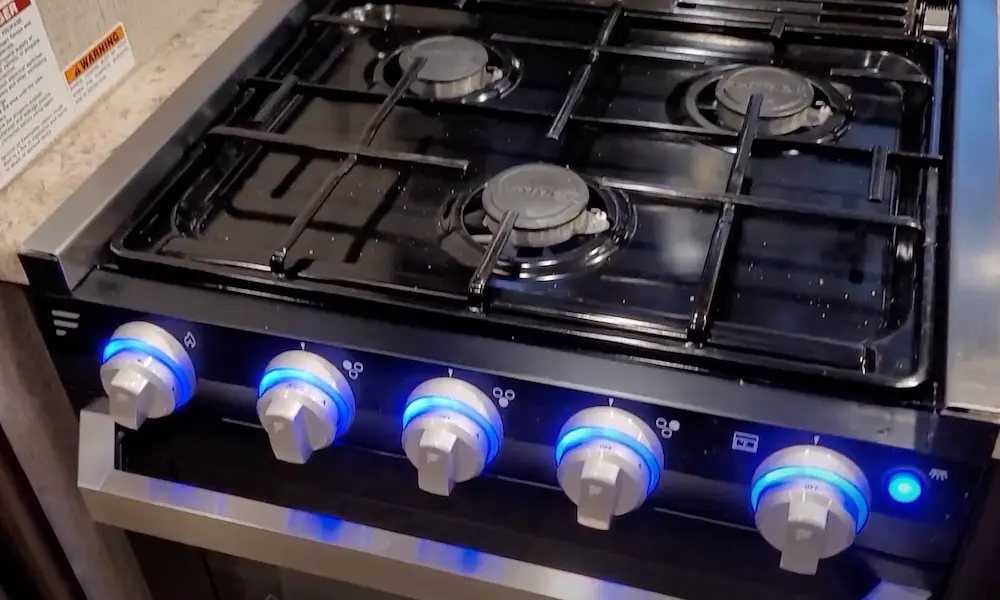
Your RV oven consists of several key components:
- A pilot assembly (located at the bottom rear of the oven)
- A thermocouple (safety device that senses heat)
- A control knob with settings for pilot, temperature, and off
- The main burner that provides cooking heat
This manual system is reliable but requires proper technique to operate safely.
Essential Safety Precautions Before Lighting
Safety comes first when dealing with propane appliances in the confined space of an RV.
Gas Leak Detection
Never attempt to light your oven if you smell gas. If you detect a gas odor:
- Evacuate everyone from the RV immediately
- Turn off the main gas supply at the propane tanks
- Contact a qualified technician before returning to the RV
A slight gas smell during initial lighting is normal but should quickly dissipate with proper ventilation.
Ventilation Requirements
Before lighting:
- Open the oven door and sniff for gas
- Open a window, door, or roof vent to ensure adequate airflow
- Never use your RV oven as a space heater – it produces carbon monoxide
Install and regularly test carbon monoxide detectors in your RV for additional safety.
Required Equipment for Lighting Your RV Oven
Having the right tools makes lighting your oven safer and easier:
| Essential Item | Why You Need It |
|---|---|
| Long-stem lighter or matches | Keeps hands safely away from the pilot assembly |
| Flashlight | Helps you clearly see the pilot location |
| Basic wrench set | For minor adjustments if needed |
Never use short lighters as they can burn your hands when reaching into the oven. Extended stick lighters are specifically designed for this purpose.
Pre-Lighting Preparation Steps
Before attempting to light your oven, take these preliminary steps:
- Verify your propane supply is adequate and the main valve at the tank is open
- Light one of your stovetop burners first to confirm gas is flowing properly
- Let the stovetop burn for 30 seconds to clear any air from the lines
- Turn off the stovetop burner
- Locate the pilot assembly inside your oven (typically at the bottom rear)
This preparation eliminates common frustrations and ensures a smoother lighting process.
Step-by-Step Lighting Instructions
Follow these precise steps to safely light your Suburban RV oven:
- Fully open the oven door for maximum visibility and ventilation
- Locate the pilot assembly at the bottom rear of the oven compartment
- Turn the oven control knob to the “PILOT” position while pushing it in
- Hold the knob firmly pushed in – this is a safety feature that allows gas to flow only while depressed
- Using your long-stem lighter, place the flame directly at the pilot assembly
- Continue holding the flame to the pilot until it ignites with a steady blue flame
Some newer Suburban models feature a Piezo ignition system that creates a spark when you press a button, eliminating the need for a manual lighter.
The Critical Holding Period
This next step is absolutely crucial and where many RVers make mistakes:
Once the pilot lights, continue holding the knob in for at least 30-60 seconds.
This waiting period allows the thermocouple to heat up properly. The thermocouple is a safety device that:
- Senses heat from the pilot flame
- Signals the gas valve to maintain gas flow
- Prevents gas leaks if the flame goes out
If you release the knob too early, the pilot will immediately extinguish because the thermocouple hasn’t reached operating temperature. Many experienced RVers recommend holding for a full minute, especially if the oven hasn’t been used recently.
After the holding period, slowly release pressure on the knob. The pilot should remain lit on its own.
Setting Temperature and Operating the Oven
With the pilot successfully lit and staying on:
- Turn the oven knob counterclockwise to your desired temperature
- The main burner should ignite immediately from the pilot flame
- Allow 10-15 minutes for the oven to preheat completely
- The burner will cycle on and off automatically to maintain temperature
RV ovens typically heat faster than home ovens but often have hot spots. Consider using an oven thermometer to verify actual temperatures and placing a pizza stone on the bottom rack to distribute heat more evenly.
Proper Shutdown Procedures
When you’re done cooking, you have two shutdown options:
For Temporary Shutdown (Using Again Soon)
Turn the knob back to the “PILOT” position. This maintains the pilot flame while turning off the main burner, making it convenient for your next meal.
For Complete Shutdown
Turn the knob fully to “OFF” position. This extinguishes both the main burner and pilot light. Always use complete shutdown:
- When leaving your RV unattended
- When traveling
- When refilling propane tanks
- When not using the oven for extended periods
Complete shutdown is always the safest practice when in doubt.
Troubleshooting Common Lighting Problems
Even with perfect technique, you might encounter these common issues:
Pilot Won’t Light Initially
The most common cause is air in the gas lines, especially after refilling propane tanks or when the RV hasn’t been used recently.
Solution:
- Be patient and continue attempting to light
- Hold the knob in longer while attempting to light
- Try lighting a stovetop burner first to clear lines
Pilot Lights But Won’t Stay Lit
If the pilot extinguishes when you release the knob, you likely didn’t hold it long enough.
Solution:
- Try again, holding the knob in for a full 60 seconds
- Ensure the thermocouple tip is properly positioned in the pilot flame
- Clean the pilot assembly if it appears dirty
Pilot Flame Flickers or Sputters
This indicates a potential restriction in the pilot orifice.
Solution:
- Gently clean the pilot orifice with compressed air
- Check for spider webs or debris blocking gas flow
- Some Suburban models had manufacturing defects requiring replacement
Thermocouple Maintenance and Replacement
The thermocouple is often the culprit when oven lighting problems persist:
Testing a Thermocouple
If the pilot won’t stay lit after multiple attempts:
- Check the thermocouple’s position – it should be directly in the pilot flame
- Ensure it’s not bent away from the flame
- Check for tight connections at the gas valve
Replacing a Faulty Thermocouple
For SRNA3 series ovens, replacement thermocouples are readily available. You’ll need to know whether you need a short version (part #161207) or long version for your specific model.
Basic replacement steps:
- Turn off all gas at the main tank
- Disconnect the thermocouple from the gas valve (usually a threaded connection)
- Remove the bracket holding the thermocouple in place
- Install the new thermocouple in the same position
- Reconnect to the gas valve and tighten connections
Dealing with Loose Connections
Road vibration can loosen fittings on your RV oven over time:
Pilot Tube Fittings
A common issue is loose pilot tube fittings from highway vibration. The simple solution involves:
- Tightening the brass fitting with a 5/16″ wrench
- Usually just a quarter turn is sufficient
- Check for leaks using soapy water solution on all connections
- Never use an open flame to check for gas leaks
Regular Maintenance for Safe Operation
Keep your RV oven in top condition with these maintenance practices:
Cleaning the Oven Interior
- Remove food debris and grease regularly
- Use non-abrasive cleaners to prevent damage
- Pay special attention to the area around the pilot assembly
- Never use steel wool or abrasive scrubbers that could damage components
Pilot Assembly Maintenance
For a stronger, more reliable pilot flame:
- Use compressed air to gently blow out the pilot assembly
- Clear any spider webs or debris from gas tubes
- Be careful not to enlarge the orifice holes when cleaning
- Check that the pilot flame is steady and blue, not yellow or flickering
Professional Service Indicators
While many RV owners can handle basic maintenance, certain situations call for professional help:
- Persistent gas odors after proper shutdown
- Yellow or sooty flames indicating improper combustion
- Pilot that repeatedly goes out despite proper technique
- Visible damage to gas lines or connections
- Excessive corrosion on any components
Suburban recommends using authorized service centers for major component replacement. Contact Suburban RV customer service at (423) 775-2131 for technical support or service center locations.
Optimizing Your RV Oven Cooking Experience
Once you’ve mastered lighting your oven, try these tips for better cooking results:
Temperature Management
RV ovens are notoriously uneven in temperature distribution. Try:
- Using an oven thermometer to verify actual temperatures
- Placing a pizza stone or unglazed tile on the lower rack to distribute heat
- Rotating dishes halfway through cooking
- Setting temperatures 25°F higher than recipes call for
Safe Cooking Practices
- Never leave the oven unattended while in use
- Keep flammable items away from the oven
- Use proper cookware that fits your RV oven (often smaller than home ovens)
- Allow adequate ventilation during cooking
Finding Your Model Information
Before ordering replacement parts, locate your specific model information:
The model number for your Suburban oven is typically found on a data plate inside the oven door or on the back panel. This information ensures you get the correct replacement parts for your specific oven.
With proper lighting technique, regular maintenance, and safe operation, your Suburban RV oven will provide years of reliable cooking performance. From morning biscuits to evening casseroles, you’ll enjoy the comfort of home-cooked meals wherever your RV adventures take you.