
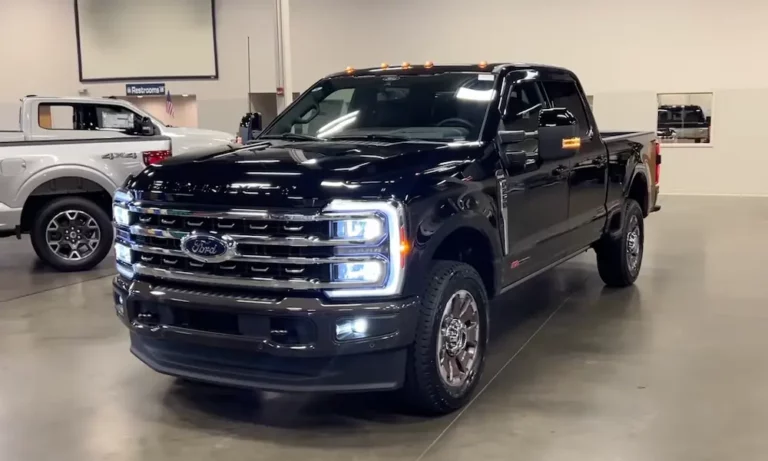
Get the F250 lug nut torque wrong, and you’re looking at loose wheels, warped rotors, or snapped studs. This guide covers every spec by model year, plus the exact steps to torque your wheels correctly. Stick around — there’s a spec change after 2020 that trips up even experienced techs.
Why F250 Lug Nut Torque Actually Matters
When you torque a lug nut, you’re not just tightening a bolt. You’re stretching the wheel stud like a spring. That tension — called clamping force — is what holds your wheel to the hub under braking, cornering, and heavy payloads.
Too little torque? The wheel micro-moves against the hub, lug nuts back off, and studs fail in shear. According to Ford’s official documentation, under-torquing is a direct cause of wheel separation while driving.
Too much torque? You stretch the stud past its elastic limit, crack alloy wheel seats, and warp brake rotors through uneven thermal stress.
Here’s what makes the F-250 especially unforgiving: it hauls heavy, it tows heavy, and it weighs over 7,000 pounds empty. Every force — acceleration, braking, cornering — passes through those eight lug nuts. Getting the spec right isn’t optional.
F250 Lug Nut Torque Specs by Year (Quick Reference)
Before you grab a wrench, confirm your model year. The F250 has three distinct eras with different specs, bolt patterns, and thread pitches.
| Production Era | Configuration | Thread Size | Lug Nut Torque |
|---|---|---|---|
| 1973–1997 | Classic 8-Lug | 9/16-inch Imperial | 140 ft-lbs |
| 1997–1999 | Light Duty 7-Lug | Varies (verify fitment) | 100 ft-lbs |
| 1999–2019 | Super Duty 8-Lug | M14 x 2.0 / M14 x 1.5 | 165 ft-lbs (224 Nm) |
| 2020–2026 | Super Duty 8-Lug | M14 x 1.5 | 150 ft-lbs (204 Nm) |
You’ll need a 21mm or 7/8-inch heavy-duty socket and a calibrated torque wrench for all configurations.
Breaking Down Each Era
1973–1997: The Classic 8-Lug Standard
These trucks used a consistent 8-lug bolt circle of 6.5 inches (165.1mm) with 9/16-inch imperial studs at 18 threads per inch. The spec held steady at 140 ft-lbs for nearly 25 years — straightforward, predictable, and well-documented according to Kipardo Racing’s fitment guide.
1997–1999: The Weird Seven-Lug Anomaly
This is the one that catches people off guard. Ford briefly built a “Light Duty” F-250 on the F-150 platform with a highly unusual 7-lug configuration on a 150mm bolt circle. The torque spec drops to just 100 ft-lbs — significantly lower than any other F-250 generation.
If you’re working on a late 1990s F-250, count the lugs before you torque anything. Applying 165 ft-lbs to a 7-lug light-duty hub will destroy the fasteners immediately.
1999–2019: The Super Duty Era Standard
Ford launched the Super Duty line in 1999 with a new proprietary 8-lug pattern on a 170mm bolt circle — and it’s been the standard ever since. The spec for this entire 20-year stretch was 165 ft-lbs (224 Nm).
There’s one thread pitch wrinkle worth knowing:
- 1999–2002: M14 x 2.0 coarse thread
- 2003: Mixed — coarse or fine depending on production date
- 2004–present: M14 x 1.5 fine thread (standardized)
Fine threads aren’t just a small change. They have a larger minor diameter at the thread root, making the stud physically thicker and stronger in tension. They also generate higher clamping force per unit of torque applied, and resist vibration-induced loosening more effectively.
If you’re working on a 2003 F-250, check the stud threads before assuming either spec.
2020–2026: The Updated Spec That Surprises People
Starting around the 2020 model year, Ford revised the spec down to 150 ft-lbs (204 Nm) — even though the bolt size (M14 x 1.5) didn’t change. Ford’s current owner manual documentation confirms this reduction.
The likely explanation: improved anti-corrosion coatings on modern studs and nuts reduce thread friction, so less torque achieves the same clamping force. Applying the old 165 ft-lb spec to a 2020+ F-250 repeatedly puts unnecessary fatigue stress on the studs over time.
Don’t ignore this update just because you’re used to 165 ft-lbs.
How to Torque F250 Lug Nuts Correctly
The right number on your torque wrench means nothing if your process is wrong. Here’s the sequence that actually works.
Step 1: Clean Every Mating Surface
Wire brush the hub flange, brake rotor face, and wheel mounting pad before you install anything. If there’s rust or debris trapped between the wheel and hub, the torque wrench will hit your target spec — but the stud won’t have stretched properly. Once you drive the truck and that trapped debris pulverizes, the clamping force drops to near zero.
Ford’s wheel and tire specifications treat clean mating surfaces as a non-negotiable requirement — not a suggestion.
Step 2: Handle Lubrication Carefully
If your F-250 uses factory two-piece flat wheel nuts, apply exactly one drop of motor oil between the flat washer and the nut body. That’s it. This reduces bearing face friction so torque translates accurately into clamping force.
Critical warning: Don’t get any oil on the threads. Lubricated threads eliminate friction, causing the nut to over-travel and stretch the stud into permanent deformation. A stretched stud won’t hold tension — it’ll shear under load.
Step 3: Follow the Star Pattern
Never tighten lug nuts in a circle. For an 8-lug hub, work in a cross pattern — tighten one nut, then move to the one directly across the hub, alternating until all eight are snugged. According to Ford’s road wheel changing procedure, the wheel must be hub-centered before final torque — lower the truck until the tires just touch the ground before applying final torque with your wrench.
Step 4: Use a Torque Wrench — Not an Impact Gun
Impact wrenches don’t apply torque accurately. Run the nuts down snug with whatever you have, then finish with a calibrated mechanical torque wrench using smooth, continuous motion. Never use an air gun for final torque on an F-250 wheel.
The Retorque Requirement Nobody Does
This is the most skipped step in heavy-duty wheel maintenance — and it’s the one that prevents wheel-off incidents.
After any wheel disturbance (tire rotation, brake service, flat change), the fasteners and seating surfaces settle under road forces. You lose some clamping force. You have to go back and retorque.
- Single rear wheel F-250: Retorque at 100 miles after any wheel removal
- Dual rear wheel F-250: Retorque at 100 miles, then again at 500 miles
This isn’t a suggested best practice — it’s a documented safety requirement. The NHTSA recall documentation from Ford specifically mandated billing labor for a 500-mile post-repair retorque to prevent wheel separation on Super Duty trucks.
If you run duals, skip the second retorque at your own risk.
Aftermarket Wheels: What Changes
Running aftermarket wheels on your F-250 introduces a few variables you need to address directly.
Hub-centric vs. lug-centric: Factory wheels center on the 124.9mm hub bore. Aftermarket wheels with a larger center bore make the truck lug-centric — meaning the studs bear the truck’s full vertical weight, not just lateral clamping. On a 7,000+ pound truck, that’s a serious problem. Use quality hub-centric rings to fill the gap.
Seat type matters: Factory F-250 setups often use two-piece flat washers. Most aftermarket alloy wheels need a 60-degree conical seat lug nut. Using flat-seat nuts on a conical seat wheel gives you minimal contact area — and an eventual loose wheel.
Material quality: Look for lug nuts rated to ISO Grade 12 or equivalent. That rating confirms the alloy has the proof load capacity to hold tension through repeated torque cycles without deforming.
Powder-coated wheels: The coating on lug nut seating surfaces and hub mounting pads compresses and wears under clamping force. Strip the coating from these contact areas before installation. Always retorque at 100 miles — the settling on a freshly coated wheel is more pronounced than bare metal.
FAQs
How does aftermarket wheel powder coating affect lug nut torque over time?
Powder coating adds a thick polymer layer over the seating areas. Under the clamping force of a 165 ft-lb torque application, that layer compresses and wears away as heat and vibration cycle through the wheel. The microscopic gaps left behind cause joint relaxation and clamping force loss. Strip coating from all seating surfaces before installation and commit to the 100-mile retorque — settling on a coated wheel is more aggressive than on bare metal.
How often should I calibrate my torque wrench for heavy-duty truck work?
Industry standards say at least every 12 months or every 5,000 cycles — whichever comes first. Drop your wrench on concrete or accidentally store it under high spring tension instead of wound down to zero? Recalibrate immediately. A compromised spring can throw your readings off by 10% or more, which on an F-250 translates to 15+ ft-lbs of error.
How do I spot a wheel stud that’s been over-torqued?
Look for “necking” — a slight narrowing of the stud’s diameter in one spot. Also check if the thread spacing looks wider in one area than another. Try threading a nut on by hand. It’ll spin freely, then bind hard when it hits the stretched section. Replace any stud that shows those signs immediately. A stretched stud has lost its clamping ability and will fail under load.
What’s the difference between a click-type and split-beam torque wrench for this work?
Click-type wrenches use an internal coil spring you set by twisting the handle. They work well but need to be wound down to zero after every use or the spring takes a permanent set. Split-beam wrenches measure deflection of the wrench body’s steel beam — no coil spring under constant tension, no wind-down required, and they hold calibration longer in heavy-duty use. For repetitive high-torque work like F-250 wheel service, split-beam wrenches are the more durable long-term choice.













