Your temperature gauge is acting weird, your heater’s blowing cold air, or your engine’s running hot. Sound familiar? A failing thermostat is probably the culprit. The good news? A Ford Focus thermostat replacement is totally doable at home — and this guide walks you through every step. Stick around to the end, because the bleeding process alone could save your new thermostat from failing all over again.
What Does the Thermostat Actually Do?
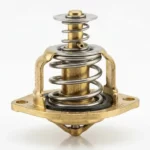
The thermostat sits between your engine and radiator, acting like a gatekeeper for coolant flow. When the engine’s cold, it stays shut, forcing coolant to circulate only through the engine block. This gets your engine up to operating temperature fast — which matters for fuel economy, cabin heat, and protecting your catalytic converter.
Once the coolant hits 194°F (90°C), a wax pellet inside the thermostat melts, expands, and pushes a valve open. Hot coolant rushes into the radiator to cool down. When the temperature drops slightly, the valve closes again. This cycle repeats constantly to keep your engine in the sweet spot.
When the thermostat fails? That cycle breaks — and things get ugly fast.
How to Spot a Bad Thermostat on a Ford Focus
Thermostat failure usually happens one of two ways: stuck open or stuck closed. Each one feels very different from the driver’s seat.
Stuck Open: The Cold Engine Problem
A stuck-open thermostat lets coolant flow through the radiator non-stop, even when the engine’s cold. Your engine never fully warms up.
Watch for these signs:
- Temperature gauge stays low, barely reaching the midpoint
- Heater blows lukewarm or cold air (brutal in winter)
- Noticeably worse fuel economy
- OBD-II code P0128 stored in the computer
- Cooling fans running constantly at full speed (the PCM assumes worst-case and cranks the fans)
The fuel economy hit is real. Your engine dumps extra fuel trying to warm up, washes oil off cylinder walls, and poisons the catalytic converter with unburned hydrocarbons.
Stuck Closed: The Overheating Emergency
This one’s dangerous. A stuck-closed thermostat traps heat in the engine with nowhere to go. The temperature gauge shoots into the red within minutes.
Ford actually built a clever Fail-Safe Cooling Strategy into the Focus to handle this:
- Stage 1: The gauge slams into the red, and the powertrain check lamp lights up. Code P1285 (Cylinder Head Over Temperature) gets logged.
- Stage 2: If you keep driving, the PCM cuts fuel to two cylinders and limits engine speed to under 3,000 RPM. Those dead cylinders pump ambient air through the engine like a pneumatic heat sink. Code P1299 (Engine Over Temperature Protection Active) stores permanently. The PCM alternates which cylinders it deactivates to prevent uneven thermal warping across the block.
One More Thing to Check Before You Blame the Thermostat
If your heater’s blowing cold but the temperature gauge reads normal with no P0128 code, the problem might not be the thermostat at all.
The Ford Focus automatic climate control uses a small cabin temperature sensor behind a round trim vent on the right side of the steering column. It has a tiny internal fan that draws cabin air across a sensor. That fan collects dust over time, insulating the sensor and making the climate system think the cabin is already warm. Result: it blocks hot air from entering — perfectly mimicking a thermostat or heater core problem.
Check and clean that sensor before condemning the thermostat based on cold air alone.
Ford Focus Thermostat Replacement Cost: DIY vs. Shop
Professional Ford Focus thermostat replacement runs $515–$634 total:
| Cost Category | Estimated Range |
|---|---|
| Labor | $212–$311 (2–3 shop hours) |
| Parts | $303–$323 (housing + coolant + supplies) |
| Total | $515–$634 |
That parts cost looks high, right? It’s because modern Focus models use an integrated thermostat housing assembly — the valve, housing, coolant temperature sensors, and mounting flanges are all one plastic unit. You’re not just swapping a $15 insert anymore.
Do it yourself, and you cut that bill roughly in half by eliminating labor entirely.
Picking the Right Replacement Part
OEM vs. Aftermarket: Does It Matter?
Yes, it matters more than people think. Budget aftermarket housings use inferior composite plastics that crack under thermal stress. Given how labor-intensive this job is, using a cheap housing and doing it twice costs more than buying the OEM part the first time.
Here’s a quick look at your options for the 2012–2018 Ford Focus 2.0L Ti-VCT:
| Brand | Part Number | Price (USD) | Notes |
|---|---|---|---|
| Motorcraft (OEM) | RT-1219 / CP9Z-8592-G | ~$49 | Factory spec, tested to 150k miles |
| Motorad | 84338FZ / 514-185 | $23–$30 | Common mass-market option |
| Dorman | 902-1071 | ~$29 | Widely available in retail stores |
| TRQ | ECA90653 | $33–$48 | Often sold as complete kits |
The OEM Motorcraft RT-1219 uses stainless steel and brass internal channels, plus a venturi nozzle for optimal coolant flow. It’s proven through rigorous durability testing for 10 years or 150,000 miles.
Which Part Number Fits Your Engine?
Not all Focus engines use the same housing. Match your engine before ordering:
| Model Years | Engine | OEM Part Number |
|---|---|---|
| 2012–2018 | 2.0L Duratec Ti-VCT | CP9Z-8592-G / RT-1219 |
| 2013–2018 | 2.0L EcoBoost (Focus ST) | CJ5Z-8575-A |
| 2016–2018 | 2.3L EcoBoost (Focus RS) | FR3Z-8575-A |
| 2015–2018 | 1.0L EcoBoost | CM5Z-8575-A |
| 2005–2011 | 2.0L Duratec HE | 1S7Z-8575-AG |
| 2000–2004 | 2.0L Zetec | F8RZ-8575-CA |
What Coolant Does a Ford Focus Need?
Draining the coolant is part of this job, so let’s get the fluid right.
Third-generation Focus models (2012–2018) left the factory with Motorcraft Orange Antifreeze (spec WSS-M97B44-D2). Ford later switched to Motorcraft Yellow Antifreeze — a new Phosphated Organic Acid Technology formula (spec WSS-M97B57-A2) designed to fight cavitation erosion in aluminum engine blocks.
Ford issued a technical service bulletin confirming:
- ✅ Yellow coolant can replace orange coolant in any Ford, Lincoln, or Mercury
- ✅ You can top off an orange system with yellow — no gelling or chemical reaction
- ✅ No full chemical flush required if the system is clean
- ✅ Initial replacement interval: 10 years or 200,000 miles, then every 5 years/100k after
- ✅ Prestone’s HOAT formula meets WSS-M97B57-A2 and works as a direct alternative
One heads-up: under certain lighting, yellow coolant in a translucent degas bottle can look greenish. That’s just the dye — it’s normal.
Always use distilled water if you’re mixing concentrated coolant. Tap water deposits calcium and magnesium that destroy the thermostat and radiator tubes.
⚠️ Ethylene glycol is acutely toxic to pets and wildlife. Capture all drained fluid in a sealed pan and take it to an authorized recycling center.
Tools You’ll Need
Don’t start this job without these:
| Tool | What It’s For |
|---|---|
| T30 Torx socket | Removing underbody skid plates |
| Remote hose clamp pliers | Expanding spring clamps in tight spaces |
| Curved metal pick | Breaking vulcanized hose seals |
| 8mm and 10mm sockets | Intake clamps and housing bolts |
| Calibrated torque wrench (inch-pounds) | Critical: exactly 89 in-lbs on housing bolts |
| Trim tool set | Releasing wiring harness clips without breaking plastic |
| Plastic razor blade | Cleaning the aluminum mating surface |
| Drain pan and funnel | Catching coolant, refilling without air pockets |
Step-by-Step Ford Focus Thermostat Replacement (2.0L Ti-VCT)
This procedure covers the most common Focus — the 2012–2018 2.0L naturally aspirated engine. EcoBoost models follow the same logic but involve intercooler piping and extra steps for routing.
Phase 1: Drain the Coolant
- Let the engine go completely cold. Place a drain pan under the passenger side of the radiator.
- Remove the underbody skid plate using your T30 Torx socket.
- Open the plastic radiator drain petcock at the bottom corner of the radiator tank. A flathead screwdriver may help, or it might turn by hand.
- Open the degas bottle cap to prevent vacuum lock and speed up draining.
- Once the flow slows to a drip, hand-tighten the petcock. Don’t overdo it — those plastic threads strip easily.
Phase 2: Clear Access to the Housing
The thermostat housing sits on the driver’s side of the engine block, buried under the air intake assembly and wiring harnesses.
- Pull the engine beauty cover straight up off its four rubber grommets.
- Loosen the 8mm worm-gear clamp on the rubber intake tube at the throttle body.
- Disconnect the Mass Air Flow sensor connector — press the red locking tab, push the release lever, and pull back.
- Remove the airbox and intake tubing entirely to open up working space.
- Unclip the wiring harness retaining anchors with a trim tool and push the harness aside. Don’t strain the wires.
Ti-VCT note: The twin VCT solenoids sit right next to the thermostat workspace. You don’t need to remove them, but don’t bang them with tools. If you do remove one for clearance, thread the 8mm bolt in by hand and keep impact tools far away from soft aluminum threads.
Phase 3: Remove the Old Housing
- Locate the three rubber coolant hoses connected to the housing. Use your remote hose clamp pliers to compress the spring clamps and slide them a few inches down the hoses.
- Those hoses vulcanize to the plastic flanges over years of heat. Don’t just yank them. Work a curved metal pick around the inside of the rubber where it meets the flange, breaking the seal gradually. Silicone spray helps. Keep a rag ready — coolant will spill from the head.
- Disconnect the coolant temperature sensor electrical connector from the top of the housing.
- Remove the four mounting bolts with an 8mm or 10mm socket and a short extension.
- Pull the housing straight off and toss it.
Phase 4: Install the New Housing
- Clean the aluminum mating surface on the cylinder head with a plastic razor blade and brake cleaner on a rag. No steel scrapers — you’ll gouge the soft aluminum and create a permanent leak point.
- Unbox the new housing and confirm the rubber gasket is seated in its groove. Don’t add RTV or silicone sealant. That changes the compression geometry, prevents the housing from seating flush, and creates a leak.
- Press the new housing firmly against the clean surface.
- Thread all four bolts in by hand first to avoid cross-threading.
- Torque to exactly 89 inch-pounds (10 Nm) in a diagonal cross-pattern. This is critical. Too tight cracks the plastic housing immediately. Use a calibrated torque wrench — not a gut feel.
- Reconnect the coolant temperature sensor until the tab clicks.
- Push the coolant hoses fully onto the flanges to the molded stop points. Slide the spring clamps back into their original indent positions on the rubber.
Phase 5: Refill and Bleed the System
This phase is where most DIYers make a critical mistake — they skip the bleed and then wonder why their new thermostat seems to still run hot.
- Reinstall the airbox, MAF connector, intake tube, and beauty cover.
- If using concentrated Motorcraft Yellow VC-13G, mix it 50/50 with distilled water first. Pre-diluted VC-13DL-G pours straight in.
- Insert a spill-proof funnel into the degas bottle and fill slowly to the MAX line.
- Don’t cap the bottle yet. Start the engine and set climate control to max heat on low blower. This opens the heater core circuit and pushes air out of the cabin lines too.
- Watch the degas bottle. When the thermostat opens at 194°F, you’ll see the coolant level suddenly drop as the radiator circuit fills and air burps out. Keep adding coolant to maintain the MAX line.
- Once the electric cooling fans kick on and no more bubbles appear, the bleed is complete.
- Cap the degas bottle. Shut the engine off.
- Slide under the car and check for drips at the petcock and around the new housing. If it’s dry, reinstall the skid plate with your T30 Torx fasteners and lower the car.
- Check the cold level again the next morning and top off if needed.
Frequently Asked Questions
Why does my cooling fan run constantly after a thermostat failure?
When the PCM detects a P0128 code — meaning the engine isn’t warming up on schedule — it enters protective mode. Since it can’t trust the thermal data anymore, it assumes worst-case and runs the electric cooling fans at max speed whenever the engine runs. It’s protecting against overheating, even though the engine is actually running too cold.
What’s the difference between a “fail-safe” thermostat and a standard OEM thermostat?
A standard thermostat uses spring tension to stay closed. If the wax mechanism fails, it typically jams shut — causing rapid overheating. A fail-safe thermostat has a secondary locking pin that releases if temperatures hit a critical emergency threshold, permanently locking the valve wide open instead. That creates a stuck-open condition, but it prevents the engine from cooking itself. Either way, the unit needs immediate replacement.
Can a bad thermostat hurt my automatic transmission?
Yes. Many Ford Focus models route transmission fluid through a heat exchanger inside the radiator’s end tank. If the engine coolant boils from a stuck-closed thermostat, that heat transfers directly into the transmission fluid. Degraded transmission fluid destroys clutch friction material fast. It’s not just an engine problem.
Does altitude affect how fast my engine overheats if the thermostat fails?
It does. Lower atmospheric pressure at high altitude reduces coolant’s boiling point. The pressurized radiator cap compensates partly, but vehicles in mountainous regions have a narrower safety margin. The thermostat still opens at 194°F regardless of altitude — that’s thermal physics, not atmospheric pressure. But if it fails closed at altitude, the coolant reaches steam faster than at sea level. You have less time to respond before engine damage occurs.
Can I diagnose a bad thermostat without any tools?
Yes — the upper radiator hose test works well. Start the engine cold and feel the upper radiator hose. It should stay cool and flexible while the engine warms up. When the thermostat opens, that hose should suddenly become very hot and firm as pressurized coolant rushes through. If your temperature gauge reads hot but the upper hose stays cool and floppy, the thermostat is stuck closed and blocking coolant from reaching the radiator.