Got a chip, scratch, or scuff on your Oxford White Ford? Finding the right paint and applying it correctly makes all the difference between a repair that’s invisible and one that screams “DIY disaster.” This guide covers everything about Ford paint code Z1 — what it is, where to buy it, and exactly how to fix your finish.
What Is Ford Paint Code Z1?
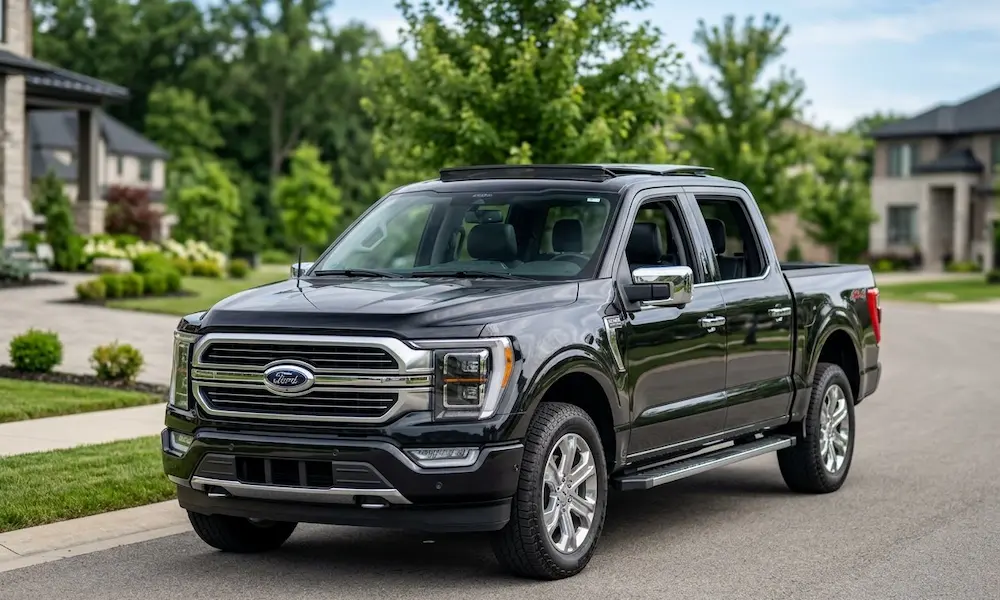
Ford paint code Z1 refers to Oxford White, one of the most widely used colors in Ford’s history. It’s been in continuous production since 1991 and still appears on 2026 model year vehicles. That’s over 30 years without a reformulation — a rare achievement in automotive paint.
You might also see this color listed as code YZ on older Ford models. Both Z1 and YZ point to the exact same paint mixture, so don’t let that confuse you when ordering touch-up products.
Other industry codes for this color include:
- M6887
- B9791
- Z1-6887
| Specification | Detail |
|---|---|
| Official Color Name | Oxford White |
| Primary Codes | Z1, YZ |
| Alt Industry Codes | M6887, B9791, Z1-6887 |
| Active Production | 1991 – 2026 |
| Finish Type | Solid (no metallic, no pearl) |
Which Ford Vehicles Use Paint Code Z1?
Oxford White shows up across virtually every segment of Ford’s lineup. The color spans everything from high-performance sports cars to heavy commercial workhorses:
- Trucks & Vans: F-Series, Transit, E-Series, Ranger
- SUVs: Bronco, Expedition, Explorer
- Cars: Mustang, Fusion, Focus, Taurus, Contour
- Luxury: Lincoln models
Because Z1 spans so many vehicles and model years, it’s one of the easiest factory colors to source replacement paint for — a genuine advantage when you need a quick repair.
What Makes Oxford White Different From Other Whites?
Oxford White is a solid, non-metallic finish. There’s no metallic flake, no aluminum powder, and no mica particles inside it. That gives it a bright, punchy, highly reflective look once cleared.
The color holds a neutral tone — no strong yellow shift, no strong blue shift. It looks consistent under direct sun, overcast skies, and indoor lighting.
Here’s the trade-off though: solid white is brutally honest about surface quality. Without metallic flake to scatter light and distract your eye, every scratch, dust nib, or substrate imperfection shows up clearly. This means your prep work matters more with Z1 than it would with a metallic silver or a flake-heavy color.
How to Find Your Ford Paint Code
Your Ford paint code lives on the Safety Compliance Certification Label, typically found on the driver’s door jamb. Look for a line that says “EXT PNT” followed by a two-character code. If your truck, SUV, or car came from the factory in white, that code will read Z1.
You can also find it in your owner’s documentation or by searching your VIN through Ford’s parts portal.
Paint Products for Ford Code Z1: What to Buy
The US market offers a wide range of Z1 paint products, from inexpensive touch-up pens to professional gallon systems. The right choice depends on the size of your repair.
Touch-Up Products for Small Chips and Scratches
For rock chips, door dings, and small scratches, a touch-up pen or bottle is the right tool.
| Product | Size | Price Range |
|---|---|---|
| Ford Motorcraft OEM Touch-Up Pen (PMPC-19500-5920A) | 0.5 fl oz | $15.83 – $23.98 |
| Dupli-Color Scratch Fix All-in-1 (AFM0229) | 0.5 fl oz | $15.00 – $20.00 |
| PaintScratch DIY Touch-Up Pen | Single pen | $19.95 |
| PaintScratch Pen + Clearcoat Kit | Pen and clear | $46.95 |
| PaintScratch Spray Can Kit | Aerosol base/clear | $79.95 |
Professional and Panel-Level Products
For larger repairs — bumper scuffs, full panel repaints, or fleet work — you’ll want a basecoat/clearcoat system or single-stage product.
| Product | System Type | Size | Price |
|---|---|---|---|
| PPG Omni MBC Basecoat (Auto Color) | Two-stage basecoat | 1 pint | $44.99 |
| UreChem Basecoat/Clearcoat Kit | Two-stage system | Multi-gallon | $87.00 – $115.00 |
| Axalta Cromax ChromaBase | Premium two-stage | 1 gallon | $613.26 |
| Prismatic Powders PSS-11335 | Powder coat (wheels/trim) | Per pound | $10.14 – $11.27 |
For budget-conscious repairs, UreChem also offers low-VOC variations that comply with California’s strict environmental regulations — worth knowing if you’re in a regulated state.
How to Prep Your Surface Before Applying Z1 Paint
Good prep is what separates a repair that lasts from one that peels in six months. Don’t skip this.
Control Your Environment First
The ideal spraying temperature is 70°F. Don’t spray above 80°F, and keep relative humidity below 50%. High moisture causes hazy, cloudy clearcoats. Work out of direct sunlight — hot surfaces make paint flash too fast, leaving a dry, gritty texture instead of a smooth finish.
Clean the Panel Thoroughly
Start with a thorough wash using dish soap (Dawn works well) to strip road film and grease. Follow up with a wax and grease remover or rubbing alcohol on a lint-free microfiber cloth. Any contamination left under the paint will cause adhesion failures.
Sand and Prime Bare Spots
If there’s rust or bubbling, scrape and sand it away completely using 220-grit sandpaper. Then apply a high-build primer to any bare metal or plastic. Let it dry, and block-sand smooth with 600–1000 grit wet sandpaper.
Here’s the critical detail for white paint: Oxford White is semi-translucent. If you spray it directly over dark primer or a patch of exposed body filler, those shadows will bleed through. Apply a uniform light gray or white sealer before your basecoat to guarantee complete opacity and a clean, consistent color result.
How to Apply Touch-Up Paint to Small Chips
The Dabbing Method
Standard brushing applies too much paint and leaves raised edges. Use a dabbing or “tattooing” technique instead.
Shake your touch-up pen for at least 30 seconds — you should hear the mixing ball rattling inside. Prime the paint flow onto a test card first, not directly on your car.
Pour a small amount of paint into a clean bottle cap. Use a fine artist’s brush to pick up a tiny droplet and gently poke it into the center of the chip. Capillary action does the work — the paint flows off the brush tip and fills the crevice naturally.
Build Up in Layers
Solvent-based paint shrinks significantly as it dries. Your first application will sink into the chip. Wait 10–30 minutes between coats and repeat the dabbing process until the dried paint builds slightly above the surrounding clearcoat level — a small dome is what you’re aiming for.
| Stage | Action | Wait Time |
|---|---|---|
| Clean | Soap wash + alcohol wipe | — |
| Sand | 220-grit to feather edges | — |
| Prime | Apply primer to bare metal | 5–10 min between coats |
| Basecoat | Dab Z1 paint into chip | 10–30 min between coats; 1–2 hr before clear |
| Clearcoat | Float clear over dry dome | 10–20 min between coats; overnight cure |
| Buff | Wet sand + compound | 3 days before compound; 30 days before wax |
Apply the Clearcoat Carefully
Once the basecoat dries for 1–2 hours, dab clearcoat over the repair using a foam applicator. Use zero downward pressure — the clearcoat’s solvents will soften and smear the uncured white basecoat beneath it if you push down.
How to Blend Z1 Paint Across a Panel
For bigger repairs — a scraped bumper or a long scratch — you need to blend the new paint into the surrounding factory finish so the boundary line disappears.
Prep the Blend Zone
Block-sand the primed repair area with 800-grit wet sandpaper, then scuff the rest of the panel section with 1000–1500 grit. This finer scratch pattern gives the clearcoat something to grip without leaving marks that show through the basecoat.
Spray the Basecoat Correctly
Rather than making straight horizontal passes, keep the gun over the repair zone and use a rapid 180-degree arcing motion. This concentrates paint thickness over the primed area and feathers it outward naturally.
Apply 3–4 light, wet coats with 5–20 minutes between passes. With each coat, extend your spray pattern 3–4 inches further into the scuffed panel area to taper the color volume toward zero.
Melt the Clear Edge
After flashing the basecoat for 20–30 minutes, apply clearcoat in a staggered sequence. First coat covers only the repair area. Second and third coats extend progressively wider to the panel edge.
Immediately after the final clear coat, load a clearcoat blending solvent into the gun. Mist it lightly over the boundary line where fresh clearcoat meets the original paint. This chemically softens the edge and melts the two surfaces together — the line disappears.
Cure for 72 hours, then wet-sand with 1500–3000 grit and polish with a rubbing compound on a 3-inch foam pad. A smaller pad gives you more control along the blend line compared to a full-size rotary buffer.
Oxford White on Fleet Vehicles: What You Need to Know
Fleet managers love Oxford White for a practical reason: the chemical formula hasn’t changed in over 30 years. That means you can stock one paint code and repair any white Ford in your fleet — no tinting adjustments, no model-year guesswork, no waste.
Why Weathered Panels Look Different
Here’s a situation fleet techs run into constantly: fresh Z1 paint looks slightly different on a 5-year-old panel than on a newer vehicle, even though the paint formula is identical.
The reason is UV degradation. Ultraviolet radiation and road pollutants break down the clearcoat over time, causing micro-pitting and oxidation that shifts the white’s appearance toward a slightly warmer, yellower tone. When you apply fresh, cool-toned Oxford White next to weathered paint, you see a contrast — not because the paint is wrong, but because the old clearcoat is degraded.
The fix is straightforward: compound the surrounding panels with an abrasive cutting compound before you start the repair. This strips the oxidized outer layer and exposes the undamaged paint underneath. Once you restore the original light reflectance of the surrounding area, your fresh Z1 blends in perfectly.