Do your garage door’s performance issues have you stressed out? Squeaking, sticking, or sluggish movement are all signs your garage door rollers might need replacing. This guide will walk you through the entire roller replacement process, from identifying worn rollers to completing the installation yourself. With the right tools and techniques, you can restore smooth operation and extend your garage door’s lifespan.
Why Roller Replacement Matters
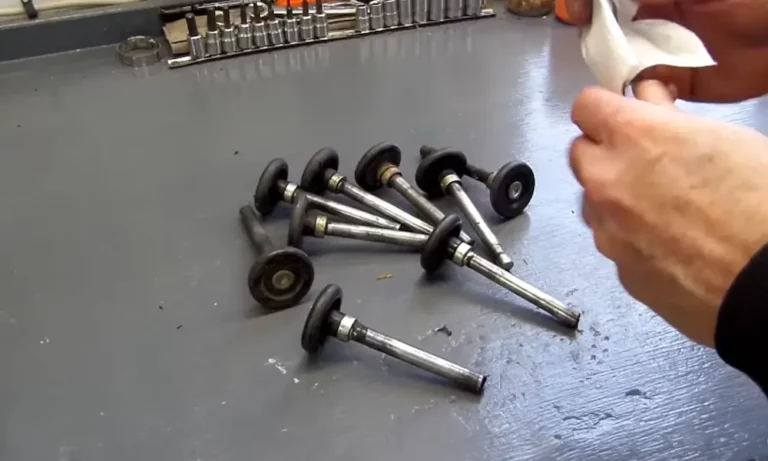
Garage door rollers are the unsung heroes of your garage door system. These small wheels allow your door to glide smoothly along the tracks. When they wear out, your entire door suffers.
Replacing worn rollers isn’t just about quieting annoying noises—it’s about preventing more serious damage. Damaged rollers can wear down your tracks, strain your garage door opener, and even create safety hazards. A simple roller replacement can save you hundreds in potential repair costs.
Types of Garage Door Rollers
Before grabbing your tools, you need to know which type of roller will work best for your door. The two main options are:
Nylon Rollers
- Quieter operation (perfect for attached garages)
- Corrosion-resistant
- Typically last 10-15 years
- Cost $10-$20 per roller
- Ideal for residential use
Steel Rollers
- Greater durability for heavy doors
- Less flexible in misaligned tracks
- Typically last 5-10 years
- Cost $3-$6 per roller
- Require more frequent lubrication
For most homeowners, nylon rollers with ball bearings offer the best combination of quiet operation and durability. Express Garage Doors recommends nylon rollers with 7-10 ball bearings for optimal performance in residential settings.
Signs Your Rollers Need Replacement
Don’t wait for complete failure before replacing your garage door rollers. Look for these warning signs:
- Unusual noises: Grinding, scraping, or popping sounds during operation
- Visible damage: Cracks, chips, or flat spots on roller wheels
- Door vibration: Excessive shaking as the door moves
- Slow operation: Door moves sluggishly or unevenly
- Rollers that look worn: Visible flattening on one side
Creative Door experts suggest inspecting your rollers at least once a year, particularly after extreme weather conditions that can accelerate wear.
Tools You’ll Need
Gather these items before you start:
- Replacement rollers (10-12 for a standard door)
- Socket wrench set
- Flathead screwdriver
- Locking pliers or C-clamps
- Step ladder
- Safety glasses
- Work gloves
- Silicone-based lubricant spray
For bottom roller replacement, you might also need:
- Hammer
- Rubber mallet
- Sharpie marker (for marking track alignment)
Safety First: Preparation Steps
Before touching a single roller, follow these critical safety steps:
- Disconnect the power: Unplug your garage door opener or use the emergency release cord.
- Secure the door: Use locking pliers or C-clamps on both tracks just above a roller to prevent the door from moving.
- Never remove all rollers at once: Work on one roller at a time to maintain door stability.
- Keep children and pets away from the work area.
Ignoring these safety precautions could result in serious injury or door damage.
Step-by-Step Roller Replacement Guide
Replacing Standard Rollers
- Position the door: Make sure the door is secured in place with clamps.
- Locate the hinges: Identify the hinges holding the rollers along the side of the door.
- Loosen hinge bolts: Use your socket wrench to loosen (not remove) the bolts holding the hinge.
- Remove old roller: Once the hinge is loose, slide out the old roller from the track.
- Insert new roller: Slide the new roller into the hinge, then back into the track.
- Tighten bolts: Secure the hinge bolts with your wrench.
- Repeat process: Move to the next roller, working on one at a time.
Replacing Bottom Rollers (More Challenging)
- Mark the track position: Use a sharpie to mark where the track connects to the wall.
- Remove track brackets: Disconnect the vertical track from the wall.
- Bend track slightly outward: Create enough clearance to remove the bottom roller.
- Replace roller: Slide out the old roller and insert the new one.
- Realign track: Return the track to its original position using the marks as a guide.
- Reconnect track brackets: Secure the track back to the wall.
Cost Comparison: DIY vs. Professional Installation
| Approach | Parts Cost | Labor/Tool Cost | Total Cost | Time Investment |
|---|---|---|---|---|
| DIY Standard | $30-$200 | $50-$100 (tools) | $80-$300 | 2-4 hours |
| Professional | $100-$300 | $75-$150/hour | $175-$450 | None |
DIY replacement typically saves 40-60% compared to professional installation. However, professionals can often complete the job in under an hour and can spot other potential issues.
Maintaining Your New Rollers
After installing new rollers, establish these maintenance habits:
- Lubricate regularly: Apply silicone-based lubricant to rollers and tracks every 6 months.
- Clean tracks: Remove debris and buildup from tracks quarterly.
- Inspect routinely: Check for signs of wear during seasonal maintenance.
- Tighten hardware: Verify all hinge bolts remain tight annually.
Houston Overhead Door recommends against using WD-40 on garage door components, as it can attract dust and create sticky residue. Silicone or lithium-based lubricants work best.
Troubleshooting Common Problems
If you encounter issues during or after roller replacement:
Door Won’t Close Properly
- Check for track misalignment
- Verify rollers are properly seated
- Inspect for bent track sections
Continued Noises After Replacement
- Ensure hinges are tight
- Check for track obstructions
- Apply additional lubricant
Rollers Fall Out During Installation
- Verify you’re using the correct roller size
- Check for track damage or flaring
- Ensure hinges are properly secured
A Reddit user on r/HomeImprovement suggests using a small piece of tape to temporarily hold rollers in place during tricky installations.
Advanced Tips for Smooth Operation
- Replace in pairs: Even if only one roller shows damage, replace both sides at the same matching height.
- Upgrade progressively: If budget is tight, replace the most worn rollers first, then do the rest later.
- Consider track cleaning: Use a wire brush to clean tracks before inserting new rollers.
- Test tension: After replacement, disconnect the opener and manually check that the door stays in position halfway open.
For difficult installations, specialized tools like the Quick Roller Change Tool can significantly reduce installation time, though they add about $110 to your project cost.
Enhancing Garage Door Security During Roller Replacement
While replacing your rollers, consider taking these steps to improve your garage door security:
- Inspect locking mechanisms: Check that manual locks engage properly.
- Verify track bolts: Ensure all track mounting hardware is secure.
- Check emergency release: Test the emergency release to confirm it functions correctly.
Many break-ins occur through improperly secured garage doors, so maintenance is also a security opportunity.
The Environmental Impact of Roller Choice
Your roller selection affects more than just your garage door’s performance:
- Nylon rollers: Lower energy consumption for door operation but petroleum-based materials
- Steel rollers: More energy-intensive manufacturing but fully recyclable
- Hybrid options: Steel core with nylon coating balances durability with noise reduction
Choose rollers appropriate for your climate—steel may be better in extremely hot regions, while nylon performs better in humid environments.
Making Your Garage Door Quieter
If noise reduction is your primary goal:
- Opt for nylon rollers with 10+ ball bearings
- Apply a silicone-based lubricant to tracks and hinges
- Tighten all door hardware
- Consider replacing metal hinges with nylon-bushed varieties
- Install a vibration isolation kit on your garage door opener
Mike Garage Door Repair notes that upgrading to quality nylon rollers can reduce garage door noise by up to 75%.
By following this comprehensive guide, you can successfully replace your garage door rollers, improving function and extending your door’s lifespan. Remember to work carefully, maintain proper safety precautions, and consider your specific needs when selecting replacement parts.