Ever pulled into your driveway only to realize your garage remote isn’t working? Or maybe you’ve just installed a new Genie opener and need to set everything up? Programming your Genie garage door opener doesn’t have to be a headache. With the right guidance, you’ll have your system up and running in minutes.
Identifying Your Genie Opener Model
Before jumping into programming, you need to know exactly which Genie model you’re working with.
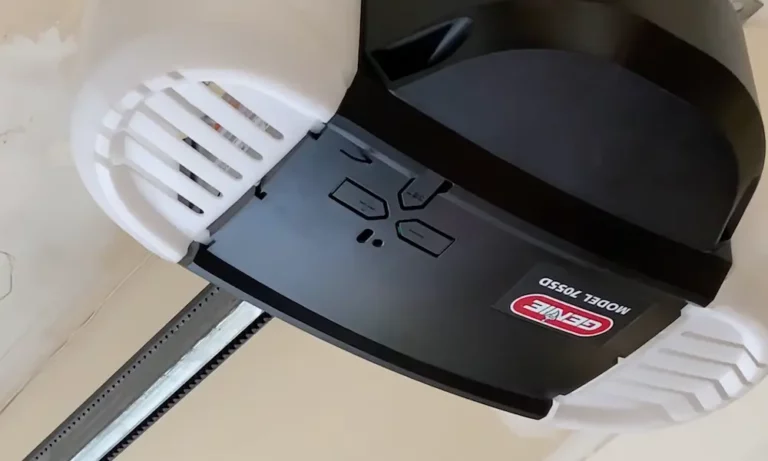
Most modern Genie openers feature a control panel with a square PRGM/SET button alongside up and down arrow buttons. These units typically include LED indicators that provide visual feedback during programming. The buttons are usually located directly on the motor head unit where you can easily reach them.
Older models might use the Intellicode I system (with a red learn indicator light) or Intellicode II systems (blue indicator light). Each requires slightly different programming methods.
Take a quick look at your unit to identify these features before proceeding. This small step saves you tons of frustration later.
Essential Preparation Steps
Before pressing any buttons, make sure:
- Your opener is properly installed and connected to power
- Any new remotes have protective films or battery covers removed
- Remote batteries are fresh and correctly installed
- You’re standing 5-9 feet away from the opener during programming (not too close!)
For most Genie remotes, you’ll need standard batteries like AAA, AA, or 2032 lithium coin batteries. The three-button remote typically included with new models uses the 2032 battery.
Programming Genie Remote Controls
For Modern Genie Openers (With Square PRGM/SET Button)
- Locate the PRGM/SET button on your garage door opener unit
- Press and hold the button for approximately 2 seconds
- Watch for the LED indicators – the small round LED will turn blue, then the long LED will flash purple
- Stand 5-9 feet from the opener (important for proper signal reception)
- Press the remote button you want to program 2-3 times, about once every 2 seconds
- Look for confirmation – both LEDs will flash blue then turn off completely
- Test the remote by pressing the programmed button
Important: You must complete programming within 30 seconds, or the opener will time out (showing flashing red LEDs) and you’ll need to start over.
For Intellicode I Systems (Red Learn Light)
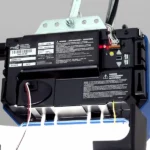
- Find the Learn Code button on the power head near the antenna wire
- Gently press and release this button – a red light will blink for 30 seconds
- Stand at least 2 feet away from the power head
- Press your remote button three times in succession
- The opener light will blink, confirming successful programming
For Intellicode II Systems (Blue Indicator)
Follow the same procedure as modern openers with the square PRGM/SET button described above.
Programming Genie Keypads
Keypads offer convenient access without needing a remote. Here’s how to set yours up:
- Enter the factory default code 3-5-7 on the keypad
- Press the large up/down button
- Go to your opener and press/hold the PRGM/SET button until the small LED flashes red
- Return to the keypad and enter 3-5-7 again
- Press the PRGM/SET button on the keypad
- Create your personal PIN (3-8 digits) and press PRGM/SET to confirm
- Go back to the opener and press/hold PRGM/SET until the LED indicators change (round LED turns blue then off, long LED flashes purple)
- Enter your new PIN on the keypad
- Press the up/down button (the long LED will turn solid purple)
- Press the up/down button again (purple LED turns off)
- Press it a third time to test the system
This three-phase process creates a secure connection between your keypad and opener while establishing your personalized access code.
Programming Multiple Garage Door Openers
Got more than one garage door? You can program a single remote to control multiple doors.
For multi-button remotes, simply:
- Program one button for the first door using the steps above
- Repeat the process with the second button for your second door
- Continue for each door/button combination you need
This functionality is perfect for households with multiple garage doors or for programming one remote to work at both home and work.
Programming Wall Consoles
Wall consoles provide interior control of your garage door. Here’s how to set them up:
- Press and hold the PRGM/SET button on the opener until the round LED turns blue and then off, while the long LED flashes purple
- Press the door button on the wall console once every two seconds
- Continue this pattern until the garage door opener responds by activating
Wall consoles generally have a more straightforward programming process than other components since they serve as the primary control interface.
Troubleshooting Programming Issues
Battery Problems
If programming fails, check:
- Battery levels in your remote or keypad
- Proper battery installation (correct polarity)
For standard three-button remotes, you’ll need to carefully disassemble the housing with a flat screwdriver to access and replace the 2032 lithium coin battery.
Signal Interference Issues
If you’re having trouble establishing a connection:
- Try adjusting your distance from the opener (5-9 feet is ideal)
- Remove potential sources of interference like LED lights or electronics
- Make sure you complete programming within the 30-second window
- Try programming at different times of day when interference might be reduced
When to Call a Professional
Consider professional help if:
- You’ve tried multiple times with fresh batteries and correct positioning
- Your opener doesn’t respond to any programming attempts
- You notice mechanical issues with your door operation
- You’re uncomfortable with the technical aspects of programming
Professional technicians have specialized diagnostic equipment and experience with various opener models that can quickly resolve persistent issues.
Programming Your Genie Garage Door Opener: A Visual Guide
| Component Type | Programming Button Location | LED Indicator Behavior | Typical Issues |
|---|---|---|---|
| Modern Openers | Square PRGM/SET button on motor head | Small LED turns blue, long LED flashes purple | Timeout after 30 seconds |
| Intellicode I | Learn Code button near antenna | Red light blinks for 30 seconds | Signal reception distance |
| Intellicode II | Square PRGM/SET button | Blue indicator light response | Similar to modern openers |
| Keypads | Initial entry uses 3-5-7 code | N/A (follows opener indicators) | Battery depletion, weather exposure |
Enhancing Your Garage Door Security
Once programmed, your Genie opener offers several security benefits:
- Modern systems use rolling code technology that generates a new access code each time the remote is used
- You can activate vacation mode on wall consoles to temporarily disable remote access
- Personalized PIN codes for keypads prevent unauthorized entry
- The 30-second programming window prevents accidental reprogramming
These security features protect your home from code-grabbing devices that might attempt to gain unauthorized access.
Keeping Your Genie System Updated
To ensure optimal performance of your programmed system:
- Replace remote batteries annually or when performance decreases
- Periodically check keypad battery status, especially before extended trips
- Test all programmed devices monthly to ensure proper operation
- Keep a record of your personalized PIN codes in a secure location
- Clean keypad buttons occasionally to prevent dirt build-up that affects functionality
The History Behind Your Genie Garage Door Opener
Genie has been a leader in garage door technology since the 1950s when they created the first mass-produced, radio-controlled residential garage door opener. Their commitment to innovation has kept them at the forefront of the industry for decades.
This long history explains why different programming methods exist across their product line – as technology evolved, so did their programming interfaces. Today’s models reflect years of refinement in both security and ease of use.
When to Replace vs. Reprogram
Sometimes issues arise that programming can’t fix. Consider replacement if:
- Your opener is more than 15-20 years old
- Parts for your model are no longer available
- The motor shows signs of failure (unusual noises, inconsistent operation)
- You want features not available on your current model
- Security technology is outdated (particularly pre-rolling code models)
Otherwise, most operational issues can be resolved through proper programming and basic maintenance.
Modern Genie openers incorporate advanced features like smartphone control, battery backup, and enhanced security that might make upgrading worthwhile if your model is older.
By following these detailed instructions and troubleshooting tips, you should be able to successfully program any Genie garage door opener component. Remember that patience and attention to the LED indicators are key to successful programming. If you continue to experience difficulties, Genie’s customer support resources can provide additional assistance for your specific model.