Tired of juggling multiple remotes just to get into your garage? Your car’s built-in HomeLink system can replace up to three separate remote controls—if you know how to set it up properly. This guide will walk you through programming your HomeLink garage door opener, no matter what vehicle you drive.
What Is HomeLink and Where to Find It
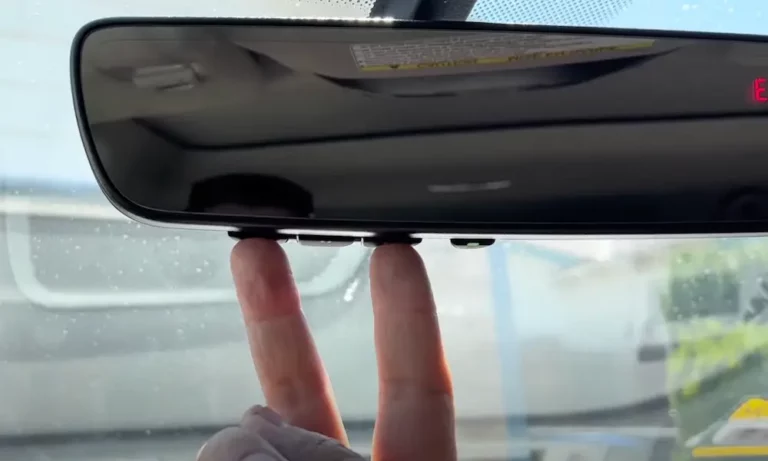
HomeLink is a universal remote system built into many vehicles that lets you control your garage door, security gate, or home lighting directly from your car. You’ll typically find the HomeLink buttons in one of these locations:
- On your rearview mirror
- In the overhead console
- On your car’s sun visor
Most HomeLink systems feature three programmable buttons with an indicator light that changes color or blinks during programming. Before you start, locate these buttons in your vehicle and have your original garage door remote handy.
Before You Begin Programming
Getting a few things ready before you start will make the programming process much smoother.
Position Your Car Correctly
Park your car outside the garage with the front facing toward the door. Make sure you’re close enough for the signal to reach but not so close that you can’t see what’s happening with the door.
Prepare Your Remote
Put fresh batteries in your handheld garage door remote for the strongest possible signal. This small step can save you lots of frustration during programming.
Check Your Engine Status
Some vehicles require the ignition to be on or the engine running during programming. Check your owner’s manual to see if this applies to your car.
Clear Existing Programming First
It’s always best to start with a clean slate, especially if you’re programming HomeLink for the first time or in a new vehicle.
- Find the two outside HomeLink buttons on your system
- Press and hold both buttons simultaneously for about 10-20 seconds
- Release when the indicator light starts blinking
- Your HomeLink system is now reset and ready for programming
Standard Programming Method
This basic method works for many garage door openers. Here’s how to do it:
- Press and hold the HomeLink button you want to program
- Hold your garage door remote 1-3 inches from the HomeLink buttons
- While still pressing the HomeLink button, press and hold the button on your handheld remote
- Continue holding both buttons until the HomeLink indicator light changes pattern (either blinking faster, changing color, or becoming solid)
- Release both buttons
- Press the programmed HomeLink button to test if it works
If your garage door operates, great! You’re done. If not, you likely have a rolling code system that needs additional steps.
Programming Rolling Code Systems
Modern garage door openers use rolling code technology for better security. If the standard method didn’t work, follow these additional steps:
- Locate the “Learn” or “Smart” button on your garage door opener motor unit (usually behind the light cover or on the back panel)
- Press this button – you’ll see a light start blinking
- You now have about 30 seconds to complete the next step
- Return to your vehicle and press the programmed HomeLink button 2-3 times (hold for 2 seconds each time)
- Your garage door should now operate when you press the HomeLink button
Vehicle-Specific Programming Instructions
While the basic process is similar across vehicles, there are some brand-specific variations you should know about.
Toyota HomeLink Programming
Toyota vehicles have a slightly different programming sequence:
- Clear existing programming by pressing buttons 1 and 3 simultaneously for 10 seconds until you see a green light
- Hold your garage remote about 1-2 inches from the HomeLink buttons
- Press and hold both your remote button and desired HomeLink button until the light turns green (about 5 seconds)
- Press the HomeLink button repeatedly until the garage door moves
- For rolling code systems, complete the “Learn” button process described above
Mazda HomeLink Programming
For Mazda owners, follow these steps:
- Press and release the HomeLink button you want to program (the light will flash amber)
- Hold your remote 1-3 inches from the HomeLink button
- Press and hold the remote button until the indicator changes from amber to green
- Press the HomeLink button again to confirm programming
- If needed, try the “press and hold for 2 seconds, then release” pattern up to three times
Volvo HomeLink Programming
Volvo’s HomeLink system uses these programming steps:
- Press the HomeLink button (indicator will flash yellow)
- Position your remote 6-12 inches from the HomeLink button
- Press and hold your remote button until the indicator changes from yellow to green
- Test by pressing the programmed HomeLink button
- For rolling code systems, complete the additional “Learn” button steps
Troubleshooting Common Problems
If you’re struggling to get your HomeLink programmed correctly, try these fixes:
Remote Isn’t Working During Programming
- Replace the batteries in your handheld remote
- Try holding the remote at different distances from the HomeLink buttons (1-12 inches)
- Make sure nothing is blocking the signal between the remote and the HomeLink system
Programming Works But Door Doesn’t Move
- Check if your garage door opener has a rolling code system and complete those additional steps
- Ensure your garage door opener is receiving power
- Verify that your handheld remote works directly with the garage door
HomeLink Light Pattern Isn’t Changing
- Hold the buttons longer during programming (up to 30 seconds)
- Try programming in a different location to avoid signal interference
- Make sure your vehicle’s ignition is on if required by your model
Programming HomeLink for Multiple Devices
One of the best features of HomeLink is its ability to control up to three different devices. To program additional garage doors or gates:
- Choose a different HomeLink button than the one already programmed
- Follow the same programming steps for each device
- Be sure to use the corresponding remote for each garage door or gate
This allows you to control multiple entrances without switching between remotes.
The Benefits of Using HomeLink
Taking the time to program your HomeLink system offers several advantages:
- No more searching for or replacing lost garage door remotes
- Reduced clutter in your car without separate remotes
- Consistent access to your garage even when your handheld remote’s batteries die
- Better security with rolling code technology
- Control of multiple home automation devices from your vehicle
Maintaining Your HomeLink Programming
Once programmed, your HomeLink settings should remain even if your car battery dies. However, you might need to reprogram in these situations:
- After replacing your vehicle’s battery
- When you get a new garage door opener
- If you move to a new home with different garage equipment
Keep this guide handy for those occasions when you need to refresh your programming.
HomeLink Compatibility
HomeLink works with most garage door openers manufactured after 1995, including major brands like Chamberlain, LiftMaster, Genie, and Overhead Door. If you have an older system or are unsure about compatibility, check the HomeLink website for specific information about your opener.
New Homeowners: Programming After Moving
If you’ve just moved into a new home with an existing garage door opener:
- Get the current remote from the previous homeowner if possible
- If no remote is available, check the garage door opener unit for model information and purchase a compatible remote
- Once you have a working remote, follow the standard HomeLink programming procedures
- Consider resetting the rolling code on your garage door opener for security reasons
Smart Home Integration with HomeLink
Modern HomeLink systems in newer vehicles can integrate with smart home systems. This allows you to:
- Check if your garage door is open or closed from your phone
- Create automation routines involving your garage door
- Receive alerts when your garage door opens or closes
- Control additional home features like lighting or thermostats
Check your vehicle’s manual or the manufacturer’s website for smart home integration options.
Programming HomeLink Without an Existing Remote
Lost your original garage door remote? You can still program HomeLink:
- Look for the brand and model information on your garage door opener unit
- Purchase a compatible replacement remote from a hardware store or online
- Program the new remote to work with your garage door opener following the manufacturer’s instructions
- Once the new remote works, use it to program your HomeLink system
HomeLink vs. Standalone Garage Door Openers
Why use HomeLink instead of just keeping your original remote?
| Feature | HomeLink | Standalone Remote |
|---|---|---|
| Battery life | Powered by your car | Requires battery replacement |
| Security | Uses rolling code technology | Varies by model |
| Convenience | Always in your vehicle | Can be misplaced or forgotten |
| Number of devices | Controls up to 3 devices | Typically one per remote |
| Replacement cost | Built into vehicle | $30-$60 per remote |
HomeLink Across Different Car Brands
| Car Brand | HomeLink Location | Programming Reset Method | Indicator Color |
|---|---|---|---|
| Toyota | Rearview mirror or overhead console | Press buttons 1 & 3 for 10 seconds | Green |
| Mazda | Rearview mirror | Press all 3 buttons for 10 seconds | Amber to green |
| Volvo | Overhead console | Press outside buttons for 20 seconds | Yellow to green |
| Honda | Rearview mirror | Press outside buttons for 10-20 seconds | Red to rapidly blinking |
| Ford | Overhead console or visor | Press outside buttons for 20 seconds | Red blinking |
HomeLink has become a standard feature in many vehicles, making garage access simpler and more convenient. With the steps outlined in this guide, you can successfully program your system and enjoy the benefits of integrated home automation from your car.