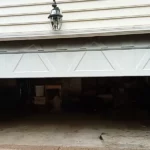
Ever watched your garage door cables snap and felt that sinking feeling? You’re looking at a door that won’t budge and a car that’s stuck inside. But before you panic and call a pro, replacing garage door spring cables is something you can tackle yourself—with the right approach and proper safety precautions.
Understanding Your Garage Door Spring System
Before grabbing your tools, you need to know what type of spring system your garage door uses. This determines the replacement process.
Torsion Springs vs. Extension Springs
Torsion springs sit horizontally above your garage door opening on a metal shaft. They work by twisting when the door closes and untwisting when it opens. These springs tend to be more durable and operate more smoothly, but they require precise installation due to their high tension.
Extension springs run parallel to your garage door’s horizontal tracks. They stretch and contract as the door moves. While they’re typically easier to install than torsion springs, they wear out faster and need more frequent checks for fraying or slack.
Here’s a quick comparison to help you identify your system:
| Spring Type | Location | Operation | Lifespan | Difficulty to Replace |
|---|---|---|---|---|
| Torsion | Above door opening | Twists/untwists | 7-12 years | Higher |
| Extension | Along horizontal tracks | Stretches/contracts | 5-7 years | Moderate |
Safety First: Critical Precautions
Working with garage door springs is potentially dangerous—these components are under extreme tension that can cause serious injury if mishandled.
Essential Safety Steps
- Disconnect power to your garage door opener by unplugging it or turning off the circuit breaker.
- Secure the door in place using locking pliers or C-clamps on the tracks about 12-18 inches above floor level.
- Never stand directly under springs or cables while working on them.
- Wear protective gear including safety glasses and sturdy gloves.
- Use proper tools designed for garage door work, especially winding bars for torsion springs.
Tools and Materials You’ll Need
Gathering everything before you start saves time and frustration:
- Replacement cables (matched to your door’s height and weight)
- Winding bars (for torsion springs)
- Vice grips or C-clamps
- Adjustable wrench
- Socket wrench (typically 7/16″)
- Step ladder
- Safety glasses and gloves
- Lubricant spray
How to Replace Extension Spring Cables
Extension spring cables are typically easier to replace than torsion spring cables. Here’s how to do it:
Step 1: Secure the Door
Clamp the door to the tracks about a foot above the floor. This prevents the door from crashing down during the repair.
Step 2: Remove the Broken Cable
Locate the S-hook that connects the cable to the track bracket. Unhook it and remove the damaged cable from the pulley system. If the cable is completely broken, you might need to cut it away with bolt cutters.
Step 3: Install the New Cable
Thread your replacement cable through the pulley system exactly as the old one was routed. Attach one end to the bottom bracket on the door and the other to the S-hook on the track bracket.
Step 4: Test and Adjust
Remove the clamps and manually test the door’s movement. It should lift smoothly with even tension on both sides. If one side feels heavier than the other, you may need to adjust the cable length.
How to Replace Torsion Spring Cables
Replacing cables on a torsion spring system requires more care because of the high tension involved.
Step 1: Release Spring Tension
Insert winding bars into the winding cone and carefully loosen the set screws. Rotate the bars downward to release tension, quarter turn by quarter turn. Continue until all tension is released.
Step 2: Remove the Old Cable
Once the spring is unwound, loosen the set screws on the cable drum. Slide the drum slightly away from the center bearing plate and remove the damaged cable from both the drum and bottom bracket.
Step 3: Install the Replacement Cable
Feed the new cable through the bottom bracket and up to the drum. Wind the cable around the drum following the grooves. Make sure it’s taut before tightening the set screws on the drum.
Step 4: Rewind the Spring
Using your winding bars, reapply tension to the spring. For a standard 7-foot garage door, this typically requires 28-36 quarter turns. Consult your door’s specifications for the exact number.
Step 5: Lubricate and Test
Apply garage door lubricant to the springs and cables to ensure smooth operation. Test the door’s balance by lifting it halfway manually—it should stay in place without rising or falling.
Common Problems and Solutions
Uneven Door Movement
If your door rises unevenly after replacing the cables, the cable length might need adjustment, or the springs could have uneven tension.
Solution: Check that both cables have the same tension and that they’re properly seated in their drums or pulleys.
Door Won’t Stay Up
When a manually lifted door won’t stay in position halfway up, the spring tension needs adjustment.
Solution: For torsion springs, add more turns using the winding bars. For extension springs, move the S-hook to increase tension.
Cable Slipping Off Drum
This usually happens when there’s insufficient tension in the system.
Solution: Ensure proper spring tension and verify that the cable is correctly wound around the drum.
Preventative Maintenance Tips
Once you’ve replaced your garage door cables, these maintenance practices will help prevent future failures:
- Inspect cables monthly for signs of fraying, rust, or wear.
- Lubricate moving parts twice a year with a garage door-specific lubricant.
- Test the door balance regularly by disconnecting the opener and manually lifting the door halfway.
- Tighten hardware periodically as vibration can loosen bolts and screws.
- Keep tracks clean and free of debris that can cause uneven movement.
Signs You Need to Replace Your Cables
Knowing when replacement is needed can prevent complete system failure:
- Visible fraying or unwinding of cable strands
- Rust or corrosion along cable length
- Door operating unevenly or jerking during movement
- Unusual noises during operation
- Visible gaps or slack in the cables
DIY vs. Professional Replacement: Making the Right Choice
While replacing garage door spring cables is doable for handy homeowners, certain situations call for professional help:
Consider DIY When:
- You have mechanical experience
- The door has a simple extension spring system
- You have all the proper tools
- You’re comfortable following detailed safety protocols
Call a Pro When:
- Your door has dual torsion springs requiring simultaneous adjustment
- You have a high-lift or specialized garage door system
- Your garage door is particularly heavy or oversized
- You lack confidence in handling components under high tension
Final Tips for Successful Cable Replacement
- Take photos before disassembly to reference the original configuration.
- Replace cables in pairs even if only one is broken to maintain even wear.
- Mark winding bar positions when dealing with torsion springs to track your turns.
- Work during daylight hours for better visibility.
- Have a helper nearby (but not directly under the door) in case assistance is needed.
Replacing garage door spring cables requires patience and careful attention to detail. By following these steps and prioritizing safety, you can restore your garage door to proper working order and save on professional repair costs. The satisfaction of successfully completing this moderately challenging home repair is well worth the effort.