Your Mazda’s infotainment screen is acting up, maps are outdated, or Bluetooth keeps dropping. A software update usually fixes all of it. This guide covers exactly how to update Mazda infotainment — whether you drive an older MZD Connect model or a newer 7th Gen system. Stick around, because the process is very different depending on which system you have.
First, Figure Out Which System You Have
Before you do anything else, you need to identify your infotainment generation. The update method changes completely depending on this.
First-Generation (MZD Connect): You’ll see a circular icon menu on the home screen. The screen works as a touchscreen only when parked. This system covers most Mazda models from 2014 to roughly 2021.
7th Generation (Mazda Connect 2): You’ll see a horizontal, list-based menu. The screen typically doesn’t work as a touchscreen at all — you use the rotary dial instead. This system rolled out starting with the 2019 Mazda 3.
Here’s a quick reference to help you confirm your generation:
| Model | Years | Generation |
|---|---|---|
| Mazda 3 | 2014–2018 | First-Gen |
| Mazda 6 | 2015–2021 | First-Gen |
| CX-5 | 2016–2020 | First-Gen |
| CX-9 | 2016–2020 | First-Gen |
| MX-5 Miata | 2016–2023 | First-Gen |
| Mazda 3 | 2019–Present | 7th Gen |
| CX-30 | 2020–Present | 7th Gen |
| CX-5 | 2021–Present | 7th Gen |
| CX-50 | 2023–Present | 7th Gen |
| CX-90 | 2024–Present | 7th Gen |
How to Update First-Generation Mazda Infotainment (Manual USB Method)
If you drive an older Mazda, you update the system manually using a USB drive. Yes, it’s a little old-school. But it’s completely doable at home.
Step 1: Prepare Your USB Drive
This step trips up a lot of people. The system is picky about the drive you use.
- Use a USB 2.0 flash drive (not USB 3.0 — the older system won’t recognize it)
- Capacity must be 4 GB to 16 GB
- Format it to FAT32 using a Windows PC
- Place the firmware files at the root level of the drive — not inside any folders
You’ll typically need two files: a “failsafe” package and a “reinstallation” package. Download these from the official Mazda Connect support page. Once both files sit directly on the drive, you’re ready.
Step 2: Enter Diagnostic Mode
- Get in your car but don’t start the engine. Press the start button once without pressing the brake pedal. This puts the car in Accessory mode.
- Wait for the infotainment screen to fully boot up.
- On the commander switch (the rotary dial area), press and hold the Music, Favorites, and Volume Mute buttons simultaneously for 2–5 seconds.
- A diagnostic screen appears.
Once you’re in, clear any stored fault codes before flashing new firmware. Enter code “3” to clear internal error logs, then code “2” to wipe fault history. Starting clean prevents software conflicts during the install.
Step 3: The Most Important Safety Step — Don’t Let the Power Cut Out
Here’s the part most guides skip, and it matters a lot.
The full update takes 40–50 minutes. But Mazda’s power-save feature cuts accessory power after just 25 minutes of inactivity. If power cuts mid-install, you can permanently brick the head unit.
Every 15–20 minutes, press and release the brake pedal (automatic) or clutch pedal (manual). That resets the timer. Set a phone reminder if you need to.
Step 4: Install the Firmware
For systems older than firmware version 70.00.335:
- Install the Failsafe package first — always.
- After it confirms installation, restart diagnostic mode.
- Enter code “99” to find and install the Reinstallation package.
For systems running firmware 74.00.324 or newer:
Mazda combined both packages into one “Update” file. Just install that single file and you’re done.
After the install completes, the system restarts automatically and shows the Mazda logo. That’s your confirmation it worked.
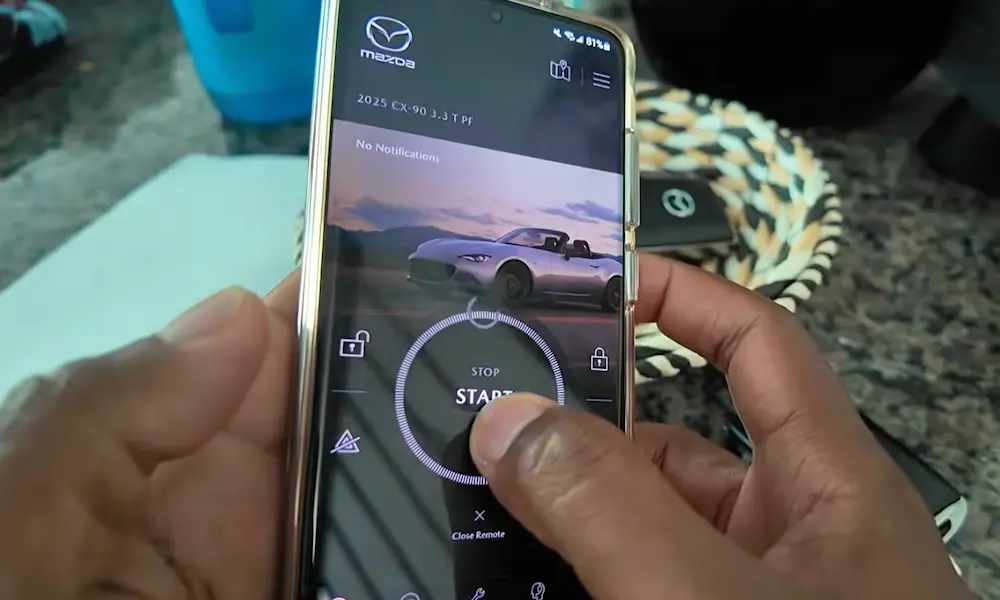
How to Update 7th Generation Mazda Infotainment (Over-the-Air)
Good news if you have a 2019 or newer Mazda: you don’t need a USB drive. The 7th Gen system supports over-the-air (OTA) updates delivered directly to the car.
Set Up the MyMazda App First
You need to connect your vehicle to Mazda Connected Services through the MyMazda app. This creates the secure link between your car and Mazda’s servers. Most 2019–2024 US models include a three-year free trial for connected services.
Check for and Install Updates
Once enrolled, checking for updates is simple:
- Tap Settings on the infotainment screen
- Select System → Software Update
- Tap “Check for Software Updates”
Or turn on “Automatically Check for Updates” and the car scans for new software while you drive. When an update is ready, a pop-up appears on the display.
Here’s what makes this system smart:
- Updates download in the background while you use navigation, music, or anything else
- If you turn the car off mid-download, it pauses and resumes when you restart — no data lost
- Once downloaded, turn the ignition off and restart the engine to activate the new version
Connect to Home Wi-Fi for Faster Downloads
For large updates like major firmware revisions, connecting to your home network speeds things up significantly. Here’s how:
- Go to Settings → Connectivity Settings → Wi-Fi Settings
- Toggle Wi-Fi on
- Select your home network and enter the password
That’s it. The car uses your home router’s bandwidth instead of its cellular modem, which makes a real difference for big file downloads. Mazda’s own Wi-Fi setup guide walks through the full process.
How to Update Your Mazda Navigation Maps
Navigation map updates work separately from system firmware. Even on OTA-capable vehicles, maps usually need their own process.
Using the Mazda Update Toolbox
Most Mazdas with factory navigation store maps on a dedicated SD card in the center console or dashboard slot. To update it:
- Turn the ignition off, then remove the SD card
- Insert the card into a PC running the free Mazda Update Toolbox
- The Toolbox reads the card’s unique ID and checks your subscription status (most US Mazdas include 3 years of free map updates)
- Download the latest maps from Mazda’s servers and write them to the card
- Back up your card data first — map files can get corrupted during the write process
- Reinsert the updated card. The system initializes the new data on startup.
What About Replacement Cards?
Official Mazda SD cards retail for around $450. But Reddit’s CX-5 community has confirmed that third-party cards on Amazon or eBay often work fine and cost under $100. Some even unlock speed limit display on the head-up display. Just know that Mazda doesn’t officially support them and future firmware updates could cause compatibility issues.
How to Update the Gracenote Media Database
The Gracenote database controls artist names, album art, and track info when you play CDs or USB music. Mazda releases periodic updates for it, and installing one is the easiest update you’ll ever do.
- Download the Gracenote update file from the Mazda Connect support site
- Copy it to a USB drive
- Plug the drive into your car
- Go to System Settings → Gracenote Database Update
- Follow the on-screen prompts
This update doesn’t touch your operating system. It only refreshes metadata for music recognition.
Dealer vs. DIY: What’s the Real Cost?
There’s a wide range of what dealers charge for these updates. Some include firmware updates in routine service at no extra charge. Others don’t.
| Update Type | Dealer Cost (US) | DIY Cost |
|---|---|---|
| Firmware Update (Gen 1) | $50–$400 | Free |
| Navigation Map Update | $150–$450 | $85–$135 (subscription) |
| OTA Update (Gen 2) | Usually included | Free (with subscription) |
| Gracenote Metadata | $50–$100 | Free |
Doing it yourself saves real money. The DIY process for firmware and Gracenote is completely free. Maps cost a small subscription fee, but it’s a fraction of what a dealer quotes.
When Updates Fix More Than Just Bugs
Software updates often solve deeper problems you might not expect. For example:
- Battery drain — Early CX-90 and MX-30 models had a telematics module staying active after shutdown, slowly killing the 12-volt battery. A software patch fixed it.
- Ghost touches — Some CX-5 and Mazda 3 owners reported the screen registering phantom inputs. Firmware updates recalibrated touch sensitivity and reduced the issue.
- Bluetooth drops and slow boot times — Classic first-gen complaints that a firmware refresh usually solves completely.
Staying current with updates keeps your car running the way it should.
Quick Fixes: Resetting a Frozen or Black Screen
Before you go through a full update, try these if your screen is acting up.
Soft Reset (keeps your settings):
Press and hold the Volume/Mute knob + Navigation button + Back/Music button simultaneously for 10–15 seconds. The screen goes black, then restarts with the Mazda logo.
Still frozen? Try a hard reset through Settings — but this wipes saved stations, paired phones, and nav favorites.
Completely black screen:
First, press the volume knob — it also works as a power button. If that doesn’t help, pull the ROOM fuse from the fuse box for at least one minute. This cuts all power to the infotainment computer and clears memory glitches a button reset can’t reach.
What’s Coming Next: Google Built-In for 2026 Models
Starting with the 2026 CX-5, Mazda is swapping its proprietary system for a Google Built-in platform. This is the biggest change to Mazda’s digital setup in over a decade.
The new system runs Google Maps, Spotify, and other apps natively — no phone needed. It also includes the Google Play Store and Gemini AI for natural-language voice commands. Updates happen automatically in the background. No USB drives, no SD cards, no diagnostic mode codes.
The trade-off? Full features like Google Assistant and the Play Store will require a paid subscription after the initial trial ends. It’s the smartphone model applied to cars — and it’s only going to become more common across the industry.