Having your LiftMaster garage door opener suddenly stop working can throw a wrench in your day. Whether you’re rushing to work or coming home with groceries, a malfunctioning garage door is more than just an inconvenience—it’s a security issue that needs fixing ASAP.
Don’t worry though, you’ve come to the right place. In this guide, I’ll walk you through every possible reason why your LiftMaster garage door opener isn’t working and how to fix it yourself in most cases.
Check the Power Supply First
Nothing works without power, right? Before diving into complex troubleshooting, let’s verify your opener has electricity.
Is Your Opener Getting Power?
Look for any lights on your opener unit. No lights usually mean no power. Check your circuit breaker to see if it’s tripped—this solves about 30% of “dead” opener problems.
If the circuit breaker looks fine, try plugging something else into the same outlet. If that works, your outlet is good. If not, you’ve found your culprit.
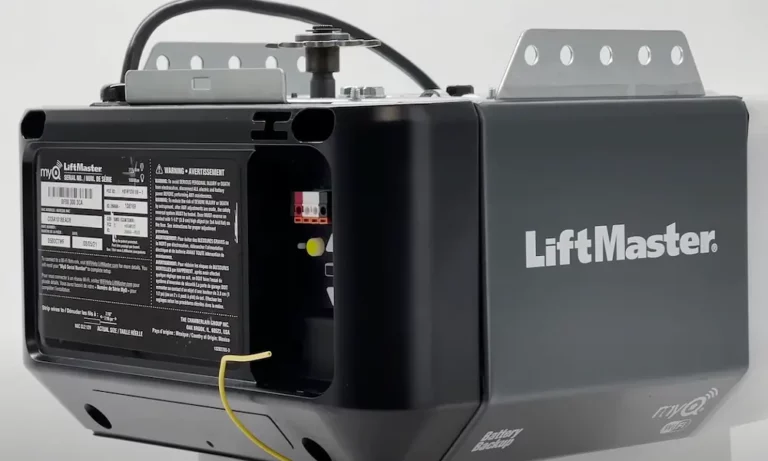
Battery Backup Issues
If you have a model with battery backup (like the LiftMaster 8550), the main power might be out but the backup should kick in. If it doesn’t, your backup battery might be dead.
Look for the battery compartment on the side of your opener. A healthy battery should read about 12V on a multimeter. Anything below 10.5V means it’s time for a replacement.
Remote and Wall Button Problems
Your opener might be fine, but the ways you tell it to open or close might not be.
Remote Control Not Working
If your garage door opener doesn’t respond to your remote, try these fixes:
- Replace the batteries in your remote
- Reprogram your remote by:
- Finding the “Learn” button on your opener
- Pressing and releasing it
- Within 30 seconds, press your remote button 3 times
- Test to confirm it’s working
Sometimes LED light bulbs can interfere with remote signals. If you’ve recently installed LEDs in your garage, try removing them to see if that fixes the issue.
Wall Button Issues
If your wall-mounted button isn’t working:
- Check for loose wires at the button and opener
- Make sure the button isn’t stuck
- Try holding the button longer (sometimes needed after power outages)
For keypad issues, you may need to resynchronize it by entering the default code (often 1-2-3-4) and then following the programming instructions.
Safety Sensor Problems
Safety sensors are the most common culprit when your door opens but won’t close.
Misaligned Sensors
These small photo-eye sensors at the bottom of your garage door track are designed to prevent the door from closing if something’s in the way.
When they’re misaligned, your LiftMaster will think there’s an obstruction. Look for blinking lights on the sensors. Both should be solid. If they’re blinking:
- Make sure both sensors directly face each other
- Check they’re at the same height (typically 6 inches from the floor)
- Gently adjust the brackets until both lights are solid
Dirty or Blocked Sensors
Sometimes it’s not misalignment but dirt or cobwebs blocking the sensors. Clean both sensor lenses with a soft, dry cloth. Winter condensation can also cause issues, so wipe away any moisture.
Sunlight shining directly on a sensor can also cause false readings. If this happens at certain times of day, consider adding a small shield.
Error Codes and What They Mean
Your LiftMaster’s blinking lights aren’t just for show—they’re telling you what’s wrong.
Decoding Common Error Patterns
The LED light on your opener blinks in specific patterns to indicate different problems:
- 1 blink: Door sensor issues
- 2 blinks: Short or reversed wiring to sensors
- 3 blinks: Wall control wiring issue
- 4 blinks: Sensor misalignment
- 5 blinks: Motor overheating or RPM sensor failure
- 6 blinks: Motor circuit failure
Consult your user manual or LiftMaster’s website for your specific model’s error codes.
How to Clear Error Codes
Most error codes can be cleared by:
- Fixing the underlying issue
- Disconnecting power for 30 seconds
- Reconnecting and testing
For persistent errors, a full reset might be necessary (more on that below).
Mechanical Issues That Stop Operation
Sometimes the problem is mechanical, not electrical.
Door Moves Partially Then Stops
If your door starts moving but stops partway, check:
- Track obstructions: Look for anything blocking the door’s path
- Bent track: Visually inspect for any deformation
- Worn rollers: Listen for squeaking and look for excessive play
Grinding or Unusual Noises
Grinding noises often indicate worn gears inside the opener. This is common in older LiftMaster units and usually requires gear replacement—a fairly involved repair that might be better left to professionals.
Travel Limit Adjustments
If your door doesn’t open or close completely, your travel limits might need adjusting.
Setting Open and Close Limits
Travel limits tell your opener when to stop moving. To adjust them:
- Locate the limit adjustment screws (usually on the side of the opener)
- For older models, turn the “UP” adjustment to increase how far it opens
- Turn the “DOWN” adjustment to change how far it closes
- Test after each small adjustment
Newer LiftMaster models use a different system. You’ll need to use the controls on the opener itself to set travel limits electronically.
Force Adjustments
If your door reverses before touching the floor or struggles to open, you might need to adjust the force settings:
- Find the force adjustment controls (consult your manual for location)
- Increase force slightly if the door reverses prematurely
- Decrease force if the door doesn’t reverse when it should
- Always test the safety reversal system after making adjustments
Resetting Your LiftMaster Opener
Sometimes, the best solution is to start fresh with a complete reset.
How to Perform a Factory Reset
To reset your LiftMaster to factory settings:
- Find the “Learn” button on your opener
- Press and hold it for 6 seconds until the LED light goes out
- This erases all programmed devices and settings
- You’ll need to reprogram your remotes, keypads, and travel limits
When a Reset Won’t Help
A reset won’t fix physical problems like:
- Broken gears
- Damaged circuit boards
- Failed motors
- Broken door springs or cables
These issues require repair or replacement of specific components.
LiftMaster Smart Features Troubleshooting
Many recent LiftMaster openers have WiFi and smartphone connectivity that can cause unique issues.
MyQ App Connection Problems
If your MyQ app can’t connect to your opener:
- Verify your home WiFi is working
- Make sure your opener is within range of your router
- Check that your phone has the latest version of the MyQ app
- Try deleting and reinstalling the opener in the app
Resetting Smart Features
To reset just the smart features without affecting your remotes and travel settings:
- Find the WiFi button on your opener (usually has a WiFi symbol)
- Press and hold until the WiFi LED turns off (about 10 seconds)
- Re-pair using the MyQ app instructions
Compatibility Issues with Accessories
Not all accessories work with all openers.
Remote and Keypad Compatibility
If you’ve purchased a new remote or keypad that won’t program, check compatibility:
- LiftMaster Security+ 2.0 devices only work with newer openers
- Older Security+ remotes won’t work with newer 2.0 openers
- Third-party remotes often have limited compatibility
Using the correct replacement parts is crucial for proper function.
Light Bulb Requirements
Using the wrong light bulbs can cause interference:
- Most LiftMaster openers require 100W max incandescent bulbs
- If using LEDs, use LiftMaster-approved LED bulbs only
- Don’t exceed the wattage rating on your opener
The Complete LiftMaster Error Code Table
Here’s a comprehensive table of error codes to help you pinpoint problems faster:
| Blink Pattern | What It Means | First Fix to Try |
|---|---|---|
| 1-1 | Sensors not connected | Check sensor wiring connections |
| 1-2 | Sensor wire shorted | Inspect wire for damage |
| 1-3 | Sensor misalignment | Realign sensors until LEDs are solid |
| 1-4 | Sensor obstruction | Remove obstacles, clean lenses |
| 1-5 | Door won’t close fully | Adjust down travel limit |
| 2-1 | Wire to wall control shorted | Check wall control wiring |
| 2-2 | Wall control wiring failure | Replace wall control wiring |
| 2-3 | Memory failure | Reset opener and reprogram |
| 2-4 | Incompatible accessory | Replace with compatible device |
| 3-1 | Force sensor fault | Adjust force settings |
| 3-2 | RPM sensor failure | May require professional repair |
| 3-3 | Thermal protection activated | Let motor cool for 30 minutes |
| 4-1 | Motor circuit failure | Professional repair needed |
| 4-2 | Logic board communication error | Reset power |
| 5-5 | Communication timeout | Reset WiFi connection |
Replacing Your LiftMaster: When It Makes Sense
Sometimes replacement is more economical than repair.
Age and Repair Cost Considerations
Consider replacement when:
- Your opener is over 15 years old
- Repair costs exceed 50% of a new unit’s price
- You want modern security features
- You need quieter operation
New models offer better security, quieter operation, and smart features like phone control.
Choosing the Right Replacement
If you decide to replace, consider:
- Belt drive for quietest operation
- Chain drive for durability and value
- Smart connectivity if you want phone control
- Battery backup for areas with frequent power outages
LiftMaster offers various models to fit different needs and budgets.
I hope this guide helps you get your LiftMaster garage door opener working again. Remember, most issues can be solved with these DIY steps, but don’t hesitate to call a professional for complex problems or safety concerns.