Ever stood in your driveway frantically clicking a garage remote that refuses to work? You’re not alone. Programming your LiftMaster garage door opener might seem tricky at first, but it’s actually something you can handle yourself in just a few minutes.
I’ll walk you through everything you need to know to get your LiftMaster opener working perfectly—whether you’re setting up a new remote, connecting to your car’s built-in system, or troubleshooting common problems.
What You’ll Need Before Starting
Before diving into programming your LiftMaster garage door opener, gather these essentials:
- Your LiftMaster garage door opener
- The remote control you want to program
- A step ladder (if your opener is mounted high)
- A small screwdriver (for battery replacement if needed)
- Fresh batteries for your remote
- Your vehicle (if programming a car-based system)
Make sure your garage door is closed before you begin for safety reasons. Also check that your opener has a working light bulb installed, as the flashing light serves as a confirmation signal during programming.
Identifying Your LiftMaster Model
The programming process varies slightly depending on your specific LiftMaster model. Here’s how to identify yours:
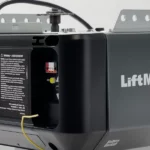
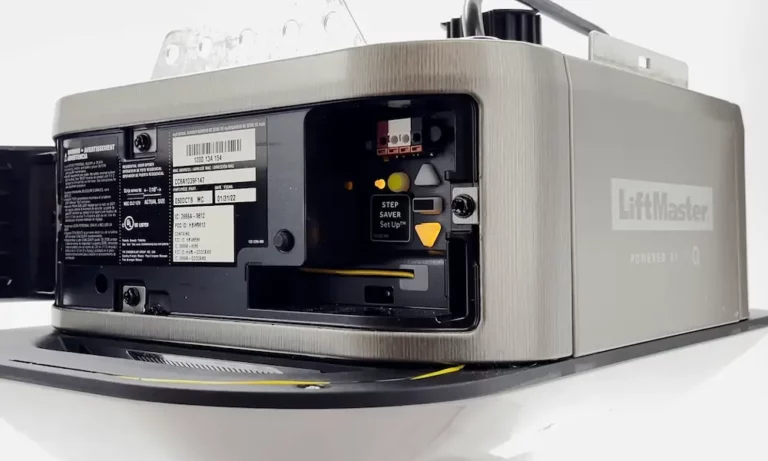
Look for the “Learn” button on your garage door opener unit. It’s typically located on the back or side panel, near where the antenna wire extends. The button will be one of these colors:
- Yellow
- Purple
- Red
- Orange
- Green
The color matters because it indicates the frequency your opener operates on and determines remote compatibility. Models manufactured after 1993 use this colored button system rather than older DIP switch technology.
If you can’t find your Learn button, you might need to remove a light lens cover or access panel. Some models feature the Learn button on a wall-mounted control panel instead of on the motor unit itself.
Programming a Standard LiftMaster Remote Control
Here’s how to program most standard LiftMaster remote controls:
- Locate the Learn button on your garage door opener unit
- Press and release the Learn button – you’ll see an indicator light start flashing
- Within 30 seconds, press and hold the button on your remote that you want to program
- Hold the remote button for about 3 seconds, then release
- Watch for confirmation – either the LED indicator will turn off or the garage door opener lights will blink
- Test your newly programmed remote by pressing the button – your door should open or close
The entire process typically takes less than 30 seconds to complete. If your remote doesn’t work after programming, simply repeat these steps again, paying careful attention to timing.
Programming LiftMaster MAX Remote Controls
LiftMaster MAX remotes (like models 890MAX and 895MAX) work with any 315 MHz or 390 MHz LiftMaster opener made since January 1993. They require a slightly different programming process:
- Locate the Program button on your MAX remote
- Press and hold this button for 2 seconds until the round LED turns blue, then release
- The long purple LED will flash, showing the remote is in programming mode
- Press and release the button on the remote that you wish to program
- Complete the standard programming process with your opener’s Learn button as described earlier
These versatile remotes are particularly useful if you’re replacing an older remote or need to operate multiple garage doors.
Programming 891LM and 893LM Remote Models
If you have the popular 891LM or 893LM remotes, follow these specific steps:
- Ensure your garage door is closed and your opener has a functioning light bulb
- Find the Learn button on your opener (typically yellow for these models)
- Press and release the Learn button
- Quickly press and hold the desired button on your remote
- Hold until the opener lights flash or you hear a click
These remotes are only compatible with LiftMaster, Chamberlain, and Craftsman garage door openers that have yellow Learn buttons. If you have a different colored Learn button, you may need a different remote model.
Programming Your Car to Your LiftMaster Opener
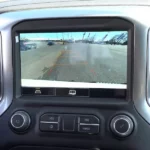
Many modern cars include built-in HomeLink or similar universal transmitter systems that can operate your garage door. Here’s how to connect your car to your LiftMaster opener:
- Open your garage door for safety during programming
- Locate the programmable buttons in your car (usually on the console, overhead panel, or sun visor)
- If necessary, reset these buttons following your vehicle’s owner manual instructions
- Find the Learn button on your LiftMaster opener
- Press and release the Learn button quickly (don’t hold it down or you might erase programming)
- Press and hold your original LiftMaster remote button briefly
- Quickly press the built-in button in your car (within 30 seconds of pressing the Learn button)
- Listen for a click from the garage door opener confirming success
This task can be tricky to do alone since you need to press buttons in two different locations quickly. Having a helper can make the process much easier.
Troubleshooting Common Programming Problems
Remote Not Working After Programming
If your remote doesn’t operate your door after programming, check these common issues:
- Battery Issues: Install a fresh battery in your remote
- Confirmation Missing: Make sure you saw the confirmation light flash during programming
- Power Problems: Verify your garage door opener has power and working lights
- Timing Problems: You only have 30 seconds after pressing the Learn button to complete programming
Remote Works Inconsistently
If your remote works sometimes but not always, consider:
- Interference: Electronic devices nearby might cause signal problems
- Antenna Issues: Check that the antenna wire on your opener hangs straight down and isn’t damaged
- Range Problems: Test the remote at different distances from your garage
Factory Reset May Be Needed
For persistent issues, you might need to completely reset your opener and start fresh:
- Press and hold the Learn button for 6-10 seconds (varies by model)
- Release when the indicator light turns off
- This erases ALL programmed devices
- Reprogram all your remotes and car systems
Programming Your Keypad (If You Have One)
Many LiftMaster systems include a wireless keypad for access without a remote. Here’s how to program it:
- Locate the Learn button on your garage door opener
- Press and release the Learn button
- Within 30 seconds, enter a 4-digit PIN of your choice on the keypad
- Press the ENTER button
- The opener lights will blink to confirm successful programming
- Test your new PIN by entering it and pressing ENTER – the door should operate
For security reasons, choose a PIN that isn’t obvious (avoid birthdates, address numbers, etc.) but is something you’ll remember.
Setting Up MyQ Smart Features (For Newer Models)
Modern LiftMaster openers often include MyQ technology for smartphone control. To set up these features:
- Download the MyQ app from your app store
- Create an account and follow the in-app instructions
- Locate the MyQ serial number on your opener or in your manual
- Connect your opener to your home WiFi network through the app
- Follow prompts to complete setup and name your device
Once configured, you can open or close your garage door remotely, set schedules, receive alerts, and even integrate with smart home platforms like Google Home or Amazon Alexa.
Maintaining Your LiftMaster Opener
To keep your LiftMaster opener working properly after programming:
- Replace remote batteries annually
- Keep the photo-eye sensors clean (these prevent the door from closing if something’s in the way)
- Lubricate moving parts of your garage door mechanism regularly
- Test the auto-reverse safety feature monthly by placing a 2×4 on the ground in the door’s path
Regular maintenance helps ensure your newly programmed opener continues working reliably for years.