Is your garage door refusing to budge when you punch in your code? A non-responsive LiftMaster keypad can leave you locked out and frustrated, but most issues have simple fixes you can handle yourself.
In this guide, we’ll walk through the most common reasons your LiftMaster keypad isn’t working and provide straightforward solutions to get you back in business quickly.
Dead Batteries Are Usually the Culprit
When your LiftMaster keypad stops working, chances are it’s just hungry for a new battery. Most models use a standard 9-volt battery, though some older units might need a 12-volt one.
Signs your battery needs replacing:
- Dim or fading lights when buttons are pressed
- Buttons respond inconsistently or not at all
- No lights appear when you press buttons
Interestingly, batteries can drain unexpectedly if a key gets stuck, which rapidly depletes power. This happens more often than you’d think, according to widespread user reports.
How to Change the Battery in Your LiftMaster Keypad
Replacing the battery sounds simple, but many people struggle with accessing the battery compartment. Here’s how to do it right:
- Look for a small hole at the bottom of the keypad cover
- Insert a Phillips screwdriver to release the spring-loaded tab
- Slide the cover down while maintaining pressure
- If that doesn’t work, try creating a small gap at the top center and using a flat-head screwdriver to carefully pry the cover away
- Remove the old battery, noting its orientation
- Connect the new 9-volt battery, making sure positive and negative terminals align correctly
- Replace the cover by aligning the top edge first, then pressing in the sides, and finally securing the bottom tab
After replacing the battery, you’ll likely need to reprogram the keypad as we’ll cover shortly.
Programming Problems and Memory Issues
The second most common reason for keypad failures involves programming issues. This typically happens after:
- Installing a new battery
- Power outages or electrical disturbances
- New installation or system resets
When these events occur, your keypad may need to be reprogrammed to communicate properly with your garage door opener again. Sometimes the opener’s memory needs to be cleared before successful reprogramming can happen.
Step-by-Step Reprogramming Instructions
Follow these steps to reprogram your LiftMaster keypad:
- Locate the “Learn” button on your garage door opener motor unit (it might be yellow, purple, red, orange, or green depending on your model)
- Press this button briefly (don’t hold it down—holding for more than 10 seconds will erase all programmed codes)
- The LED light will illuminate for about 30 seconds
- During this window, enter your desired 4-digit PIN on the keypad followed by the Enter button
- The motor unit’s LED light should flash, confirming successful programming
- Test your new code by entering it on the keypad
For security, avoid obvious PIN choices like birth dates or address numbers that could be easily guessed.
When Signal Interference Is the Problem
Sometimes the issue isn’t with the keypad itself but with the signal it’s trying to send. Several factors can interfere with proper communication:
- Metal surfaces (like mounting on a metal door)
- Proximity to electrical equipment
- Thick concrete walls between the keypad and opener
- Distance from the opener (signal strength decreases with distance)
Quick Fix: Change the Keypad’s Location
Try this simple test: Remove the keypad from its mount and hold it in different positions while testing. If it works in some positions but not others, signal interference is likely your problem.
Solutions include:
- Mount the keypad on wood instead of metal
- Move it away from electrical equipment
- Relocate it closer to the garage door opener
- Adjust its position, even slightly, for better reception
Complete System Reset: When All Else Fails
If basic troubleshooting doesn’t solve the problem, a complete system reset often does the trick:
- Disconnect the garage door opener from power for at least 5 minutes
- Important: Also disconnect any backup battery—failure to remove this will prevent a true reset
- Reconnect the main power first, then the backup battery if applicable
- Allow the system to reboot completely
- Reprogram your keypad using the Learn button process
- Test to ensure proper operation
This process effectively erases temporary memory issues and clears persistent error codes.
Error Codes and What They Mean
Your LiftMaster keypad might display specific error codes to indicate particular issues. For example, a “4-6 code” may appear after the safety sensor beam is interrupted during door operation.
| Error Code | Likely Cause | Solution |
|---|---|---|
| 4-6 code | Safety sensor interruption | Complete power reset including backup battery |
| Flashing lights | Low battery | Replace battery |
| No response after PIN entry | Programming issue | Reprogram using Learn button |
| Lights but no operation | Signal interference | Relocate keypad or check for obstructions |
When to Reset Your LiftMaster Keypad
You should reset your garage door keypad in these situations:
- You’ve forgotten your existing PIN code
- The keypad is unresponsive despite battery replacement
- You’ve moved into a new home (don’t trust previous owners’ codes)
- You suspect someone else knows your code
- Previous tenants have moved out
- Suspicious activity occurs in your neighborhood
These scenarios warrant a prompt keypad reset to ensure only authorized individuals can access your garage.
Protecting Your Keypad from the Elements
Environmental factors can significantly shorten your keypad’s life. Protect it by:
- Using the flip cover consistently (many people forget this simple step)
- Installing it in a location sheltered from direct sunlight and rain
- Checking regularly for cracks, moisture intrusion, or corrosion
- Securing it properly to prevent damage from vibration
When to Replace Your Keypad
Despite your best efforts, sometimes a keypad is simply beyond repair. Consider replacement when:
- Buttons remain unresponsive after battery replacement and reset procedures
- You see visible damage to internal components
- It works only intermittently despite multiple repair attempts
- The keypad is more than 7-10 years old
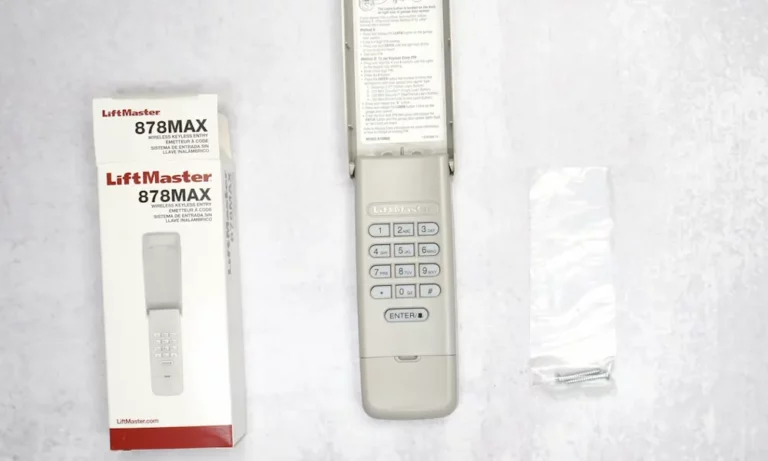
When buying a replacement, stick with genuine LiftMaster or Chamberlain branded keypads rather than third-party alternatives. While generic replacements might be cheaper, they often have compatibility issues and shorter lifespans.
Current LiftMaster keypad models include universal options like the 878 Max, which works with openers manufactured from 1993 onward across the LiftMaster, Chamberlain, and Craftsman brands.
Preventative Maintenance Tips
Keep your keypad working smoothly with these maintenance tips:
- Replace batteries annually, even if they still seem to work
- Clean the keypad surface gently with a slightly damp cloth
- Check and tighten mounting screws periodically
- Test all buttons regularly to ensure consistent operation
- Keep a record of your programming steps for quick reference
Watch for Warning Signs
Don’t wait for complete failure. These early warning signs suggest your keypad needs attention:
- Buttons require multiple presses to register
- Certain numbers work while others don’t
- Delayed response between code entry and door operation
- Intermittent function that improves in certain weather conditions
Addressing these issues early can prevent being locked out at an inconvenient time.
The Professional Option
If you’ve tried everything and your keypad still won’t cooperate, it might be time to call a professional. Look for:
- Garage door specialists certified by LiftMaster
- Companies with positive reviews specifically mentioning keypad repairs
- Businesses offering warranties on their repair work
A professional can diagnose issues beyond DIY capabilities, especially those involving the motor unit or wiring problems.
Most keypad problems stem from simple issues you can fix yourself. By starting with the battery and working through these troubleshooting steps, you’ll likely have your garage door responding to your commands again in no time.