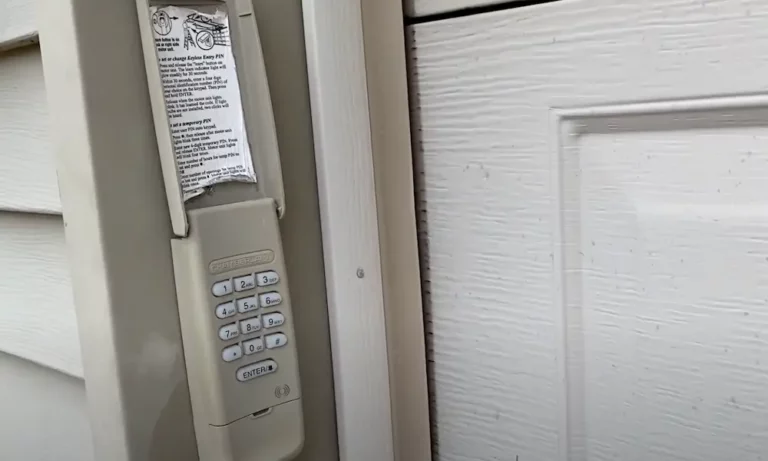
Staring at your garage door that refuses to budge despite frantically punching numbers into your Chamberlain keypad? You’re not alone. That small device mounted on your garage exterior can sometimes go from convenient home access to frustrating paperweight.
Let’s cut to the chase—your Chamberlain keypad issues are likely fixable without calling a professional. Whether it’s completely dead, inconsistent, or just acting strange, I’ll walk you through everything you need to know to get back to the convenience of keyless entry.
Start With the Obvious: Battery Problems
When your Chamberlain keypad stops working, the battery is the first suspect. These devices typically run on 9-volt batteries that naturally lose juice over time.
Check for Signs of Battery Failure
Your keypad will tell you if the battery’s the issue:
- No backlight when pressing buttons
- Dim lighting that fades quickly
- Garage door opens sometimes but not always
- Multiple button presses needed to get a response
Replace the Battery Properly
Here’s how to swap out that dying battery:
- Find the small cover at the bottom of your keypad
- Use a flathead screwdriver to gently twist and open it
- Disconnect the old 9-volt battery (don’t just pull—disconnect the connector)
- Connect a fresh battery, making sure the terminals align correctly
- Close the compartment securely
Pro tip: Use a high-quality alkaline battery for best results, and consider replacing it annually before problems occur.
Deal with Battery Corrosion
If you notice whitish, greenish, or bluish powder around the battery contacts, you’ve got corrosion. This can prevent power flow even with a fresh battery.
To fix corrosion:
- Remove the battery completely
- Clean terminals with a small wire brush or fine sandpaper
- Wipe away residue with a clean, dry cloth
- Install a new battery
Programming Issues: When Your Keypad Has Amnesia
If your keypad lights up but doesn’t open your door, you likely have a programming problem.
Common Programming Problems
- Previous code no longer works after power outage
- New homeowner with unknown code
- Security lockout after too many wrong attempts
- Temporary PIN codes that have expired
Reprogram Your Keypad (Step by Step)
- Locate the “Learn” button on your garage door opener motor unit (usually colored yellow, purple, or red)
- Press and release this button once—the LED indicator will light up
- Within 30 seconds, enter your desired 4-digit PIN on the keypad
- Press the “Enter” button
- The opener lights should flash or the unit will click to confirm success
- Test immediately by entering your new code
Weather and Physical Damage: Environmental Enemies
Your keypad lives outside, facing everything Mother Nature throws at it. This exposure takes a toll.
Signs of Physical Damage
- Sticky or hard-to-press buttons
- Cracked housing
- Missing or damaged weather seals
- Buttons that work intermittently (especially in extreme temperatures)
- Water spots or fogging inside the display
Clean and Inspect Your Keypad
- Gently wipe the keypad with a slightly damp cloth (never drench it!)
- Check the housing for cracks or damage
- Ensure it’s mounted securely to the wall
- Inspect weather seals around the edges
- Look for wear patterns on frequently used buttons
For stubborn dirt between buttons, use a dry toothbrush to gently dislodge debris. Avoid using cleaning chemicals that might damage the plastic.
Communication Problems: When Keypad and Opener Stop Talking
Sometimes the issue isn’t the keypad itself but how it talks to your garage door opener.
Test for Signal Problems
- Try operating the keypad from different positions
- Move closer to the garage door and test
- Check for large metal objects that might block signals
- Remove new electronic devices that could cause interference
Check Your Opener’s Antenna
The antenna wire hanging from your opener unit is crucial for receiving keypad signals:
- Make sure it hangs straight down
- Check for damage or breaks
- Ensure it’s not wrapped around anything
According to a professional garage door technician, this simple adjustment resolves many mysterious keypad failures.
System Reset: The Universal Fix
When all else fails, sometimes you need to reboot the entire system.
Perform a Complete System Reset
- Locate your garage door opener unit
- Unplug it from the electrical outlet
- Wait 30 seconds (this is important—count it out!)
- Plug it back in
- Wait for the unit to fully power up
- Test your keypad
This forces both your opener and keypad to reset their communication protocols and can clear electronic glitches that cause mysterious failures.
Advanced Troubleshooting Table: Symptoms and Solutions
| Symptom | Likely Causes | Solution |
|---|---|---|
| No lights on keypad | Dead battery, severe corrosion | Replace battery, clean terminals |
| Lights work but door doesn’t move | Programming issue, signal problem | Reprogram keypad, check opener antenna |
| Some buttons work, others don’t | Physical wear, water damage | Clean buttons, check for moisture damage |
| Works inconsistently | Battery getting low, weather extremes | Replace battery, wait for temperature change |
| Door reverses immediately | Safety sensor issue (not keypad) | Check and align safety sensors near floor |
| Keypad works only up close | Signal interference, weak battery | Replace battery, check for interference sources |
When to Replace Your Chamberlain Keypad
Not every keypad can be saved. Here are clear signs it’s time for replacement:
Terminal Failure Indicators
- No response despite new battery and clean connections
- Visible internal water damage or corrosion
- Multiple buttons permanently failed
- Cracked circuit board
- Age over 7-10 years with declining performance
Choosing the Right Replacement
Not all keypads work with all openers. To find a compatible replacement:
- Check your opener model number (usually on a label on the motor unit)
- Look for “Security+” or “Security+ 2.0” markings (different technologies)
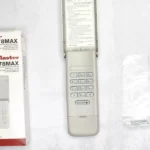
- Consider the universal LiftMaster 878MAX keypad for most Chamberlain openers made after 1993
- Avoid cheap knockoffs that lack security features
Preventative Maintenance: Keep Problems Away
The best fix is preventing issues before they happen:
- Replace batteries annually before they fail
- Clean the keypad every few months
- Check weather seals before rainy seasons
- Cover the keypad during extreme weather when possible
- Keep a record of your PIN and programming instructions
These simple steps will extend your keypad’s life substantially and prevent that frustrating moment when you’re locked out in the rain.
What About the Chamberlain App and Smart Features?
If your Chamberlain opener has myQ technology, you have alternative access options when your keypad fails:
- Use the myQ app on your smartphone to open your garage
- Set up temporary access codes for visitors through the app
- Check the door status remotely
- Consider adding a myQ-compatible keypad as a replacement
This modern backup system can save you from emergencies when your physical keypad isn’t cooperating.