Looking to upgrade your vehicle’s transmission or need a replacement for your worn-out gearbox? The 4L60E has become one of the most popular choices for transmission swaps thanks to its widespread availability, electronic control capabilities, and solid reliability when properly maintained. But diving into a transmission swap can be intimidating if you don’t know what you’re getting into.
This comprehensive guide will walk you through everything you need to know about the 4L60E and how to successfully complete your swap project.
What Is the 4L60E Transmission?
The 4L60E is an electronically controlled automatic transmission developed by General Motors. The name breaks down as:
- 4: Four forward gears
- L: Longitudinally mounted (for rear-wheel drive)
- 60: Relative torque rating (originally for 6,000 lbs GVWR)
- E: Electronically controlled
Introduced in 1993 as the electronic evolution of the 700R4, the 4L60E features:
- Cast aluminum case
- Weight of 146 pounds dry
- Length of 21.9 inches
- Gear ratios: 1st (3.059:1), 2nd (1.625:1), 3rd (1.00:1), 4th (0.696:1), Reverse (2.29:1)
The stock 4L60E can handle up to 360 lb-ft of torque, though performance upgrades can significantly increase this capacity.
Understanding 4L60E Model Years and Compatibility
The 4L60E evolved significantly over its production run, creating important compatibility considerations for your swap project:
Early Years (1993-1994)
These initial models have a one-piece case design and lack pulse width modulated (PWM) torque converter control. They’re only compatible with each other without significant modifications.
Middle Evolution (1995-2000)
- 1995: Introduced PWM torque converter control – a standalone year with unique requirements
- 1996-2000: Major updates including removable bellhousing and six-bolt tailshaft
- 1998+: LS engine applications received 300mm torque converters and updated internals
Later Models (2001-2013)
- 2001-2006: Redesignated as 4L65E with five-pinion planetary gears (vs. four in earlier models)
- 2007-2013: Final evolution with significant electronic changes
- 2009+: Introduced internal mode switch, making these completely incompatible with earlier models without extensive modifications
Vehicle Compatibility and Applications
The 4L60E was used extensively across GM’s rear-wheel-drive lineup, including:
- Chevrolet Silverado, Tahoe, Suburban, Camaro
- Corvette (special rear-mounted configuration)
- GMC Sierra, Yukon
- Cadillac Escalade
- Various other GM trucks and SUVs
It’s also become a popular choice for LS engine swaps due to its electronic control and overdrive capability.
Essential Tools and Equipment
Basic Tools You’ll Need
- Complete socket set (metric and standard)
- Combination wrenches
- Ratchets with extensions
- Torque wrench (capable of both inch-pounds and foot-pounds)
- 10mm, 13mm, 15mm sockets
- Various extension lengths
Specialized Transmission Tools
- Transmission jack (highly recommended)
- 1-1/8 inch socket with long breaker bar
- Snap ring pliers
- Seal pullers
- Bearing pullers (depending on application)
Lifting Equipment
- Floor jack
- Jack stands rated for your vehicle’s weight
- Wheel chocks
- Vehicle lift (optional but helpful)
Electronic Control Components
- Standalone transmission controller (for non-GM applications)
- Popular options: US Shift Quick 4, MSD Atomic TCM, Compushift
- Price range: $400-$1500
- Wiring harness specific to your application
- Price range: $200-$700 for LS swap harnesses
Planning Your 4L60E Swap
Selecting the Right Transmission
When choosing your 4L60E, consider:
Transmission Condition and Cost:
- Used units: $300-$800
- Remanufactured transmissions: $1200-$2500
- Performance-built units: $2500-$8000
Year Compatibility:
- For LS swap applications, 1998 and later units are preferred
- Pre-2009 units avoid internal mode switch compatibility issues
Mileage and Service History:
- High-mileage units (150,000+ miles) may need immediate rebuilding
- Lower-mileage transmissions from well-maintained vehicles offer better reliability
Supporting Components Assessment
Torque Converter Selection:
- Stock converters work for mild applications up to 400 horsepower
- Performance builds require aftermarket units with higher stall speeds
- Budget: $150-$1200 depending on specifications
Crossmember Modifications:
- The 4L60E uses different mounting points than some transmissions
- Adjustable transmission mounts cost $50-$200
- Custom crossmembers may be necessary for certain swaps
Driveshaft Considerations:
- Length differences between transmissions often require modification
- Professional driveshaft modifications: $250-$750
- Custom performance driveshafts: $1000+
Removing Your Old Transmission
Safety First
- Disconnect the battery
- Ensure the vehicle is properly supported on level ground
- Place wheel chocks to prevent movement
- Drain the transmission fluid (remove drain plug or drop the pan)
Component Disconnection
- Remove the driveshaft (mark its position for reinstallation)
- Remove the starter for access to torque converter bolts
- Disconnect all electrical connections:
- Neutral safety switch
- Vehicle speed sensor
- Main transmission harness
Transmission Removal Process
- Support the transmission with a transmission jack
- Remove the crossmember and transmission mount
- Lower the transmission carefully
- The torque converter typically comes out with the transmission
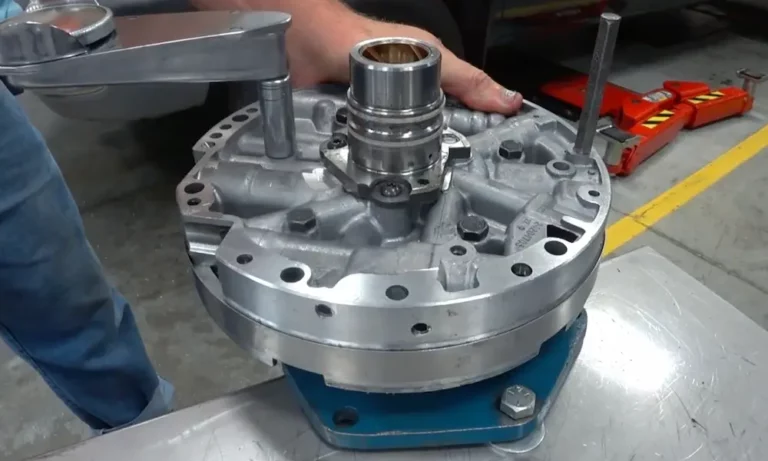
Installing Your 4L60E Transmission
Torque Converter Installation
Proper torque converter installation is critical. It must:
- Be fully seated on the transmission input shaft with three distinct engagement points:
- Hub engaging the pump
- Inner hub engaging the stator support
- Outer hub engaging the front pump
- Have approximately 1-1/8 inches from bellhousing to mounting lugs
- Never bear the transmission’s weight during installation
Transmission Mounting
- Carefully position the transmission to align with engine dowel pins
- Install bellhousing bolts finger-tight initially
- Tighten bolts in a crisscross pattern to pull the transmission evenly against the engine
Torque Specifications:
- Bellhousing bolts: 40 ft-lbs
- Torque converter bolts: 45 ft-lbs (with thread locker)
- Extension housing bolts: 26 ft-lbs
- Transmission pan bolts: 9 ft-lbs (108 inch-pounds)
Electrical Connections
- Install the main solenoid connector (note the arrow for proper orientation)
- Connect the vehicle speed sensor (different between early/late models)
- Set up the transmission controller with:
- Power (ignition-switched 12V)
- Ground (connected to ECU ground, not chassis)
- Throttle position sensor signal
- Brake switch input
Fluid System Setup
- Install cooler lines with proper routing and secure connections
- Consider auxiliary transmission coolers for performance applications
- Install the dipstick tube properly, routing away from exhaust components
Filling with Fluid and Initial Setup
Fluid Specifications
- Use Dexron III or Dexron VI automatic transmission fluid
- Total system capacity: approximately 12 quarts when completely dry
- Dexron VI is backward compatible and offers improved performance
Initial Filling Procedure
- Add 4 quarts through the dipstick tube
- Start the engine for 3 seconds, then shut it off
- Add another 4 quarts
- Start the engine and continue adding fluid until proper level is achieved
Break-In Procedure
- Limit to gentle driving for the first 500-1000 miles
- Avoid hard acceleration, trailer towing, or sustained high-speed operation
- Operate through all gear ranges at light throttle
- Change fluid and filter after 500-1000 miles
Common Issues and Troubleshooting
No Movement in Any Gear
Possible causes:
- Insufficient fluid level
- Internal pump failure
- Improper torque converter installation
First step: Verify fluid level, then check torque converter seating.
Harsh or Delayed Shifting
Possible causes:
- Incorrect line pressure
- Faulty solenoids
- Improper controller calibration
These issues often require diagnostic equipment to properly identify.
Electrical Problems
Park/Neutral Safety Switch Issues:
- Can prevent engine from starting
- Must provide ground signal to PCM in park/neutral positions
- Common cause of no-start conditions in swap applications
Solenoid Failures:
- Manifest as specific gear losses or erratic shifting
- Each solenoid has distinct failure symptoms
Fluid-Related Problems
Overheating:
- Most common cause of 4L60E failure
- Symptoms: burnt fluid odor, slipping, eventual complete failure
- Prevention: adequate cooling capacity and proper fluid maintenance
Contamination:
- Coolant in transmission fluid requires immediate attention
- Complete system flushing is necessary if contamination occurs
Performance Upgrades and Modifications
Internal Improvements
Shift Kit Installation:
- Improves shift quality and transmission longevity
- Provides firmer, quicker shifts that reduce clutch wear
- Popular options: TransGo, B&M, Corvette servo upgrades
Clutch Pack Upgrades:
- Essential for high-horsepower applications
- Includes additional clutches, upgraded friction materials, stronger steel plates
- Can increase torque capacity to 600-700 ft-lbs or more
External Enhancements
Auxiliary Cooling:
- Large external coolers with electric fans reduce operating temperatures
- Consider bypassing the radiator’s built-in cooler for severe-duty applications
Deep Transmission Pans:
- Increase fluid capacity by 1-2 quarts
- Improve cooling
- Often include drain plugs for easier servicing
Alternative Transmission Options
4L80E Upgrade Path
The 4L80E offers significantly greater strength and torque capacity:
- Built on the proven Turbo 400 platform with overdrive
- Can handle 1000+ horsepower when properly built
- Requires different torque converters, crossmember modifications, and wiring
- Higher cost: $5000-$9000 for built units vs. $2500-$5000 for 4L60E builds
Manual Transmission Options
NV3500 and NV4500 Five-Speeds:
- Excellent alternatives for manual operation preference
- Require clutch pedal assemblies, master cylinders, flywheel conversions
T56 Six-Speed:
- Premium manual option with close-ratio gearing
- 600+ ft-lb capacity
- Higher cost: $3000-$5000
- Requires extensive modification for most swaps
Traditional Alternatives
TurboHydramatic 400:
- Maximum strength in a three-speed configuration
- Lacks overdrive but offers legendary durability
- Popular for drag racing and severe-duty applications
Cost Analysis and Budget Planning
Budget Breakdown
A complete 4L60E swap typically ranges from $3000-$8000:
Budget Builds ($3000-$4500):
- Used transmission
- Basic supporting components
- DIY installation
High-End Builds ($8000+):
- Performance transmission
- Premium components
- Professional installation
Major Cost Components:
- Core transmission: $300-$8000 depending on condition/build
- Supporting components: $1000-$3000
- Professional installation: $800-$3500 (regional variations)
Maintenance for Longevity
Service Intervals
- Regular fluid changes every 30,000-50,000 miles
- More frequent service for performance applications
- Always use correct fluid specification
- Filter replacement with every fluid change
Monitoring and Diagnostics
- Temperature monitoring (above 250°F indicates problems)
- Consider external temperature gauges for performance use
- Modern scan tools can identify problems before catastrophic failure
Final Thoughts
The 4L60E transmission offers an excellent balance of performance, reliability, and affordability when properly selected and maintained. While it has known weak points, these can be addressed through upgrades and proper tuning to create a durable, high-performance drivetrain solution for a wide range of applications.
Whether you’re performing a budget-friendly replacement or building a high-performance custom setup, proper planning and attention to detail will ensure your 4L60E transmission swap delivers years of reliable service.