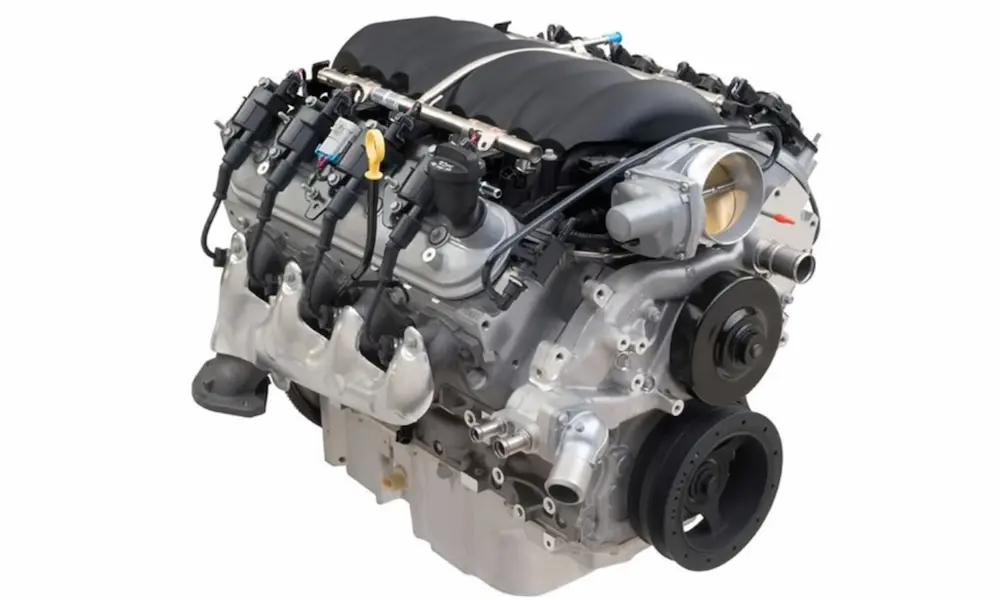
Got a Chevy big block sitting in front of you and no idea where to start with the firing order? You’re in the right place. Whether you’re rebuilding a classic muscle car, dropping a big block into a boat, or chasing more horsepower, getting the firing order right is non-negotiable. Read to the end — there’s more to this than just memorizing eight numbers.
The Standard Chevy Big Block Firing Order
The standard Chevy big block firing order is 1-8-4-3-6-5-7-2.
This sequence covers every Mark IV, Gen V, and Gen VI big block built from the mid-1960s through the late 1990s. It also matches the classic Chevy small block, which makes it one of the most recognizable firing orders in automotive history.
The distributor rotates clockwise when viewed from the top of the engine. As the rotor sweeps past each terminal inside the cap, it delivers spark in that exact 1-8-4-3-6-5-7-2 sequence.
How Chevy Numbers Its Cylinders
Before you route a single wire, you need to understand how GM lays out its cylinders. Mix this up with a Ford or Chrysler layout, and you’ll be chasing misfires all day.
GM uses a staggered front-to-back numbering system based on crankshaft journal position:
- Left bank (driver’s side): Cylinders 1, 3, 5, 7 — front to rear
- Right bank (passenger’s side): Cylinders 2, 4, 6, 8 — front to rear
Cylinder 1 sits at the front of the driver’s side. That’s your anchor point for everything — timing, distributor orientation, and wire routing.
| Manufacturer | Left Bank (Driver Side) | Right Bank (Passenger Side) |
|---|---|---|
| Chevy Big Block / Small Block | 1 – 3 – 5 – 7 | 2 – 4 – 6 – 8 |
| Chrysler / Mopar V8 | 1 – 3 – 5 – 7 | 2 – 4 – 6 – 8 |
| Traditional Ford V8 | 5 – 6 – 7 – 8 | 1 – 2 – 3 – 4 |
Ford numbers one entire bank before moving to the other. Apply that logic to a Chevy, and you’ll get backfires and a no-start condition every single time.
Why the Firing Order Matters More Than You Think
It’s not just about spark timing. The firing order directly affects:
- Engine balance — How smoothly the crankshaft spins under load
- Cooling efficiency — Where heat concentrates in the block
- Intake mixture distribution — Whether each cylinder gets equal fuel and air
- Crankshaft stress — How evenly combustion forces spread across the main bearings
The cross-plane crankshaft in a traditional V8 fires one cylinder every 90 degrees of rotation. That’s clean and even on paper, but the physical reality forces some same-bank cylinders to fire back-to-back. In the standard 1-8-4-3-6-5-7-2 sequence, cylinders 5 and 7 — both sitting at the left rear of the block — fire consecutively.
That’s where the trouble starts.
Companion Cylinders Explained
Two pistons always reach top dead center at the same moment in a V8. They share a crankshaft journal, so they’re mechanically linked. One is on its compression stroke, ready to fire. The other is on its exhaust stroke, pushing out spent gases.
These are called companion cylinders. Split the standard firing order in half and align the two halves side by side to find each pair:
| Firing Position (First Half) | Firing Position (Second Half) | Companion Pair |
|---|---|---|
| Cylinder 1 | Cylinder 6 | 1 and 6 |
| Cylinder 8 | Cylinder 5 | 8 and 5 |
| Cylinder 4 | Cylinder 7 | 4 and 7 |
| Cylinder 3 | Cylinder 2 | 3 and 2 |
The crankshaft permanently dictates these pairings. But the camshaft determines which cylinder in each pair fires on compression versus exhaust. That distinction is exactly what makes firing order swaps possible — and powerful.
The 4/7 Swap: A Simple Mod With Real Gains
Pioneered by professional drag racing engine builders in the 1990s, the 4/7 swap exchanges the operational phases of cylinders 4 and 7 in the firing sequence.
The new sequence becomes: 1-8-7-3-6-5-4-2
You get this by installing a specially ground camshaft with the intake and exhaust lobes for cylinders 4 and 7 swapped. No crankshaft changes needed. The rotating assembly stays perfectly balanced.
What the 4/7 Swap Actually Does
It moves the heat. In the standard firing order, cylinders 5 and 7 fire back-to-back at the left rear corner of the block — the hottest, coolest-coolant zone in the entire engine. The 4/7 swap relocates that consecutive firing event to cylinders 4 and 2 at the right front of the block, right next to the water pump where coolant is coldest. Lower local heat means you can safely advance ignition timing — and that means more power.
It fixes mixture distribution. When cylinders 5 and 7 pull their intake charge from the same end of the manifold in rapid succession, cylinder 7 gets robbed. It’s starved of air and fuel while cylinder 5 runs rich. The 4/7 swap spreads those intake pulses across opposite sides of the plenum, equalizing the air-to-fuel ratio in every cylinder. The result? Typically 5 to 10 more peak horsepower and noticeably better mid-range torque.
It eases crankshaft stress. Every combustion event hammers the crankshaft journal with a massive downward force. That creates torsional vibration — microscopic flexing and twisting that wears main bearings over time. The 4/7 swap redistributes those load impacts more evenly across all five main bearings, which is a big deal for endurance racing engines.
The LS Firing Order on a Big Block
GM took the 4/7 concept further when designing the Gen III LS engine. Engineers ran a double swap — exchanging both the 4/7 pair and the 2/3 pair simultaneously.
The result: 1-8-7-2-6-5-4-3
This is the factory sequence for every modern LS and LT engine. It reduces stress on the center main bearings and distributes harmonic forces across the full length of the block more evenly than any previous sequence.
The aftermarket caught on fast. You can now buy off-the-shelf hydraulic flat tappet and roller camshafts ground with the LS firing order specifically for classic Big Block engines. For builders chasing maximum durability and the smoothest possible power delivery, this upgrade is worth serious consideration.
Camshaft Options for Firing Order Swaps
Summit Racing’s Pro SBC/BBC 4/7 swap camshaft line makes the conversion straightforward. Here’s how the stages break down:
| Stage | Best For | Duration (.050″) Int/Exh | Lift Int/Exh | RPM Range |
|---|---|---|---|---|
| Stage 1 | Daily drivers, tow vehicles | 204° / 212° | .420″ / .428″ | 750–5,250 |
| Stage 2 | Mild street, stock converter | 218° / 222° | .428″ / .450″ | 1,000–5,500 |
| Stage 3 | Street/strip, mild gear ratio | 218° / 227° | .465″ / .473″ | 1,500–5,800 |
| Stage 4 | Performance street, higher stall | 228° / 236° | .473″ / .495″ | 2,000–6,200 |
| Stage 6 | Serious strip, deep gears | 242° / 248° | .510″ / .518″ | 2,600–6,600 |
| Stage 8 | Bracket racing, all-out | 252° / 258° | .533″ / .540″ | 3,200–7,200 |
The Vortec 8100: The Big Block That Did Things Differently
The Generation VII Vortec 8100 (8.1L), built from 2001 to 2009, is a completely different animal. It kept the 4.840-inch bore spacing of the classic 454 but stretched the stroke to 4.370 inches for 496 cubic inches of torque-heavy displacement.
GM built it with the 1-8-7-2-6-5-4-3 firing order from the factory — the LS sequence — specifically to handle the torsional stress of heavy towing and industrial use.
It also ditched the distributor entirely. The 8.1L uses a distributorless coil-on-plug ignition system, controlled by crankshaft and camshaft position sensors feeding the ECU. The head bolt pattern changed to 18 bolts, metric fasteners replaced standard hardware, and virtually nothing swaps directly with older Mark IV blocks.
Marine Big Blocks: When the Engine Runs Backwards
Twin-engine boats need counter-rotating propellers to cancel out torque steer and keep the hull tracking straight. In direct-drive setups, the engine itself spins backward rather than the transmission inverting the rotation.
A reverse-rotation Chevy Big Block requires:
- A reverse-wound starter motor
- Pistons installed in reverse (piston pin offset)
- A rear main seal with reverse knurling
- A completely different camshaft
And a different firing order: 1-2-7-5-6-3-4-8
Here’s the trick: the distributor on a reverse-rotation marine engine still spins clockwise. The cam gear and distributor driven gear use opposing helix angles to make that happen. So you wire the cap clockwise, but in the reverse sequence — which is just the standard order read backward starting from cylinder 1.
| Application | Engine Rotation (From Flywheel) | Distributor Rotation | Firing Order |
|---|---|---|---|
| Standard / Marine Port | Counter-Clockwise | Clockwise | 1-8-4-3-6-5-7-2 |
| Marine Starboard (Reverse) | Clockwise | Clockwise | 1-2-7-5-6-3-4-8 |
Ignore the molded numbers on a standard marine cap when wiring a reverse-rotation engine. Following those numbers will cause immediate backfiring and a no-start condition.
Setting Up the Ignition System Correctly
Finding Top Dead Center on the Compression Stroke
This step trips up a lot of builders. Cylinder 1 reaches TDC twice per engine cycle — once on the exhaust stroke and once on the compression stroke. Install the distributor during the exhaust stroke and you’re 180 degrees out. The engine will backfire through the intake and refuse to start.
Here’s how to find true TDC on the compression stroke:
- Pull the spark plug from cylinder 1 (front driver’s side)
- Put your finger over the plug hole
- Slowly rotate the engine with a socket on the harmonic balancer bolt
- Feel for air pressure pushing against your finger — that’s the compression stroke
- Keep rotating until the timing mark on the balancer aligns with 0° on the timing cover pointer
Now install the distributor with the rotor pointing toward the cylinder 1 terminal on the cap — typically toward the front driver’s side of the engine.
Routing Spark Plug Wires
Route the remaining wires clockwise around the cap in your firing order sequence. But routing isn’t just about plugging in wires — it’s about preventing two specific problems:
Inductive crossfire. High voltage flowing through a spark plug wire creates a magnetic field. If two wires for consecutively firing cylinders run parallel and close together for any distance, one wire can electromagnetically trigger the other prematurely. That causes knock and can shatter ring lands or bend connecting rods. Separate consecutive-fire wires with insulated looms. Where wires must cross, run them at 90-degree angles — not parallel.
Heat damage. Big block headers run extremely hot. Silicone boots and wire cores deteriorate fast with direct header contact. Route wires away from exhaust tubes, use thermal protective sleeves where needed, and apply dielectric grease inside every boot to prevent vulcanizing to the plug’s porcelain insulator.
HEI Distributors Need Full Voltage
If you’re retrofitting an HEI distributor into a vintage big block that originally used points, you must bypass the old resistor wire. Points systems ran on reduced voltage (around 9V) to protect the contact points from burning. HEI systems demand a full 12 volts directly from the battery. Feed it reduced voltage and you’ll get a weak spark, misfires, and a fried ignition module. Standard points-style plug wires won’t seat on HEI terminals either — you need dedicated HEI-compatible wire sets.
Symptoms of a Wrong Firing Order
Swap two wires and the engine will tell you immediately. Watch for these signs:
- Engine cranks but won’t start — classic indicator of wires in the wrong sequence
- Backfires through the carb or intake — spark hitting an open valve
- Violent, shaking idle with loud popping — combustion events out of phase
- Dead power under load with heavy fuel smell — cylinders running raw or misfiring completely
To diagnose the problem, trace every wire from the distributor cap terminal to the correct cylinder. An infrared thermometer pointed at exhaust primaries works well — a cold tube means that cylinder isn’t firing. Cross-check against your camshaft specs, because a 4/7 or LS swap cam requires a different wire layout than the standard sequence.