Your F-150’s AC just stopped blowing cold air. Maybe it’s making a grinding noise. Maybe it’s just… nothing. Whatever’s happening, this guide walks you through everything — from spotting the problem to getting cold air back in your cab. Stick around, because the details here can save you from a repeat repair.
How the F-150 AC Compressor Actually Works
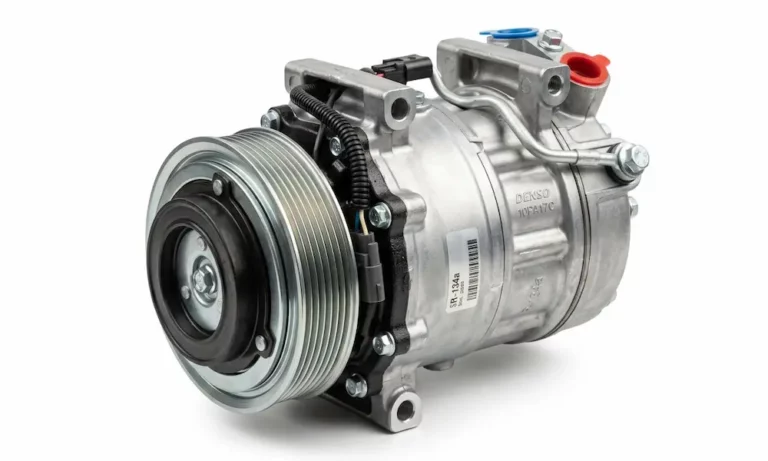
The compressor is the heart of your AC system. It pulls in low-pressure refrigerant gas from the evaporator, compresses it into a hot, high-pressure gas, and pushes it toward the condenser at the front of the truck. The condenser releases that heat outside, and the cycle keeps your cab cool.
In the F-150, the compressor is belt-driven off the engine’s crankshaft. Simple concept — but the specific design changed dramatically across generations, from basic fixed-displacement piston units in the late ’90s to electronically controlled scroll compressors in today’s trucks.
| Generation | Production Years | Compressor Type | Refrigerant |
|---|---|---|---|
| 10th Gen | 1997–2003 | Ford FS10 Piston | R-134a |
| 11th Gen | 2004–2008 | FS18 / Scroll Variants | R-134a |
| 12th Gen | 2009–2014 | Scroll / FS20 | R-134a |
| 13th Gen | 2015–2020 | Variable Displacement Scroll | R-134a / R-1234yf |
| 14th Gen | 2021–2024 | Electronic Control Scroll | R-1234yf |
Knowing your generation matters. A lot. More on that shortly.
Signs Your F-150 AC Compressor Is Failing
Warm Air From the Vents
This is the most common complaint. If your AC only blows lukewarm air, the compressor may not be building enough pressure to move heat out of the cabin. Worn internal valves let high-pressure gas leak back to the low side — which kills cooling efficiency fast.
If you notice it only cools well at highway speeds, don’t assume it’s just the compressor. Condenser fan issues share that symptom too.
Grinding, Squealing, or Roaring Noises
- Grinding or roaring when AC is on: Internal components are breaking down. Don’t ignore this — replace it immediately and flush the whole system.
- Squealing: The clutch is slipping or the belt needs attention.
- Noise even when the AC is OFF: That’s the pulley bearing — it spins constantly. If it seizes, it shreds your serpentine belt. No serpentine belt means no power steering and no alternator. That’s a safety issue, not just a comfort one.
Clutch and Electrical Problems
The electromagnetic clutch is a frequent failure point across all F-150 generations. A burnt coil, worn pressure plate, or incorrect air gap between the clutch plate and pulley can all cause it to fail.
On 2021–2023 models, Ford’s Technical Service Bulletin 23-2130 specifically links clutch malfunctions to parasitic battery drain. The clutch coil stays partially energized even when the truck is parked, draining your battery overnight.
Black Death Contamination
This is the worst-case scenario. When a compressor’s internals disintegrate, they create metallic shavings mixed with oxidized oil — a thick, black, tar-like sludge that circulates through the entire system. If you find black residue at the ports, you can’t just swap the compressor. The condenser, orifice tube, and accumulator all need replacement, and every remaining line needs a chemical flush.
| Symptom | Likely Cause | What to Do |
|---|---|---|
| Lukewarm vent air | Internal valve/seal wear | Pressure test, then replace |
| Grinding noise | Internal bearing failure | Replace immediately + flush |
| Squealing | Clutch slippage or belt wear | Check air gap and belt |
| Black residue at ports | “Black Death” contamination | Full system replacement |
| Oily film on compressor body | Shaft seal leak | Replace compressor |
Getting the Right Part: Fitment Is Everything
This is where most DIYers go wrong. Ford changed compressor designs based on engine, model year, and even the manufacturing date within the same year.
The 2009 Production Date Split
If you own a 2009 F-150, check the sticker on the driver’s side door jamb. Trucks built before November 30, 2008 use a different compressor than those built on or after that date. Install the wrong one and the pulley offset will destroy your drive belt.
V8 Engines (4.6L, 5.4L Triton and 5.0L Coyote)
The compressor sits low on the passenger side of the block. The general location is consistent, but mounting brackets and pulley designs differ between the older Triton and the modern Coyote. The 6.2L V8 found in Raptor and heavy-duty variants uses its own unique assembly with a different pulley configuration.
EcoBoost Engines (2.7L and 3.5L)
These turbocharged engines are a whole different challenge. The engine bay is packed with charge air cooler pipes, turbo coolant lines, and oil feed tubes. The 2.7L EcoBoost especially buries the compressor behind the turbocharger and heat shields — you’ll need to pull the underbody shield and fender liners just to reach the mounting bolts.
Tools You’ll Need Before You Start
Don’t start this job without the right equipment. A standard socket set isn’t enough.
Required tools:
- Manifold gauge set
- High-volume vacuum pump
- Electronic refrigerant scale
- Refrigerant recovery machine (legally required before opening lines)
- Torque wrench
- Non-marring O-ring pick
- For EcoBoost models: Lisle 59350 stretch belt installation tool
Torque specs you need to know:
| Component | Fastener | Torque (lb-ft) |
|---|---|---|
| Compressor mounting bolts | 13mm / 15mm | 18–30 |
| Refrigerant line manifold bolt | 10mm | 8–11 |
| Splash shield screws | 8mm | 5–8 |
Over-tighten the manifold bolt and you’ll crush the O-ring. That means a refrigerant leak and the whole job needs redoing.
Safety and Legal Requirements First
Before touching anything, understand two critical rules.
Recovery is the law. Federal regulations prohibit venting refrigerant into the atmosphere. You must use a recovery machine to extract the refrigerant before opening any lines. Beyond legal compliance, refrigerant sprayed on skin causes immediate frostbite.
Disconnect the battery. Use a 10mm wrench to pull the negative terminal. This prevents two things: the clutch accidentally engaging during service, and the electric cooling fans spinning up unexpectedly — which they’ll do even with the engine off.
Park on a flat surface, set the parking brake, and don’t skip either of these steps.
Step-by-Step Removal: V8 Models (5.0L Coyote)
Gain Access
- Remove the lower splash shield — it’s held by 8mm or 10mm screws and plastic push-pins.
- Pull the front passenger-side wheel for better access to the mounting bolts and room for your torque wrench.
- Peel back or remove the inner fender liner.
- Locate the serpentine belt tensioner. Use a breaker bar to rotate it and slip the belt off the compressor pulley. You don’t need to remove the belt entirely — just get it clear.
Disconnect Lines and Electrical
- Press the locking tab on the clutch wiring harness and pull it free.
- Clean the area around the refrigerant line connections with a rag — you don’t want dirt in the system.
- Remove the single 10mm bolt holding the line manifold. Wiggle the lines free and immediately cap the open ends. Moisture gets in fast, and it destroys the system from the inside.
- Remove and discard the old O-rings.
Pull the Compressor
Loosen all mounting bolts first, then remove them one at a time while supporting the compressor weight with your other hand. The unit drops down through the splash shield opening or comes out through the wheel well. It’s heavy — don’t let it fall onto the subframe.
EcoBoost-Specific Removal Challenges
On the 3.5L EcoBoost, the charge air cooler pipes and air cleaner outlet pipes block access to the top of the compressor. Loosen the worm-gear clamps and remove those pipes first. The turbocharger coolant lines also run over the mounting bracket — in some cases, you’ll need to partially drain the cooling system to move them.
The 2.7L EcoBoost is tighter still. The compressor is tucked behind the turbo and its heat shields. Removing the underbody shield and fender splash shields isn’t optional on this engine — it’s the only way to get reasonable access to the bolts. This engine also has a specific harness retainer that’s nearly impossible to reach without pulling the intake air system components.
The Oil Balancing Procedure (Most People Skip This)
The AC system runs PAG oil throughout — not just inside the compressor. Get this wrong and you’ll destroy the new part.
Use PAG 46 oil exclusively. The viscosity matters. Mixing viscosities — or mixing R-134a with R-1234yf refrigerant — causes chemical reactions that eat seals from the inside out.
How to balance the oil:
- Drain the old compressor into a graduated measuring cup. Rotate the shaft by hand to get as much oil out as possible.
- Drain and measure the shipping oil from the new unit — aftermarket compressors come pre-filled with a generic amount for storage.
- Add fresh PAG oil to the new compressor in the exact amount you drained from the old one (if no flush was done). If the system was flushed, add the full system capacity — typically 7 to 9 ounces.
Hand-prime before installation. Turn the center clutch hub by hand at least 10 times. This pulls oil into the pumping chambers. Skip this step and the compressor starts dry — scored internal surfaces, immediate failure.
Installation and Reassembly
Every opened connection gets a new O-ring. Use the green HNBR (Hydrogenated Nitrile Butadiene Rubber) seals — they resist the chemicals in refrigerant and PAG oil. Coat each O-ring lightly with clean PAG oil before installation. A lubricated seal slides into place cleanly. A dry one pinches, tears, and leaks.
Reassembly sequence:
- Lift the compressor into position and align it with the bracket.
- Start all mounting bolts by hand — no cross-threading.
- Tighten in a crisscross pattern to spec (18–25 lb-ft for the 5.0L).
- Remove the caps from the refrigerant lines and press the manifold onto the compressor. Torque the 10mm bolt to 8–11 lb-ft — not a pound more.
- Click the electrical connector back in place.
- Reinstall the serpentine belt, making sure it’s centered in every pulley groove.
Stretch Belts: What You Need to Know for V6 EcoBoost Models
Starting in 2011, several F-150 V6 models — especially the 3.5L and 3.7L — ditched the spring-loaded tensioner for a stretch-fit belt on the AC drive.
These belts don’t have a tensioner because they’re designed to maintain constant tension through their internal cord structure. Once you remove one, throw it away — the internal cords are compromised and the belt can’t be reused safely.
Installing a new stretch belt without the Lisle 59350 tool is nearly impossible and usually damages the pulley or belt. The tool clips onto the crankshaft pulley edge. You drape the belt over the compressor pulley and feed it into the tool. Then you use a socket on the crank bolt to rotate the engine clockwise — the tool forces the belt to stretch and seat as the engine turns.
Evacuation, Vacuum Hold, and Recharging
The system is now full of air and moisture. Both will destroy the new compressor. Moisture reacts with refrigerant and oil to form corrosive acid. Air causes pressure spikes that blow seals.
The vacuum procedure:
- Connect your vacuum pump to both the high and low sides via the manifold gauges.
- Run the pump for at least 30–45 minutes. This deep vacuum drops the boiling point of any moisture, pulling it out through the pump.
The vacuum hold test:
- Close the manifold valves and shut off the pump.
- Watch the gauges for 15–30 minutes. If the needle climbs toward zero, you have a leak. Find it before you add refrigerant.
Recharging by weight:
Use an electronic scale to add refrigerant. The exact amount is on the under-hood sticker — in pounds or ounces. Overcharging blows seals. Undercharging kills cooling and starves the compressor of oil. On trucks using R-1234yf refrigerant, precision is even more critical — that refrigerant is expensive.
Final System Check and Common Post-Repair Problems
Start the engine and set the AC to max cold, fan on high. The compressor clutch should engage smoothly. After a few minutes, the center vent temperature should read 30–40°F below the outside ambient temperature.
If it’s still not cooling:
- Rushed vacuum: Air left in the system prevents proper refrigerant condensation. The only fix is to recover, re-evacuate, and recharge.
- Clogged orifice tube: If the old compressor failed internally and you didn’t replace the orifice tube, debris clogs it fast. Recover refrigerant, replace the tube, and recharge.
- Stored fault codes: On 2015+ models, the computer may refuse to engage the new compressor until old fault codes are cleared. Plug in a scan tool and clear them.
- Blend door actuator: Sometimes the AC works perfectly but a faulty blend door under the dash mixes in hot air. Diagnose this before assuming the compressor is the problem again.
Keep the New Compressor Alive Longer
Replace your cabin air filter every 15,000 miles. Restricted airflow across the evaporator makes the compressor work harder and run hotter. Check the condenser at the front of the truck periodically for mud, bugs, or bent fins — all of these reduce the system’s ability to shed heat and push the compressor toward early failure.
A properly serviced AC system in an F-150 can last the life of the truck. The work is involved, but do it right once and you won’t be doing it again anytime soon.