
Ever noticed that annoying “brake lamp bulb fault” warning on your Ford Focus dashboard? You’re not the only one dealing with this common issue. While it might seem like a simple bulb replacement would solve everything, there’s often more to the story. This guide will walk you through everything from quick DIY fixes to tackling more complex electrical problems.
What Causes the Brake Lamp Bulb Fault Warning?
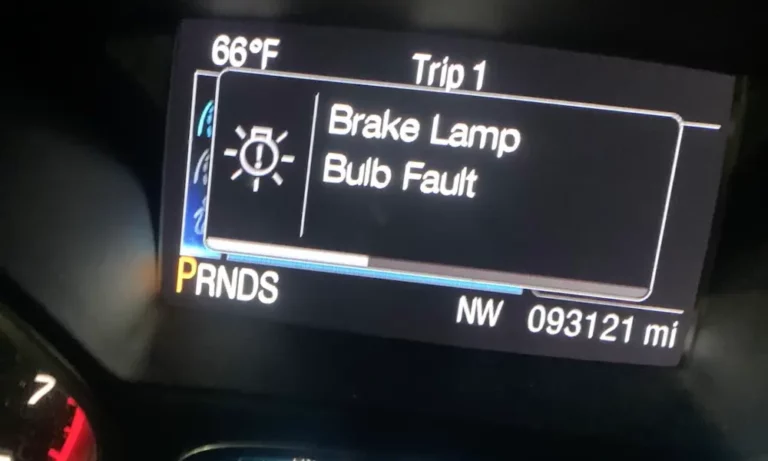
The brake lamp bulb fault warning appears when your Ford Focus’s computer system detects a problem in the brake light electrical circuit. When you press the brake pedal, the system expects a complete circuit through all brake lights – when something interrupts this circuit, the warning appears.
How the Brake Light System Works
Your Ford Focus brake lights use a surprisingly complex system. When you press the brake pedal, it activates a brake light switch near the pedal assembly. This sends an electrical signal through wiring to illuminate the brake lights at the rear of your vehicle.
Most Ford Focus models use 3157 dual-filament bulbs for brake and tail light functions. These special bulbs contain:
- A lower-intensity filament for tail lights (on when headlights are on)
- A higher-intensity filament for brake lights (on only when braking)
This dual-filament design lets one bulb handle multiple functions while allowing the computer to monitor both circuits separately.
Common Triggers for the Warning Light
Several electrical issues can trigger the brake lamp fault warning:
- Burned-out brake light bulb (most common)
- Failed filament in a dual-filament bulb
- Faulty brake light switch
- Blown fuse
- Water damage to taillight housings
- Damaged wiring or poor connections
- Corroded ground points
What makes diagnosis tricky is that your lights might still work even with the warning on. This happens because the computer can detect when only one filament in a dual-filament bulb fails, or when there’s an intermittent connection that’s not obvious during visual inspection.
Checking and Replacing Brake Light Bulbs
How to Test Your Brake Lights
Before digging deeper, check if your brake lights are actually working:
- Turn on your headlights (to activate tail lights)
- Ask someone to watch the rear lights while you press the brake pedal
- Have them confirm if all brake lights illuminate properly, including the high-mounted third brake light
- Look for any lights that flicker, appear dim, or don’t work consistently
Pay special attention to whether all lights respond the same way. If the third brake light works but the main brake lights don’t, the problem is likely in the main brake light circuit rather than the brake light switch.
Replacing Brake Light Bulbs
If you’ve determined a bulb needs replacing, here’s how to do it:
- Open your trunk and locate the access panel for the taillight assembly
- Remove the fabric panel or plastic cover inside the trunk
- Unscrew the plastic wing nuts securing the taillight assembly (usually two)
- Carefully pull the assembly straight out toward the side of the vehicle
- Locate the brake light bulb (typically the upper bulb in the assembly)
- Remove the old bulb by turning it counterclockwise and pulling it straight out
- Insert the new 3157 bulb without touching the glass with bare hands (oils can cause premature failure)
- Turn the bulb clockwise until it locks into place
- Reinstall the taillight assembly and test the lights
Pro tip: Always replace brake light bulbs in pairs, even if only one has failed. Bulbs typically have similar lifespans, and replacing both reduces the likelihood of having to repeat this process soon.
Diagnosing Electrical System Issues
Checking Fuses
If replacing bulbs doesn’t fix the problem, check the brake light fuse:
- Locate the passenger compartment fuse box (usually under the glove compartment)
- Find the brake light fuse (labeled “brake lights,” “stop lights,” or “brake lamp”)
- Remove and inspect the fuse for damage
- Replace with a new fuse of identical amperage if needed
If the new fuse blows immediately, you likely have a short circuit somewhere in the brake light wiring that requires more thorough diagnosis.
Testing the Brake Light Switch
The brake light switch is a critical component located above the brake pedal:
- Look for a small plastic component with electrical connections attached to the brake pedal assembly
- Check that the switch is properly seated and tight in its mounting position
- Press the brake pedal and listen for a clicking sound from the switch
- If the switch seems loose or doesn’t click, it may need adjustment or replacement
For more detailed testing, you’ll need a multimeter to check for proper electrical continuity while pressing and releasing the brake pedal.
Water Damage and Corrosion
Water infiltration is a surprisingly common cause of brake light problems in Ford Focus models. To check for this:
- Remove the taillight assembly
- Inspect the interior for signs of moisture, corrosion, or mineral deposits
- Check rubber seals for damage that might allow water entry
- Look for corrosion on electrical connections
If you find water damage, thoroughly clean and dry the taillight housing, replace affected bulbs, and clean any corroded connections with electrical contact cleaner.
DIY Repair Procedures
Replacing the Brake Light Switch
If your diagnosis points to a faulty brake light switch, here’s how to replace it:
- Disconnect the vehicle’s battery negative terminal
- Locate the brake light switch above the brake pedal
- Disconnect the electrical connector by pressing the release tab
- Remove the old switch by turning it counterclockwise
- Press the brake pedal fully while threading the new switch clockwise into position
- Reconnect the electrical connector
- Reconnect the battery and test all brake light functions
The installation position is critical – the switch must be precisely adjusted to ensure proper brake light operation. After installation, verify that your cruise control disengages when you press the brake pedal.
Fixing Water Damage
To resolve and prevent water damage to the taillight assembly:
- Thoroughly clean and dry the taillight housing
- Replace all affected bulbs
- Clean corroded connections with electrical contact cleaner
- Apply dielectric grease to prevent future corrosion
- Replace damaged rubber seals around the taillight assembly
- Ensure proper installation of the housing to create a watertight seal
In severe cases where the taillight housing itself is cracked, you’ll need to replace the entire housing to prevent recurring water damage.
Wiring Repairs
For simple wiring issues like loose connections:
- Check all connectors between the brake light switch and taillight assemblies
- Ensure connections are clean, tight, and free of corrosion
- Look for pinched or damaged wires, especially near moving parts
- Repair damaged sections using proper automotive wire, connectors, and heat-shrink tubing
For more complex wiring problems, including shorts or breaks in the wiring harness, professional diagnosis is typically recommended.
Repair Costs and Considerations
DIY vs. Professional Repair
Here’s what you can expect to pay for common brake lamp fault repairs:
| Repair Type | DIY Cost | Professional Cost | Difficulty Level |
|---|---|---|---|
| Bulb Replacement | $5-15 | $50-100 | Easy |
| Brake Light Switch | $45-75 | $120-225 | Moderate |
| Fuse Replacement | $5-10 | $50-75 | Easy |
| Water Damage Repair | $20-50 | $150-300 | Moderate |
| Wiring Harness Repair | $50-150 | $300-600 | Difficult |
Most vehicle owners can handle bulb and fuse replacements with basic tools. Brake light switch replacement is moderately complex but doable with some mechanical knowledge. Complex electrical issues generally require professional diagnostic equipment and expertise.
Preventing Future Problems
To avoid recurring brake lamp fault warnings:
- Inspect taillight assemblies twice yearly for cracks or seal damage
- Replace brake light bulbs in pairs using quality 3157 or 3157K specification bulbs
- Keep taillight assemblies clean and free of moisture
- Regularly test brake light operation, especially before long trips
- Address minor issues promptly before they develop into major problems
Taking these preventive steps can significantly extend the reliability of your brake light system and reduce repair costs over time.
Advanced Troubleshooting for Persistent Issues
If you’ve tried the basic repairs and still have problems, consider these advanced approaches:
Using Diagnostic Trouble Codes
Professional-grade OBD-II scanners can retrieve specific trouble codes related to brake light system malfunctions. Pay particular attention to codes like P0504 (Brake Switch A/B Correlation) that specifically relate to brake light system issues.
Ground Connection Issues
Poor ground connections can cause intermittent electrical problems that are difficult to diagnose. Check all ground points in the brake light circuit, including:
- Taillight housing ground connections
- Body ground straps
- Engine-to-chassis ground connections
Clean any corroded ground connections and ensure they’re tight and making good contact.
System Integration Problems
The brake light system interacts with multiple vehicle systems including:
- Cruise control disengagement
- Transmission shift lock systems
- Anti-lock braking system (ABS)
Problems in these related systems can sometimes manifest as brake lamp fault warnings. If you’ve ruled out common causes, consider having these systems professionally checked.
What Professional Mechanics Check
When brake lamp faults prove stubborn, professional mechanics typically:
- Perform a complete circuit analysis using advanced electrical testing equipment
- Trace voltage drops throughout the brake light circuit
- Test for parasitic draws or unusual resistance in the system
- Check for computer module issues that might affect brake light monitoring
- Use Ford-specific diagnostic equipment to communicate with vehicle control modules
These advanced diagnostic procedures help identify complex issues that might not be apparent during basic testing.
The Ford Focus brake lamp bulb fault can range from a simple fix to a complex electrical puzzle. By following this systematic troubleshooting approach, you can identify and resolve most brake light issues while minimizing repair costs. Remember that properly functioning brake lights are essential for your safety and the safety of others on the road – addressing this warning promptly should be a priority.


